Friday, August 31, 2012

Garden photos, Part 1

We lose our garden today :( Technically, it was only kind of ours, but it gets turned over to a new person tomorrow.  It's part of a group of plots held by the management of the apartment complex, and the plot can be kept as long as the person still lives at the complex.  But our contact is moving out.  We have since tried to transplant some of our vegetables into pots, but it was fun while it lasted :)

DPP_0138

DPP_0136

DPP_0137

DPP_0139
I never knew how pretty rosemary is when it blooms.

Thursday, August 30, 2012

Running Mate Key Minder

I am very minimalist when I run.  Nothing in my pockets and my ipod, when I have it, is usually clipped onto my shorts so nothing is really bouncing around (or can bounce right out of my pocket). 

DPP_0133
I used to have one of these that I think I picked up at a 5K as a freebie from Reebok, but I lost it and can't seem to find a replacement or anything similar.


DPP_0134


DPP_0135
The supplies:
-A scrap (<0 .125=".125" cloth="cloth" duck="duck" nylon="nylon" of="of" something="something" sport="sport" sturdy="sturdy" yds="yds">
-Velcro aka Hook and Loop closure in generic brand
-Twill tape/grosgrain ribbon/bias tape

I made a pattern! Please excuse the roughness of it as I am neither an artist nor a seamstress.  Everything I know about sewing is pretty much based off of my middle school home economics experience.

Download from Flickr and print! I believe it's the Large 1024 size that gives the right pattern size as long as you don't fit/scale it to the page when you print. Cut on the outside of the thick black line (pattern piece on the left).
IMG_0013

1) Cut out 2 pieces from your fabric.  You will only work with one of the pieces until step 5.

2) Make a self fabric tube, about 1.5 times the length of the middle portion of the pattern piece.  Fold a strip of fabric in half and sewing up one edge and turning inside out, placing the seam in the middle of one side, then hem the short edges of the tube by folding over twice.  Sew a rectangle of Velcro onto one end of the tube as long as the top piece of the pattern plus an extra 1/2-1 inch.  Stitch on in box shape as shown.

3) Sew on the other side of the Velcro on the top edge and bottom edge as shown.

4) Sew on the other end of your fabric tube (opposite end of the Velcro end) to the box indicated at the bottom fold.  Wrong side of tube (side with seam) should be facing right side of piece.

5) Now, sew together 2 pieces of pattern wrong sides together.

6) Take your twill tape and bind very bottom edge (thick edge in drawing) to enclose raw edges.

7) Fold up at bottom fold and add binding to all edges.

Hopefully those instructions are fairly clear!  Please post a picture if you make one :)

To use:
Unlatch Velcro and feed self fabric tube through laces of shoe.  Velcro to top flap, insert keys/money and latch Velcro to bottom flap.  Go run :)


Wednesday, August 29, 2012

Thrifty Plate Score!

Can I just brag about these amazing plates that N and I found at an estate sale?  Ok, so they don't match everything (like the perennial favorites, the everyday whites), but what are a couple of non-fancy college kids to do?  Besides, who are we really trying to impress here?

We had a crazy experience getting these plates.  We were on our way back from Target and Home Depot, when I saw a neon poster tacked up to a telephone pole "ESTATE SALE 12 BLOCKS".  Quite possibly the least descriptive sign ever.  No arrows, no address.  Fortunately, there were more signs as we kept going back towards home, which culminated in us crossing over 3 lanes so we could make a last minute right hand turn to follow the signs.  We found it mostly without incident after that.  There was 30 minutes left in the sale, so we quickly ran through the house looking at random things.  I found some little kitschy things, and by the time we were done looking at everything else, we ended up in the kitchen.  We were on the look out for a few spare plates since we were constantly having to wash the 2 plates we own, but somehow we managed to come home with this whole set.  Mostly because they wouldn't let us break up the set.

These are Mikasa plates from their Galleria collection.  Mikasa plates go for at least $20 each.

We got this set of 6 dinner plates, 6 salad plates, 6 bowls, 6 mugs, and one serving bowl for $20 total.  I was super excited about the new dishware.  Probably more excited than anyone should be about dishware.

IMG_4597

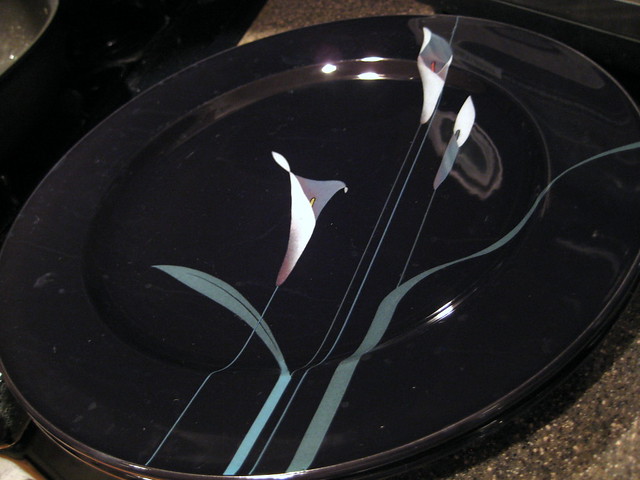
We always feel a little fancy when we use these :)

IMG_4602

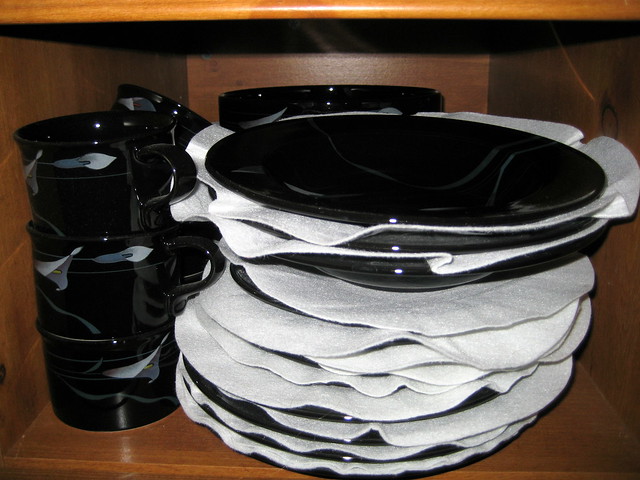
Plus, a silly thing, but those little felt spacer things came with the plates which keeps them from scratching each other.

This is basically my crowning thrifting achievement.  I keep going to various sales hoping to make another amazing find like this :)

Anyone else get crazy excited about thrifting?

Monday, August 27, 2012

Fresh Peach Cake

Yum, this is seriously a sweet taste of summer.  Plus, this is the perfect excuse to treat myself to some of those delicious smelling local peaches that I always catch a whiff of at the grocery store.  I'm the crazy person at the store who puts her nose into the peaches to sniff them.  See? This is actually why you wash your produce when you bring it home from the store.  (I'm only kind of kidding, I try not to touch all the peaches.)

DPP_0132

IMG_4565

Seen on One Sheepish Girl via Ina Garten

I placed the peaches on top in a radiating star design since I omitted the nuts on top (I hate nuts on or in cakes) and covered with an excess of cinnamon sugar :)  The sugar makes this amazing crusty top to the cake when it bakes.

Cautionary note: I'm not sure if I made my cake differently, but the peaches stay pretty moist, so definitely eat when it comes out of the oven :)  At least refrigerate right away because it's going to get soggy and mold really quickly.

Sunday, August 26, 2012

A Terrible White Elephant Gift (as I might have expected)

On occasion STITCH likes to do little white elephant gift exchanges during our parties.  Usually the standard is $5 "gifts", which usually equates to smallish sized crocheted things. 

But oftentimes, people get lazy and try to pass off junk as their contributions, such as the thing on the left.  It's a head. With a yarn bow.  I had the misfortune of opening this particular one, so it came home with me.

20120826

But, as you can see, I transformed it into something cute! That can be sold!  I carefully snipped off the puffy paint smile and embroidered a bunny nose instead.  A little bunny with fluffy pink tail too!

Friday, August 17, 2012

Cabrillo National Monument

Cabrillo National Monument is one of those things that you do when you say, "Hey, I've lived in San Diego for 4 years, and I haven't really been anywhere historic/landmark/cool/touristy lately."  Mostly, though, we just used this opportunity to get out of the house and scramble around on the rocks/tide pool area.  We did hit the ranger station and read a little about the monument and see an interesting little film on whales, so going to the actual monument wasn't a waste.

100_1439

100_1445

DPP_0129

Mermaid Heart
It looks like an anatomical heart, complete with aorta!

DPP_0130
Loved the pretty blue, green, and purple colors in this anemone.

DPP_0131
The cliffs were very layered and square-ish.. I liked the look of this piece of rectangular prism piece of rock jutting out.

Thursday, August 16, 2012

Breaking Glass

We did the increasingly popular DIY of cutting wine bottles with acetone on our day off way back on Fourth of July.  I first saw it on Lifehacker before it blew up all over Pinterest and all the other crafting sites.  And here's another tutorial from Lifehacker on cutting up bottles with a cleaner edge (the acetone method leaves it pretty jagged).

IMG_4493


IMG_4497


IMG_4498
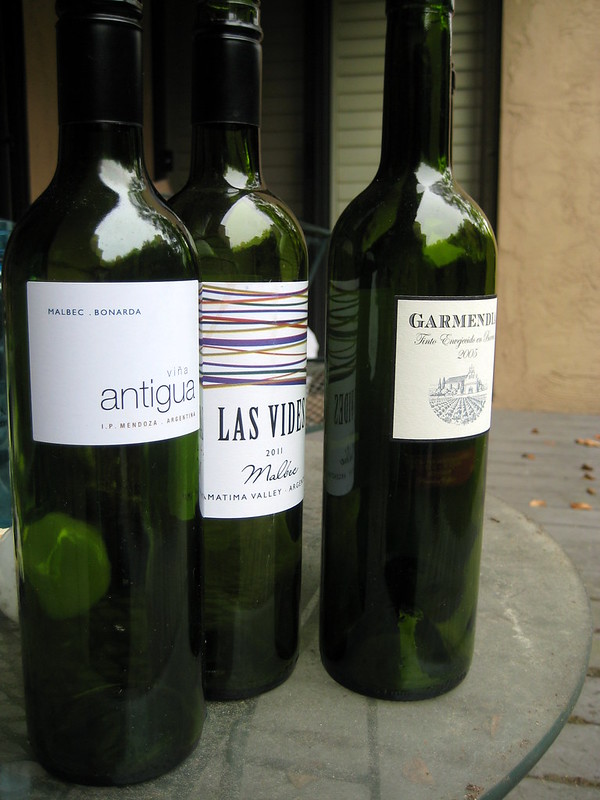
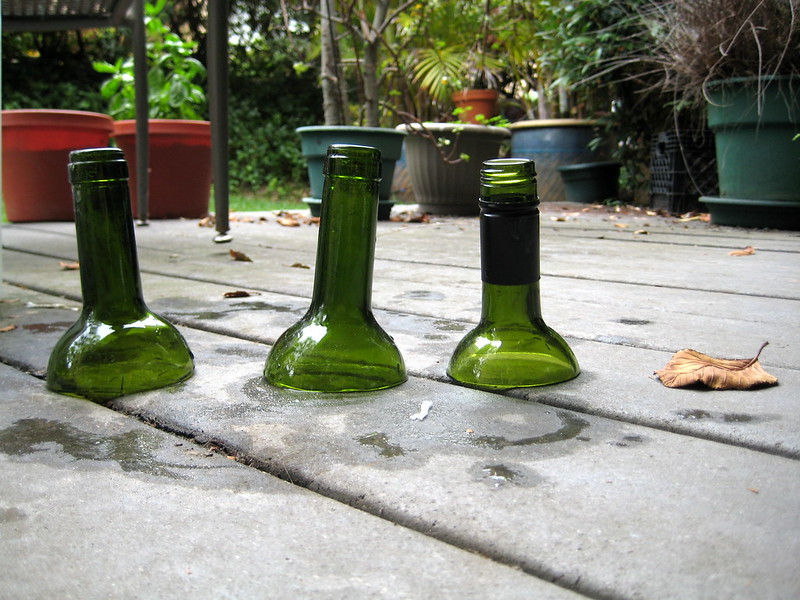
Haha, we thought this was really funny.  We thought this looked a little like the wine bottles had weirdly sunk into the patio.

IMG_4595

And here's the finished product! We put together 3 of our cut bottles and glued them together using glass and ceramic cement.  Awesome utensil holder!  And it really cleared up the clutter in the cabinet.


(Woops! Would you believe I hit my photo limit in the built in Blogger web album?  I'm going to try and figure out the Flickr thing, hopefully all of the photos will stay visible on my free account.)

Wednesday, August 15, 2012

Santa Fe Train Depot

I'm actually not sure why this is called the Santa Fe train depot because it's actually in the middle of downtown San Diego..

DPP_0126

I was mostly inspired to stop by and see the pretty building because of a pretty photoshoot done there.  A Hunger Games inspired photoshoot.  With handmade Girl on Fire dress by one of my favorite sewing bloggers, Cindy from Cation Designs.  I have to say, I kind of aspire to sew as well (and be as geeky awesome as Cindy :) haha)

IMG_0039


And a gratuitous picture of me inside the train station.

Monday, August 13, 2012

Amazing Fluffy Waffles


This has to be the best waffle recipe. Ever! It's amazingly light and they're almost better when they've been toasted after freezing.

IMG_4213
And this breakfast wouldn't be complete without a mug of earl grey tea and yogurt.  I have kind of a funny habit when I eat waffles.  I eat waffles with yogurt in the squares, it's really yummy :)

IMG_4209
My birthday waffle iron :) Is it weird we gave each other kitchen utensils/appliances as birthday gifts?

IMG_4208

Recipe!


Waffles
Servings: 8
Ingredients:
1 ¾ c flour
2 tsp baking powder
½ tsp salt
1 Tbsp sugar
3 eggs
7 Tbsp vegetable oil
1 ½ c milk

Preparation:
Preheat the waffle iron. Sift the dry ingredients into a medium sized bowl. Separate the eggs, putting the egg whites in smaller bowl. Beat the egg whites until they are stiff. (If you are using an electric mixer, you can beat the egg whites first, and then beat the batter without having to wash the beaters. The reverse is not true. If you beat the batter first then you have to wash the beaters before beating the egg whites.) Add the egg yolks, oil and milk all at one time to the dry ingredients. Beat until there are no lumps in the batter. Fold the egg whites into the other batter using a spatula or other flat utensil. Put a full ½ c of batter in your waffle iron to make a 9” round waffle.
If this recipe makes too many waffles for one setting, try freezing the waffles you do not eat. After the waffles have been cooked in the waffle iron, put them out on a cooling rack. When they are cool, place them in a plastic bag taking out as much air from the bag as possible. Then freeze the bag of waffles. The next time you want a quick waffle, toast just until crispy.

Sunday, August 12, 2012

Badger Pride

My friend and I used to regularly obsess over Harry Potter when we were supposed to be working on our lab reports.  Most notably, she was showing me Pottermore (she got sorted into Hufflepuff!) which has really cool extended back story type of stuff.  So for Christmas (yeah, I know, I'm a little late in doing this), I crocheted this Hufflepuff house scarf for her from this movie still. (This is the only observable shot in the Prisoner of Azkaban movie of a Hufflepuff house scarf.)  The house scarves changed from the first two books to this "trapped-bar" design.


Ta-da!


I made the scarf pretty long so that it would wrap around the neck and still hang down with a good deal of length.  The pattern was mostly just winged from how I thought it should look based on the movie still, so I put in 15 rows of double crochet in a really buttery yellow (Caron Simply Soft) and then two rows in black, two rows in yellow, two rows in black, and then another 15 rows of the yellow.  I ended up with 7 trapped bar patterns.  I really like the buttery yellow since it looks a little less bumblebee than a bright yellow would have.

Anyone else have Harry Potter pride?