Showing posts with label Crochet. Show all posts

Wednesday, June 10, 2015

Handmade Mint "Lingerie"

I sincerely apologize to anyone who may find the contents of this post offensive; however, I press on in the name of sewing! Also, I promise there are no pictures of my giant biking thighs modeling this thing *shudder*.

As you may have seen on my Instagram, I have just recently completed my first pair of hand made underwear!

Back story: I'm going to a bachelorette party this weekend, and the hosts had played this game at previous parties in which all the guests bought a piece of lingerie for the bride-to-be that represents themselves. The game part of this is that the bride will have to match up the lingerie with the person who brought it, and if she gets it wrong, the person is allowed to task her with some dare/command etc. I had no idea what to do about this (what is my spirit lingerie?), so I just went with handmade and hopefully the bride gets what is going on here.

And here's the finished product!
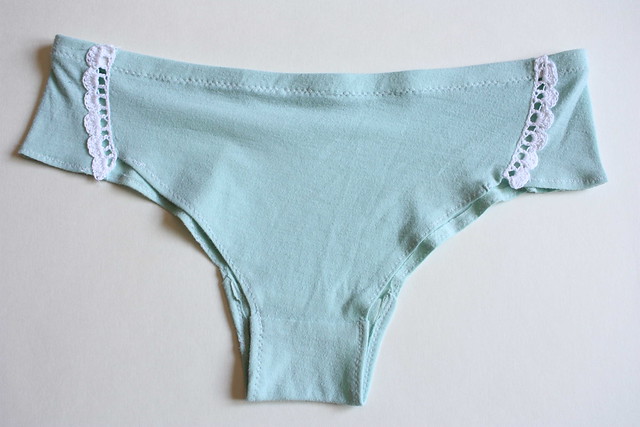
Handmade Mint Undies

Not too shabby for my first attempt, huh? I had initially printed out the free Indigo Orchid bikini pattern, but due to a technical error with the pdf, I didn't have all the pieces properly scaled and couldn't print out another one. So, I hacked up an old pair and drafted my own pattern! I did use the crotch gusset from the pattern since I at least had that piece. I was able to cut all the pieces out of the back of an old t shirt plus a little bit from the front!

I used the instructions from the pattern (found here) to sew these up. Look at that nicely concealed crotch seam :)
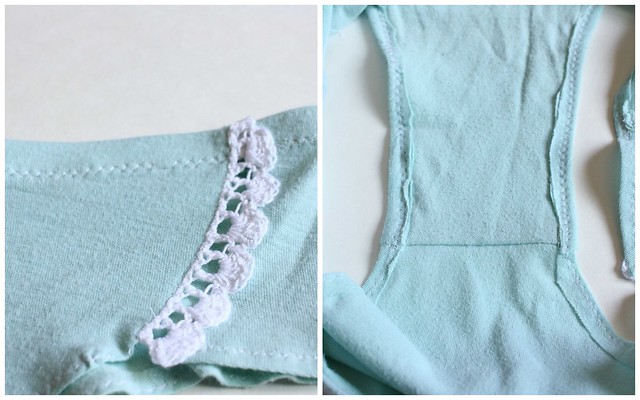
Handmade Mint Undies

The lace insert was added also using Indigo Orchid's helpful tutorial. Apparently, the sexy cutout is what makes it "lingerie", so let's go with that. I'll talk more about the lace insert later because I think it's the other special detail that makes it "me".
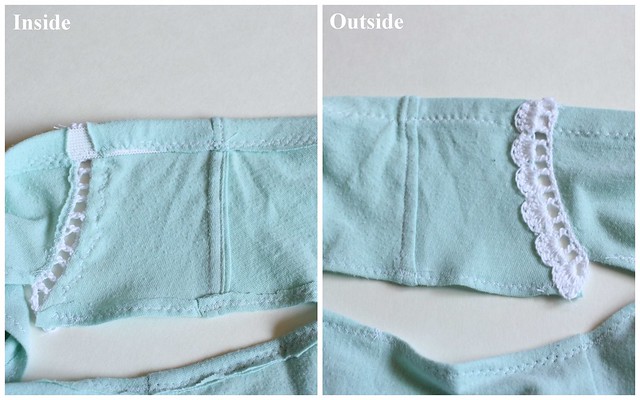
Handmade Mint Undies

And you can see here how the fabric has been cut away and folded back to make it see through under the lace - a true insert and not just an applique. Also, can I point out my beautiful side seams? Those are french seamed and then top stitched down to make them lay flat and look pretty inside and out.

The elastic was added using Lladybird's very simple and useful tutorial which was probably a better way to go than threading it through a turned down hem due to that screwy portion behind the lace insert. The leg holes are just turned under and stitched, and they're a bit wavy but look fine on the body (I tried them on with my own underwear on also, so they're still clean!)
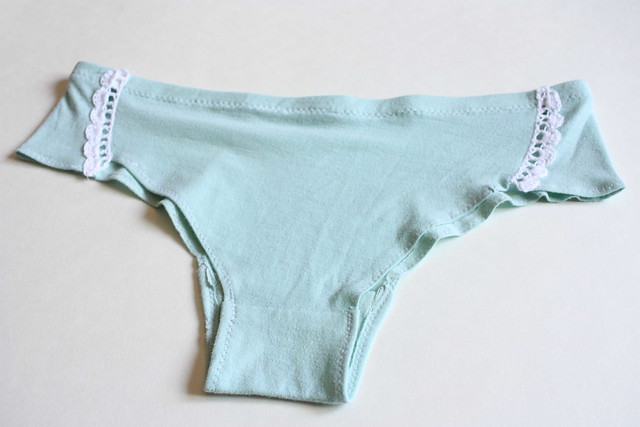
Handmade Mint Undies

And finally, the lace! I crocheted those little lacy bits with some cotton thread and a teeny tiny hook. I tested out quite a few different stitch patterns before I made up this one myself. Side note: either crochet patterns have gotten harder to read or I have completely lost my touch. I got totally confused on several of them, but in my defense I was looking at a few vintage patterns. I decided to make a pattern that has a nice open stitch so you actually get the full effect of the insert, but it also has a feminine scalloped edge but not too complicated!

Here's the basic idea:
Ch 27.
Row 1: DC into 3rd ch from hook. Ch 1, sk 1, DC 1. Repeat across. Ch 3, turn.
Row 2: 5 DC into 2nd ch sp from Row 1. Sk 1 ch sp for each shell. Repeat across and FO.

I foresee actually making myself more underwear in the future, they're so easy! And I wish my current underwear was a little more low rise, so hopefully this is the solution.

So, tell me, what's your spirit lingerie? ;)

Monday, April 20, 2015

Lovebirds

I'm on a roll! I'm slowly working through my backlog of photos for the blog which is why you're hearing so much from me lately! I just like to spend my time making instead of fussing with html for blogging :) Also, I'm about to go into quilting hibernation, and I won't come out until those quilts are done! I'll still be on Instagram, but I'll keep the blog quiet so I can knuckle down and get these quilts made before the weddings in July and August :)
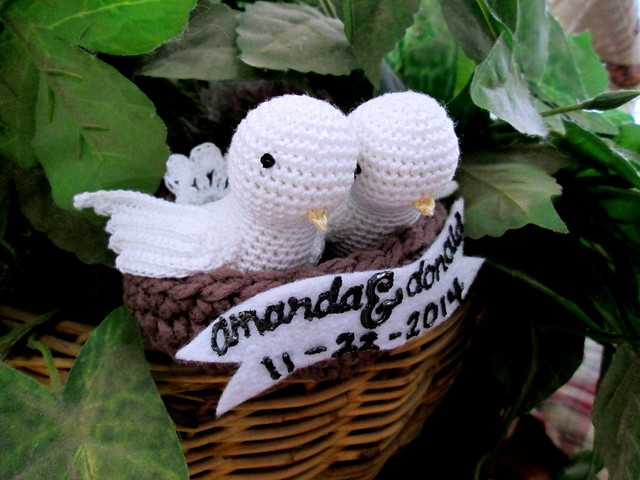
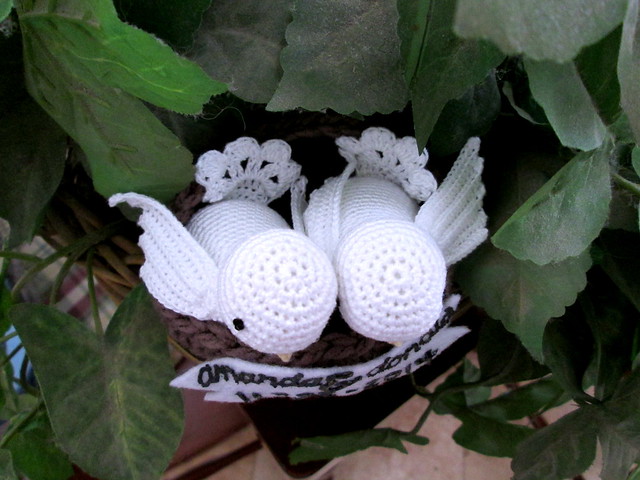
And speaking of weddings, here's a cute bridal shower gift I made for my friend when she got married last November (which I kind of still can't believe).

Crocheted Lovebirds

I used the (free!) Cute Bird Pattern by Lisa Auch on Ravelry and you can view my own modifications here.

Crocheted Lovebirds

As you can see, this is not my first time giving nested lovebirds to newlyweds. I'm still on an impractical gift giving kick! (But I did get them something off the registry anyways).

Crocheted Lovebirds

I just used puffy paint for the banner instead of embroidery on this version, which saved me a ton of time. Plus, I'm definitely an embroidery n00b, so my stitches never turn out all that pretty. Let's call it charming.

Crocheted Lovebirds

One last thing, can we talk about how everyone seems to know social conventions about these kinds of things except me?? And when I say "these kinds of things", I'm talking bridal showers, engagement parties, weddings; all things I am expected to know about because I am a ~girl~ apparently. Where are you all learning about these things? Is there a secret "girl basic training" that I forgot to go to??

Well, don't mind me, I'm just going to sit in the corner over here and knit then. I'm planning on bringing my knitting to a bachelorette weekend, is that a huge faux pas?

Monday, January 19, 2015

Neapolitan Baby Set

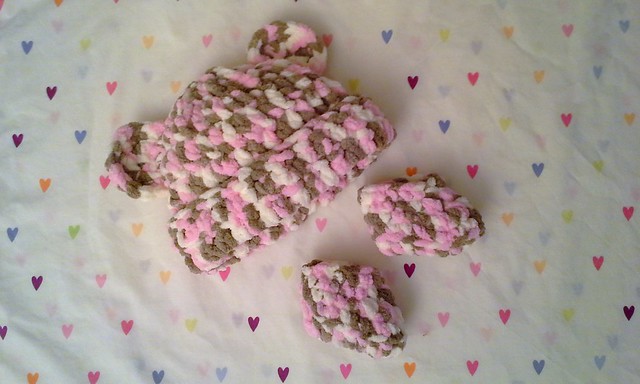
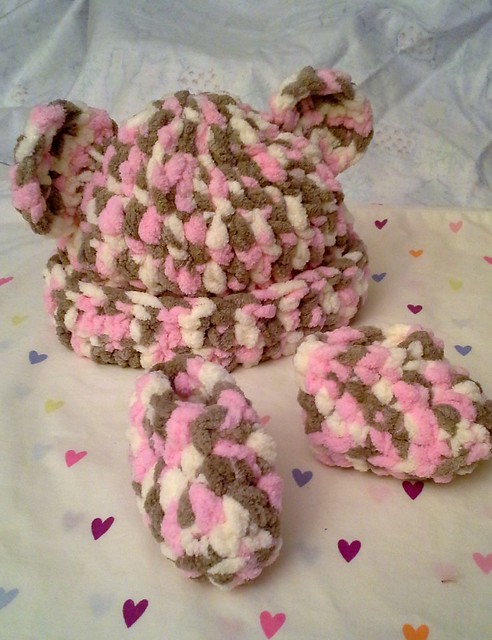
First up in the holiday making craze is this adorable Neapolitan colored baby hat and booties set.  This one has been a surprising favorite among Ravelers because y'all are just suckers for tiny things with ears aren't you?

Neapolitan Baby Bear Hat

You can see more of the specifics and my notes about the patterns and yarn on Ravelry: hat and booties. I made the 6 month size for the hat and rolled the brim up.

Neapolitan Baby Bear Hat

It was super easy to whip this up, I finished both the hat and booties in a couple of hours during the post-Christmas dinner lull. We even went out and bought a skein of this Bernat baby blanket and a J hook at Wal-mart on Christmas eve because my mom just decided that she needed a handmade gift for a baby shower like now

Everyone loved these when I finished, so they make a great project especially for new crocheters - very fast with super bulky yarn and maximum cuteness! I hope it fits!

Wednesday, August 6, 2014

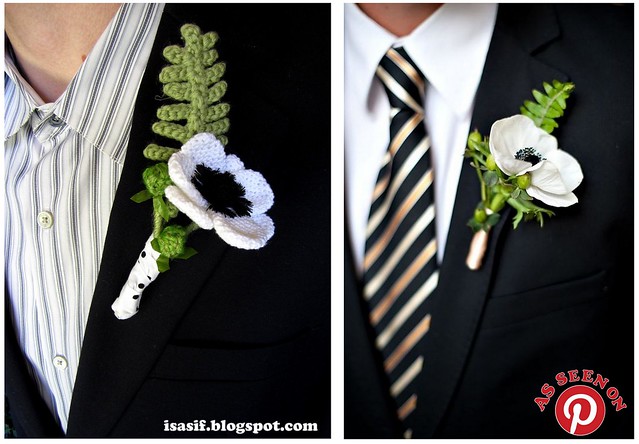
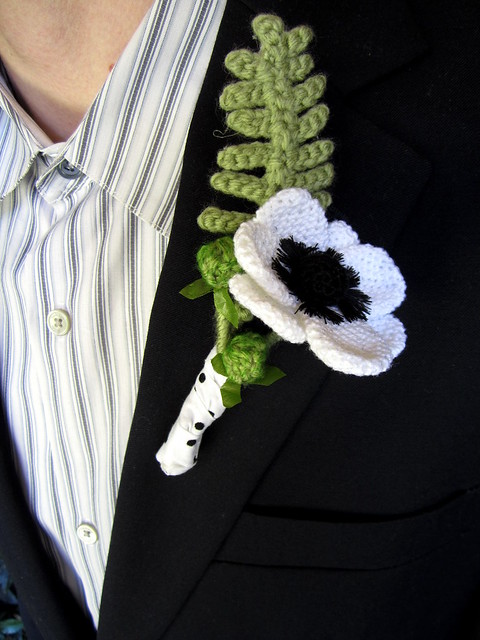
A Crocheted Boutonnière

So I had sometime ago thought about what to get my brother for his birthday seeing as I have little idea about what he might like/want (I got him a comb, lol).  I had always thought it would be really cool to do an entire bouquet of crocheted flowers, I even tried to copy this Saipua arrangement once upon a time (I love their aesthetic), but it didn't really come together.

I thought it might be time to give that idea another go, and I thought I could make my brother a cool boutonniere for his prom. Since it's pretty customary for the guy to get a tie/bow tie to match his date's dress, I didn't want to sew him a tie or bow tie because I had no idea the color of the dress.  I tried to play it safe with a black and white color scheme.

Because I went with black and white, I picked anemones as my main flower since I love those and searched around on Pinterest until I found something that I liked. (See also picture below right)

20140730

What do you think? Did I get it right?

Some details about the construction:
-I used a pair of super strong neodymium magnets to keep it in place on the lapel, no awkward pins, hooray!
-I made up the pattern for the flower and the fern as I went, but it's just a basic round shape flattened and sewed together. I think it has a total of 6 petals.
-I used worsted yarn for the fern and bobbly things, crochet thread in white for the petals, embroidery floss in black for the center, and black sewing thread to make the fringe.  I wrapped the whole thing in a scrap of white cotton with black flecked dots to continue the black and white theme (plus the stems were a little hideous)

052
I made the boyfriend get all dressed up on the upper half and stand outside patiently so I could stand on a chair and take close up pictures of his lapel :)

I think this would work really well for a wedding too! Plus it's super reusable :)

Anyone else ever try to recreate things from Pinterest?

Wednesday, July 16, 2014

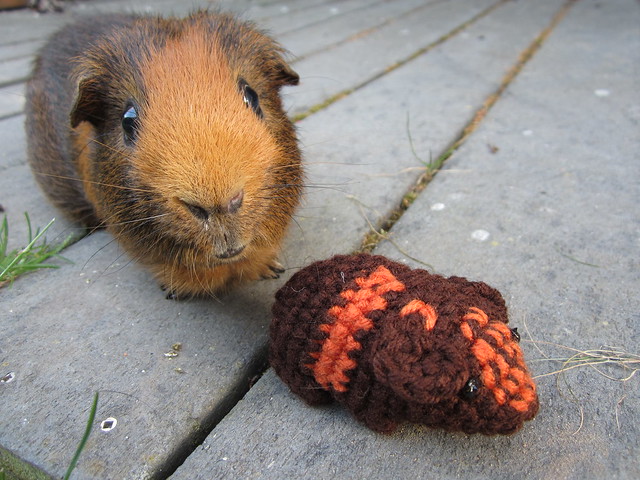
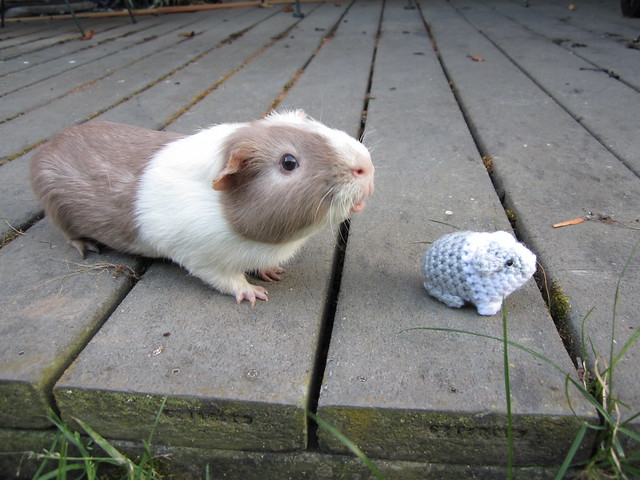
Crochetvies

That's pronounced cro-SHAY-vees.

Crochet + cavies = crochetvies!

Look at those sweet furry and yarny faces! 

IMG_1846
Pumpkin!

IMG_1835
Sage!

They're my furriest inspirations :)

Anyone else doing some pet related crafting?

Thursday, February 6, 2014

Awesome and (fairly) easy crocheted flower potholders

Sorry for the radio silence around here, but you know how it gets around the holidays, right? Traveling and involuntary internet breaks was the norm for me in December and January.

Plus, holiday crafting. Ugh. Don't even get me started on how awful it is.  It's nice to think that you'll make some people their gifts this year, but then you forget about it until December.  And then everything goes to hell in a hand basket.  That's why all the hardcore crafters do "Christmas in July" isn't it??

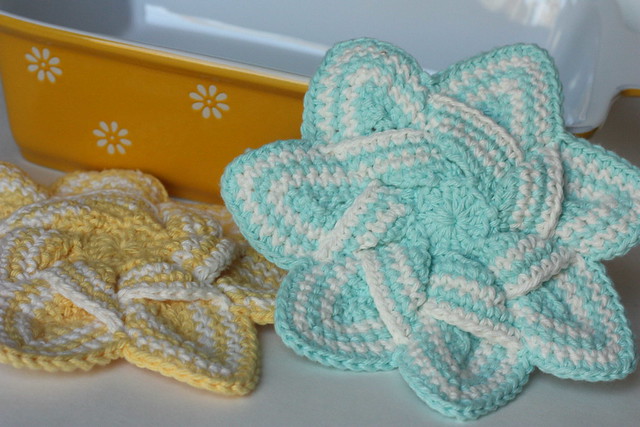
Enter the Crochet Flower Hot Pad on Ravelry.  Super interesting to look at, yet a piece of cake to crochet (and it's free!).  What's not to love? I was able to whip up several of these in a short amount of time, however there's a huge caveat here.  I could have left them as-is after crocheting, but I wanted these to be more or less functional as potholders too.  I couldn't have all those holes in them, so I decided I wanted to sew up all the holes. This took twice as long as the actual crocheting, probably due to the striping, since I wanted to make the seams as unobtrusive as possible.

I made a bunch of these for my aunts while I was visiting over the holidays, it was like kitsch-on-demand! Everyone wanted one as soon as they saw me making one (I was initially only making the 2 for N's parents as a thank-you-for-hosting-me gift). 

I did them all up in Lily Sugar'n Cream cotton yarn, and I really do love them even if I didn't get to keep a single one and they drove me crazy. Plus, they use hardly any yarn at all.  I probably squeezed 5 of them out of a single ball of the Ecru.

DPP_0295

Made these two pretty colorways for N's parents.

DPP_0294

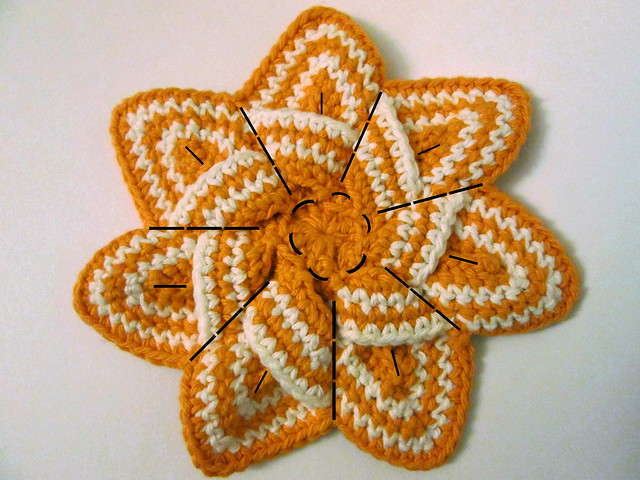
See the picture above for all the seams I had to close up, and I did it all in the secondary color (orange here). I used one long tail to sew them all closed so I had to be very careful to stay within the correct stripe as I went from seam to seam. It was aggravating, and if I never crochet another one of these for at least a few months, I'll be happy.

'Til next year easy-but-aggravating pattern!

Sunday, October 27, 2013

A Dinosaur for Atlas

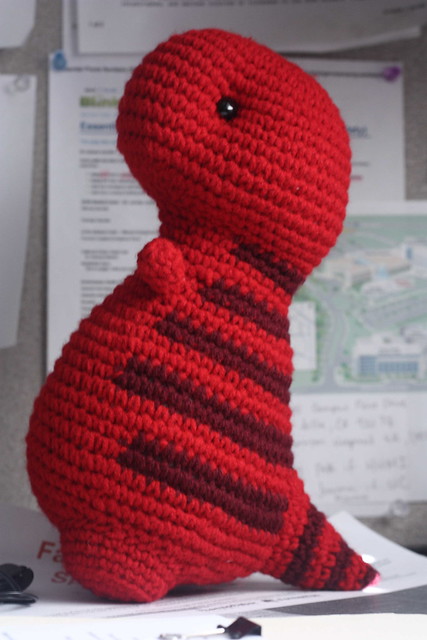
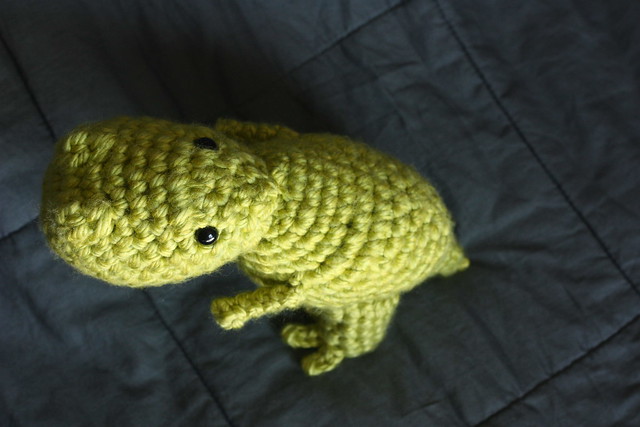
I made this sweet, sweet t-rex for my coworker who was pregnant. Yep, was pregnant, as in, I made this for her baby shower gift, and then baby Atlas decided to come a month early!  We cancelled the baby shower, and just had her come pick up her gifts with baby in tow.  So, on the plus side, little baby at work :)  But on the minus side, no baby shower cake :( I know, priorities, right?

Here's the Ravelry page for Timothy the T-rex from Bluephone studios.  Oh my gosh, I am like drooling over all the patterns from Bluephone.  Everything is freaking adorable.  I just loved this pattern, it's a great design, and easy enough to make again and again without getting tired of it.

I know I made the colorway from the pattern photo, but I thought this was the cutest for a baby boy without being ubiquitous blue.  Plus, red was the color family of yarn that I actually had a good matching stripe color.

When making this up, I tried to avoid weaving in ends in the body stripes by carrying the color through the rest of the stitches until I reached the next stripe.  I really wanted all my loose ends to be secure since this is probably destined for a rough toddler.  I am usually really lazy about knotting my loose ends inside the piece since most of my things are bought by college age students.

I'm kind of mad about the eyes since I tried to put them in straight, but they somehow ended up a little crooked, so they're not perfectly straight with the indentation in the head.  I try not to look at it too hard.

DPP_0284

Don't his little useless arms just kill you?

Sunday, July 7, 2013

I have a big head...and little arms...

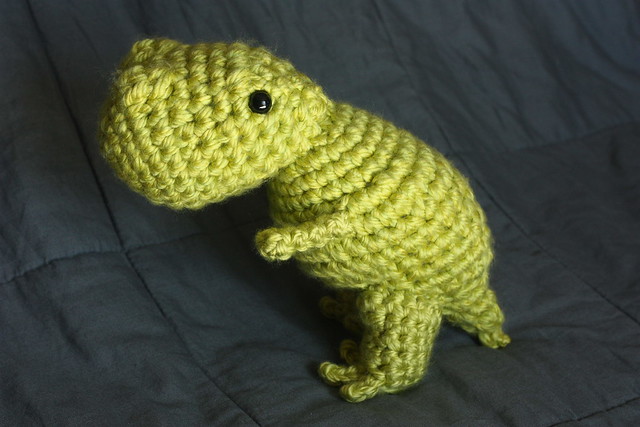
Ok, I have quite a lot of notes/adjustments on this pattern by Elizabeth Mareno

I did use a chunky yarn instead of worsted, and I ended up using somewhat more than 1 skein of Lion Brand Hometown.

Head: Made as written in pattern (ignore the stitch counts in parentheses because they apparently are a little wonky/not quite right)

Eyebrows/Eyes/Teeth: Not made. Could not understand, for the life of me, what the eyebrow directions meant.  I prefer a pretty safety eye anyway.  No teeth embroidery either as it creeped me out a little.

Neck and Body: All rounds made as usual except multiple rounds of SC around were omitted.  Meaning that, where noted, I made one row of single crochets but then did not make the next one or two rounds of single crochet (ex: R10-12, I only made R10 and then skipped to R13).

Front Arms: Not made as written.  I ended up with teeny little sticks for arms because I liked it better.
Round 1: Ch 2, 3 SC in 2nd ch from hook
Round 2-4: SC around.
F/O (Make 2)

Back Legs: Made 2 of the Left Leg pattern but fastened off after round 7 (did not work 8 or 9).  Sewed on both legs using same technique as my hippo - more underneath the body than sticking out from the sides.

DPP_0255

DPP_0256

He's very front heavy and can't stand up on his own :(  But this is what I think of, haha!


And this!


Ok, ok, enough of the tiny arm jokes.  At least he ended up cute in the end!

Sunday, June 16, 2013

Dust Bunny (or Fish bunny depending on how you look at it)

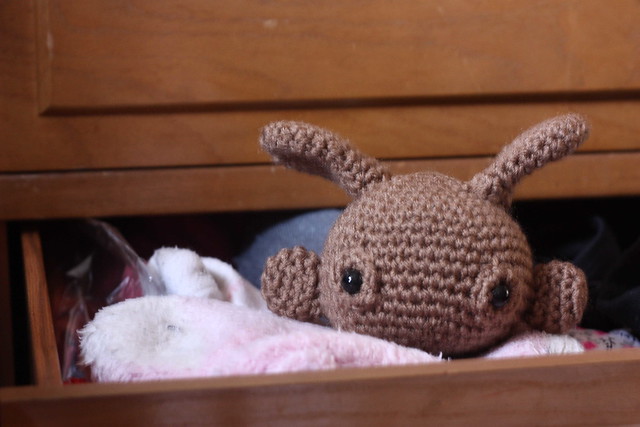
Ok, honestly, this pattern was kind of dumb.  I thought, "Oh! I'll just whip this up really quick. No problem. One hour, tops!" Nope, unfinished bunny parts rolled around in my bag for weeks, and I refused to sew the damn thing together.  I was mostly unmotivated by the fact that I thought it was ugly.  I don't even know what possessed me to make it in the first place.  It looks like a fish the way its paws stick out to the side!

This is another Voodoo Maggie pattern.  People probably generally enjoy the simplicity of the pattern, so it's probably not the pattern's fault.  It's really probably my fault for picking such a dull brown.

DPP_0247
See how much I disliked this? I couldn't even bother to take a clear picture..

Sunday, June 9, 2013

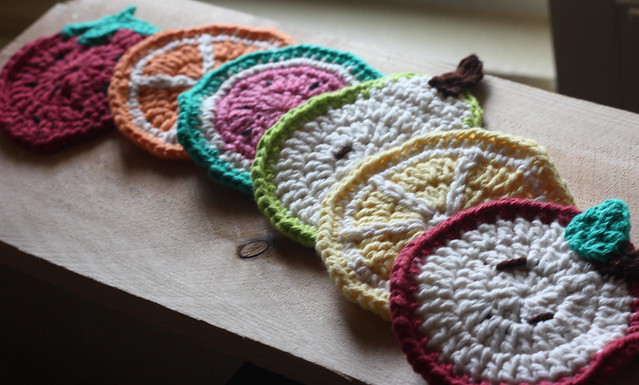
Cotton Fruit Coasters

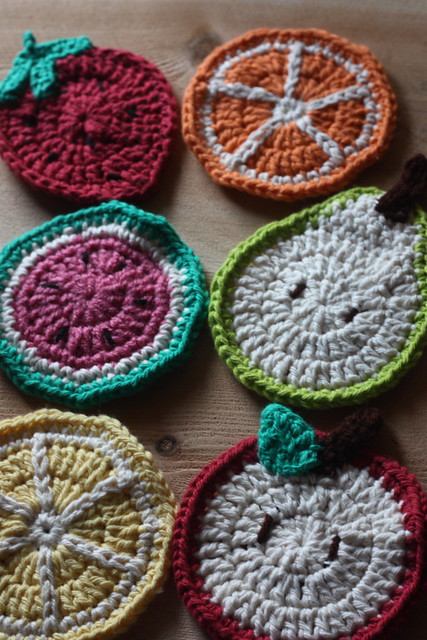
When these popped up on Craftgawker, I loved it!  We stayed with some relatives on our state national parks trip, so I thought these would make the perfect host/hostess gifts!

I used cotton yarn instead of acrylic as noted in the original pattern since cotton is much more absorbent for sweaty drinks.  (Except for the pink of the watermelon since I didn't have any pink cotton yarn. And I regretted it greatly because I don't like the texture)

Get the free pattern over at Repeat Crafter Me!

A few notes on the patterns:

For the pear and apple, I added a pattern of [inc, 1 sc] around the circular part of the green edge so that the coaster would stay flatter.

For the orange and lemon, I actually embroidered lazy daisy-type chain stitches instead of doing surface slip stitching.

DPP_0246

Aren't these great little favors? And super quick to whip up!

DPP_0244

I find that the patterns really lend themselves to variation fairly well although these several fruits are really the most recognizable. 

Variations!:
-pink grapefruit from the lemon pattern (pink inside, yellow rind)
-kiwi with slight modifications to the lime pattern (green inside, brown outside, dark brown seeds)
-avocado (pear pattern, green inside, dark brown outside, light brown pit)

I think it could also be really cute to do a hamburger and make all the parts and stack 'em up with a little toothpick!

I think I'll make these variations (I've already mostly made the kiwi) for the next time I need little gifts.

Thursday, May 30, 2013

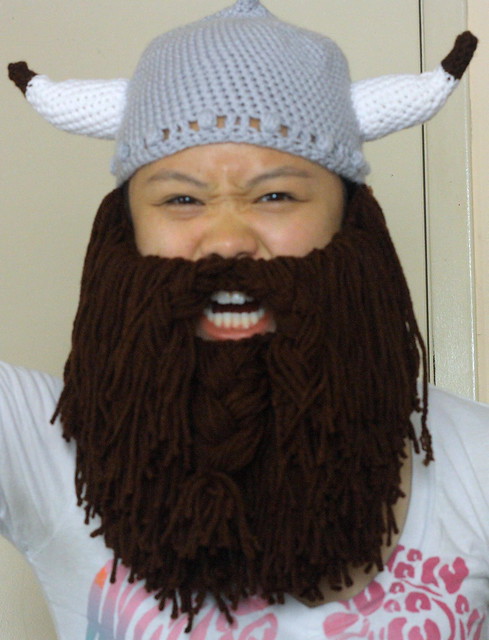
The Cuddliest Viking

This is about the unrelenting brutality of harvesting carrots..*

Actually, if you haven't heard, today's the day that the Pintester Movement reveals all the awesome crafts that people have been working on since Sonja revealed the challenge a week and a half ago.  See everyone's efforts over at the Pintester!

I'm afraid that there is no source tutorial for this as it first turned up on Reddit and has been floating around Pinterest since then.  As it is, I managed to wing it myself as well.

I've been wanting to make this for forever, but I've always held off because (a) I probably don't need a viking hat with a beard (b) knotting all those individual strands of hair is a royal pain in the ass (c) if people make requests for these, they never pay enough, and finally, (d) I've never really found a good yarn to use for the beard that won't scratch your face.  Well, regarding (d), let's say I've never found a good cheap yarn to use.

I used some Red Heart Super Saver for the hat portion, but more importantly, I used Red Heart With Love for the beard.  It's one of their newer products, some kind of premium acrylic that comes out really soft.

DPP_0243
Apologies for the horrible picture, it's apparently very difficult for me to take a self-timer picture.

I tried to make my most fearsome barbarian face, did it work?  Hey, at least it's better than the weird pirate face I made in every single other picture, haha.

I kind of wish I had a cool morningstar or sword or something to wield in this picture.  Oh and please ignore my silly out-of-character animal print t-shirt.  I didn't have anything appropriately Viking to wear.

So that's it.  That's my thick and luscious beards that two dwarves would be proud of.  Now, should I just wear it in public randomly and freak people out?

*Also, an appropriately timed Viking reference in Questionable Content.


Anyone else want to join in on the crafting fun? It's awfully satisfying to finish a project that you've been wanting to make!  Post a comment if you finish a craft, I'd love to see!

Sunday, April 14, 2013

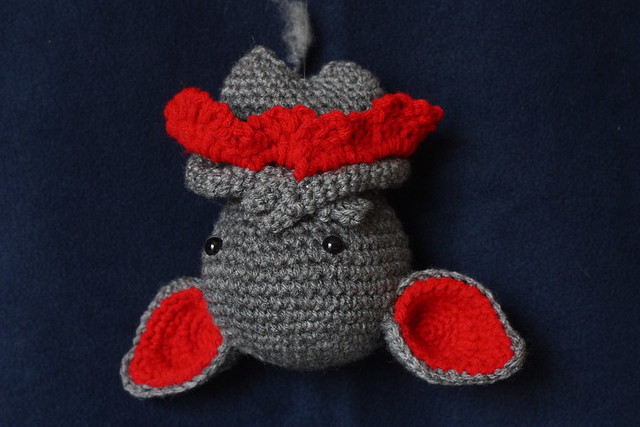
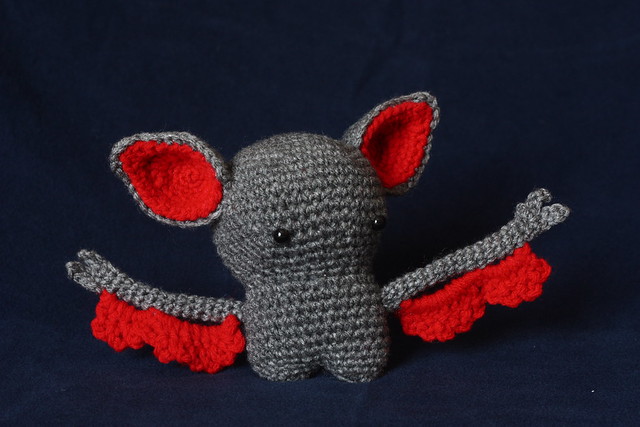
Batty about VooDoo Maggie

This is not the last VooDoo Maggie creation you've seen from me, although I am running out of the patterns in the book that I actually like.

I immediately loved this guy, but I was dissuaded at first from making him because "it wouldn't sell unless it was around Halloween."  Well, I sucked it up and made him anyways because I do what I want, haha.

A cautionary note: make sure you know where to attach your safety eyes.  The head, body, and legs are made all together in once piece so there is definitely a front side to him.  I accidentally put the eyes a little to the side of where the true front was so he has a quirky head tilt to the side (see bottom photo for proof).  Character design, right?

DPP_0223

DPP_0222

Sunday, April 7, 2013

Round-bellied Hippo

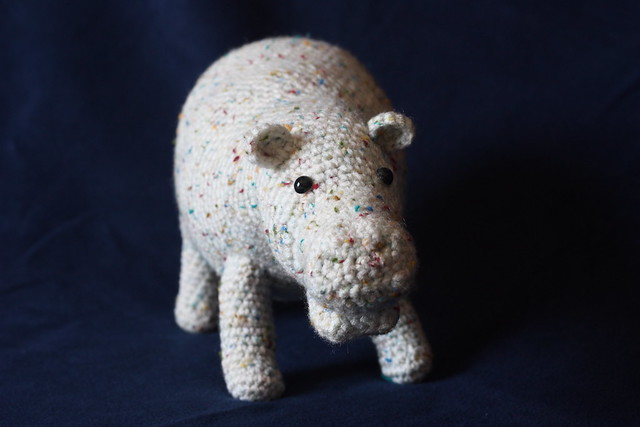
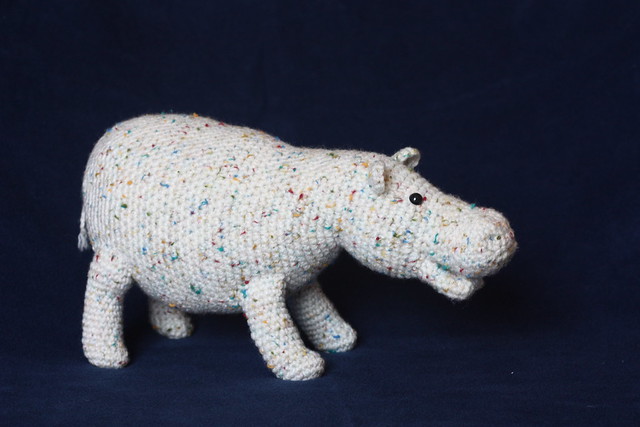
This cutie was a UFO for the longest time, all summer I think. I just couldn't make myself sew on the legs.  And then he sat on top of the TV waiting to be photographed for almost 5 months.  Nevertheless, he is one of my favorite patterns to date.

The pattern is beautifully written with subtle but important shaping and excellent step-by-step instructions.  She also has a great idea for sewing on legs so they look more seamless and realistic.

My little hippo definitely turned out very much like a soft doll - stiff crocheting and stuffed firmly.  N has also made the same pattern and his is definitely squishier and more plushy-like.  I used a D hook to make this, and he still turned out pretty large.  One thing to consider, make sure that your wrong sides are truly on the wrong sides.  My snout is wrong side out but I made the body right side out.  I kind of wished they at least matched even if they were both wrong side out.

Check out the "Little Hippo Taweret" Ravelry pattern page. (It's a free download, how generous!)

DPP_0219

DPP_0220

Sunday, February 10, 2013

Speckled Squid

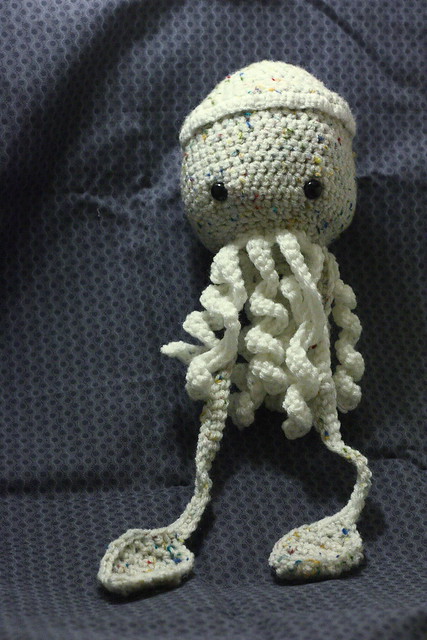
I made another Voodoo Maggie pattern lately (I made the Yeti earlier), and it turned out pretty cute even though I may have cheated the pattern a little bit.  I tried to make this guy out of the small remainder of a weird skein of speckled off-white yarn that I used to make a hippo out of.  Unfortunately, I realized almost at the end of the head that I wasn't going to be able to finish the pattern with the yarn that I had left.  I ended up leaving out the last round of increases and SC across to try and leave at least a little yarn for the longer tentacles.  And I almost made it.  The second tentacle is half speckled-half white.  And since I'm a rebel and didn't do the cap in a contrast color (as the book advises you do), I had to add a little trim of white single crochets in order to tie it together with the little white tentacles.

All right, one for the not-a-total-disaster column!

DPP_0201

Whoops! Please ignore the wrinkled fabric I used for my backdrop :) And the graininess - still learning!  I'm trying to figure out good ways to light things while shooting at night, since I can't ever seem to find a time to shoot pictures when the sun is actually out.

Tuesday, January 15, 2013

Veggie-tastic Crochet Case

I've been wanting to make a cute little crochet case for N for a while. Personally, I use an old Lisa Frank stationery binder to hold my hooks and various crochet odds and ends. 

If your new year's resolution is to crochet more, maybe this cute case will inspire you to take your crocheting with you everywhere.

Sorry I didn't take process photos, but I kind of winged it as I went, so I'll just explain my process.  Honestly, the whole thing is just sewing felt shapes to another big piece of felt.

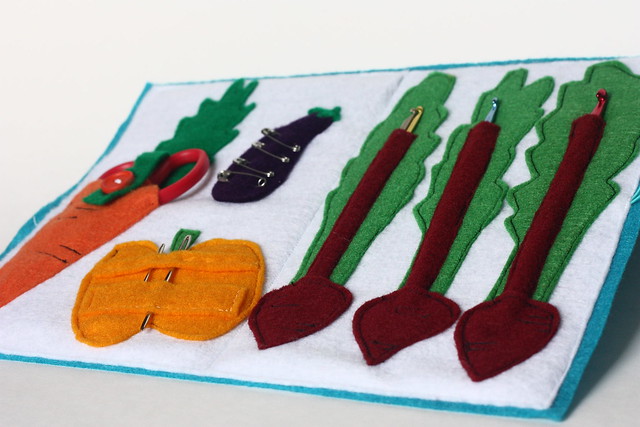
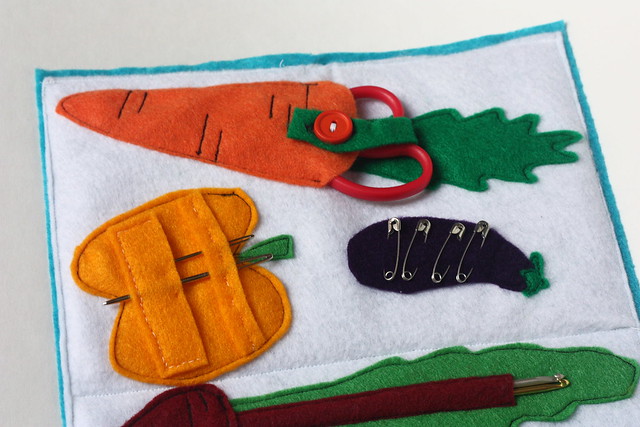
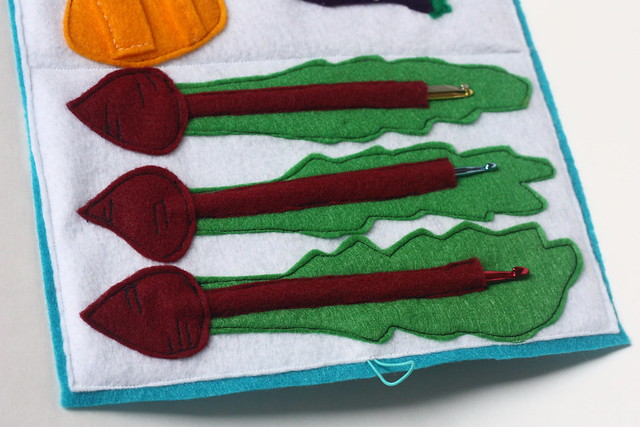
I have a carrot scissors holder, eggplant safety pin tab, bell pepper needle holder, and beet hook slots.  These are all vegetables that we actually grew in our garden. 

I think other vegetables that would be cute here are mushrooms, ears of corn, peas in a pod, green onions, and tomatoes. Just try to pick vegetables that translate easily to graphic line drawings (for example, not round yellow onions because the shading and skin would be hard to convey with felt),

See the how-to below:
DPP_0193

Materials:
-2 full sheets of felt (any color) in standard 8.5x11"(?) size bought at Michaels
-Various scraps of colored felts for veggies
-2 Buttons and elastic or 2 pieces of ribbon
-Flat plastic sheets, I used part of the top of a sandwich party platter plus two pieces from a plastic school folder

All the pieces will be sewn onto the inner piece of felt and then the cover will be added with the plastic for stiffness.

1. Trim your inner felt piece so that it's a little smaller than your outer piece so that it will fold nicely.

2. Cut out all your shapes from various colored felts and make sure that they fit onto your inner piece.  The carrot should be big enough to cover most of the scissors but with the handles peeking out (see picture below)

3.  Do all the embroidery and top stitching of details before you sew anything down onto the inner piece of felt.

4. Working from left to right on my case, start with the carrot.  Sew down the greens first with an extra strip of green (with a buttonhole!) tacked to the bottom of the foliage.  Sew your button onto the carrot then sew the bottom v-edge of the carrot but not across the rounded top!  Gotta leave room to put the scissors in.

5. Bell pepper next. Sew down 2 strips of felt across the top of the bell pepper leaving spaces for needles to go through.  Sew around the outline of the pepper and its stem.

6. Eggplant. I actually hand stitched the eggplant because much less of it is tacked down to the felt to leave room for it to be lifted up to get safety pins in and out.  I sewed around the outside of the foliage and the outline of the eggplant down about an inch and then straight across to the other side. You will end up with a trapezoid-like shape of seams on the top of the eggplant.
DPP_0194

7. Beets! Sew down the greenery. Add a strip of beet color in the middle of the greenery and sew up the sides but not the top and bottom (the hook is going in there).  Finally, sew the beets on top and position so they are just barely covering the bottom of the greens.  Sew around the bottom of the beets and leave the top open so that the hooks will poke through (I top stitched the beets before hand to make them look more complete).
DPP_0195

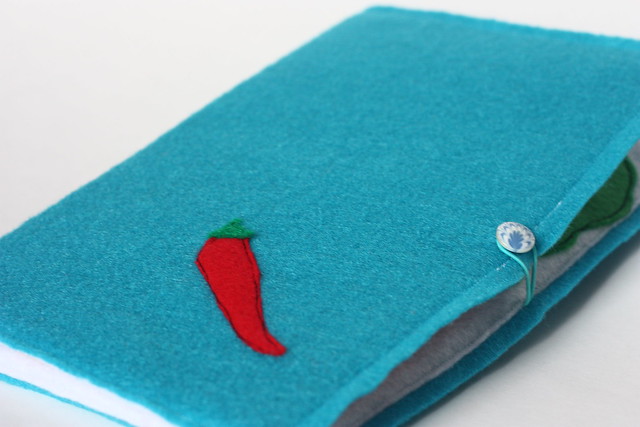
8. Sew the little hot pepper onto the cover piece of felt.  Place and sew the button on.

9. Add the front cover! Sew a seam down the middle of the case for a center seam.  Carefully sew around the edges leaving the top open.  On the back side seam, tie your elastic into a loop and push the knot between the cover and inner felt pieces even with where the button is on the front.  Stitch over the elastic while doing the seam. Instead of elastic and button, you could use 2 pieces of ribbon for a tie closure.
DPP_0192

10. Adding the plastic.  Cut your plastic sheets to fit the front and back of the case and slip them in between the cover and inner felt pieces.  For the back piece of plastic, I used the top plastic cover from a sandwich party platter and cut it to size.  For the front, I used a beat up plastic file folder and cut 2 of the same size since they were a little flimsier than the sandwich tray.  Sew a seam across the entire top of the case to encase the plastic and sew the pieces of felt together.

Fin!  Now you have your own veggie-tastic crochet case to take your crocheting on the go - in style!

If you have any questions, feel free to leave a comment, I know there are a lot of words and not that many pictures, so ask away!

Sunday, January 6, 2013

Please Sir, I want S'more

Ok, that was a bad pun, considering that this has more to do with S'mores than Charles Dickens.

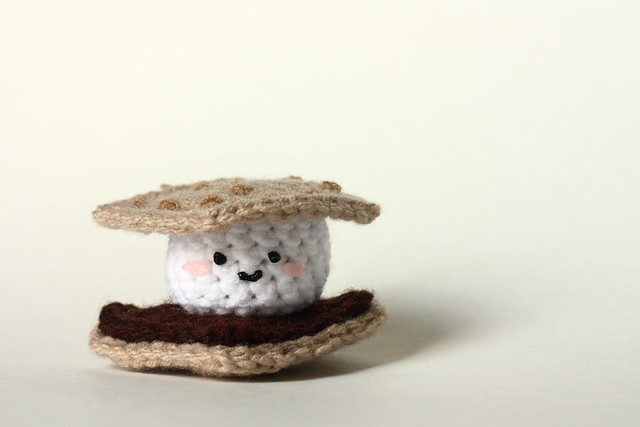
This little guy was inspired by the A Beautiful Mess post about fancy S'mores. I love the idea to use fun-sized candy bars as the chocolate!  My roommate and I were talking about how we missed the entire s'mores/bonfire season even though we live in SD!

DPP_0196

And here's the free pattern!
Finished size: ~4 cm tall

Marshmallow:
Ch 2, 6 SC.
[2 SC in next st] repeat x6.
[2 SC in next st, 1 SC in next st] repeat x6.
sl st to first SC, Ch 1.
(in BackLoopsOnly) SC around
SC around
SC around
SC around
SC around
(in FrontLoopsOnly) SC around
[sc2tog, 1 SC] repeat x6.
stuff
[sc2tog] repeat x6.
F/O

Chocolate:
Ch 9, turn
[SC 8, Ch 1, turn] repeat for 8 rows
F/O
Make 2, SC around edges to join 2 together

Graham Cracker: (2)
Ch 10, turn
[SC 9, Ch 1, turn] repeat for 9 rows
sl st evenly around edges
F/O
Optional: Embroider French knots in darker tan onto graham cracker surface (3-2-3 offset pattern like you might see on the 8 of diamonds)

Stack up your pieces and glue or sew together! Add a sweet little face with black puffy paint and maybe some pink felt for blushing cheeks.

Sunday, December 16, 2012

Little Cow

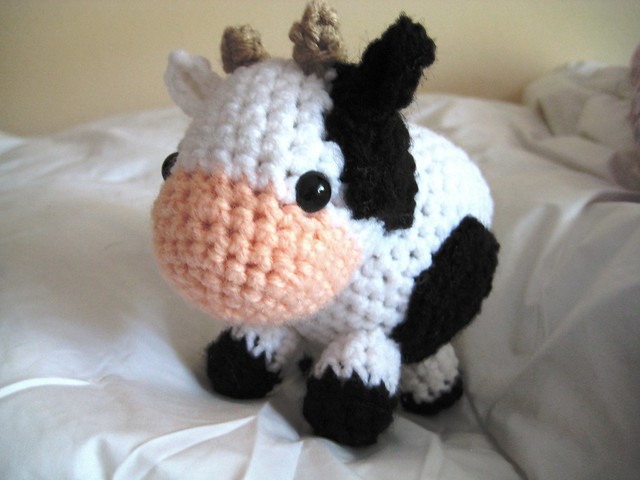
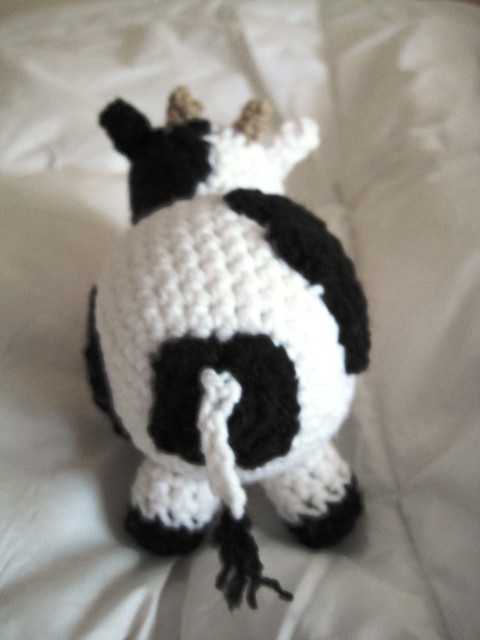
I actually made this little guy on request for my coworker's wife. 

I love this little pattern from Studio Ami, and it's free!  I did change the legs because I like these stubby little things better.

Make 4 of the same:
With black:
Ch 2, 6 SC in 2nd ch from hook. (6)
2 SC in next st, 1 SC in next stx3 (9)
In BLO, SC around (9)
With white:
SC around
SC around
SC around
F/O

Bonus! I also learned how to put safety eyes on correctly.  Or at least I think it's correct now.  Apparently, the concave part goes into the eye stem, not the convex part.

IMG_4878

IMG_4879

Sunday, December 9, 2012

A Freezer with a Face?

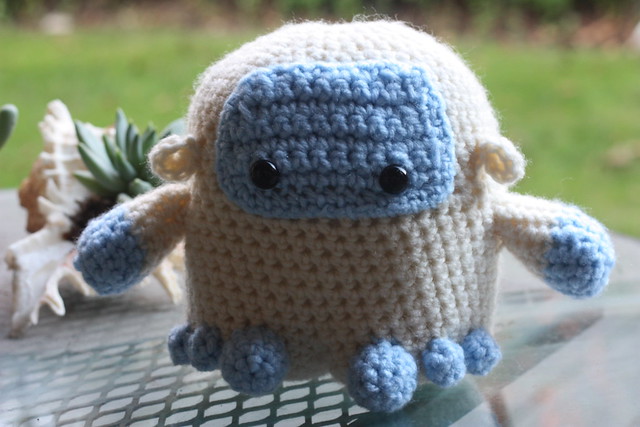
Ok, so I know it seems like I haven't made any crochet projects in a while, but it's mostly because of the secret project!  Here's a little yeti that I've been working on (slowly) from Voodoo Maggie's book!  He's really cute, and he has a butt!  I'm afraid that he's pretty stylized, so it may be hard to tell at first glance what he's supposed to be.  One of my lab mates was thoroughly confused and thought he might be a freezer with a face.

DPP_0178

Haha, love all the little toes.

Sunday, October 21, 2012

Meet Dragon (and Bunny)

This is Dragon.  She has a little pet bunny. Aren't they cute?

Lol, I feel like I could write a short children's book if I keep going like this.

When I found this pattern at Ravelry, I was super determined to start right away.  Well, I did the head while waiting at my brother's basketball thing and realized that the head was huge and how was there any way this is right?  It basically seemed like the head and the body were not going to go together in any kind of predictable way. I set it aside for a while and finally just made the rest of the pieces and put it together.  It's very kawaii.  Classic big head, little body style.  Finished, she actually stands up on her own with the support of a little tail and is about 6 inches tall at the tip of the horns.  I'm glad I'm done with this one though, because all the finishing details were driving me crazy!

IMG_4790

P.S. Sorry for the terrible, poorly-lit photo. It's hard to take pictures at 7:30am :(

Sunday, October 14, 2012

Too many legs

I was totally swamped last Friday at work, but I just did not have enough hours in the day to get everything done that I wanted to.  [Technical stuff: I was trying to do a drug assay that takes 5 hours with 30 minute time points, but I couldn't get through the assay fast enough between time points, so it was some kind of vicious cycle.]  So, because of the crazy-ness at work, I basically intercepted one of our volunteers in the hall and steered him into my chair and made him help me with my assay while I took a much needed break to work on a different experiment and then grab a quick bite to eat.

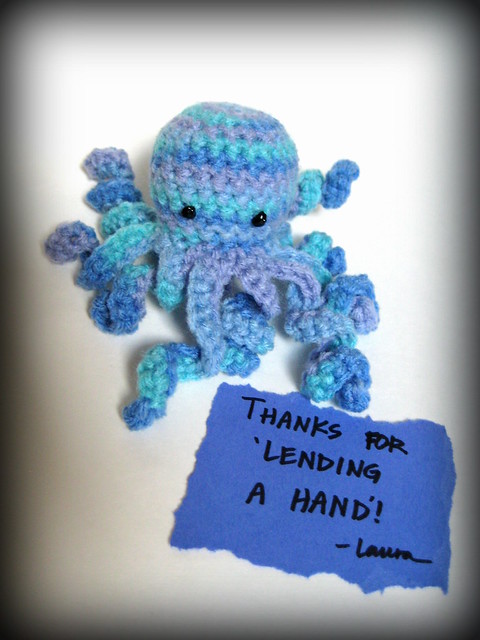
But anyways, that was an extremely long prelude as to why I made an octopus this week.  He's a little lopsided as seems to be my signature octopus style.  The very first amigurumi I ever made was a penta-pus (a 5 legged octopus!).  This little guy ended up with 10 legs mysteriously since I had to fill the extra space around the body with more legs.

I should really write this pattern down some day since he's so easy to make.

IMG_4760

I even made a happy meal style box to gift this little octopus. 
IMG_4761

Third Yarndango project!