Showing posts with label embroidery. Show all posts

Wednesday, August 26, 2015

The #YouMayNowSmithTheBride Wedding Roundup

As I may have hinted at before, in my handmade undies post, one of my oldest and dearest friends got married this year. As such, I have spared no expense in wedding gifts.

Beware: this is a very very long post. I have a lot to say, haha.

Let's have a look, starting with the biggest and baddest of them all:

The quilt.
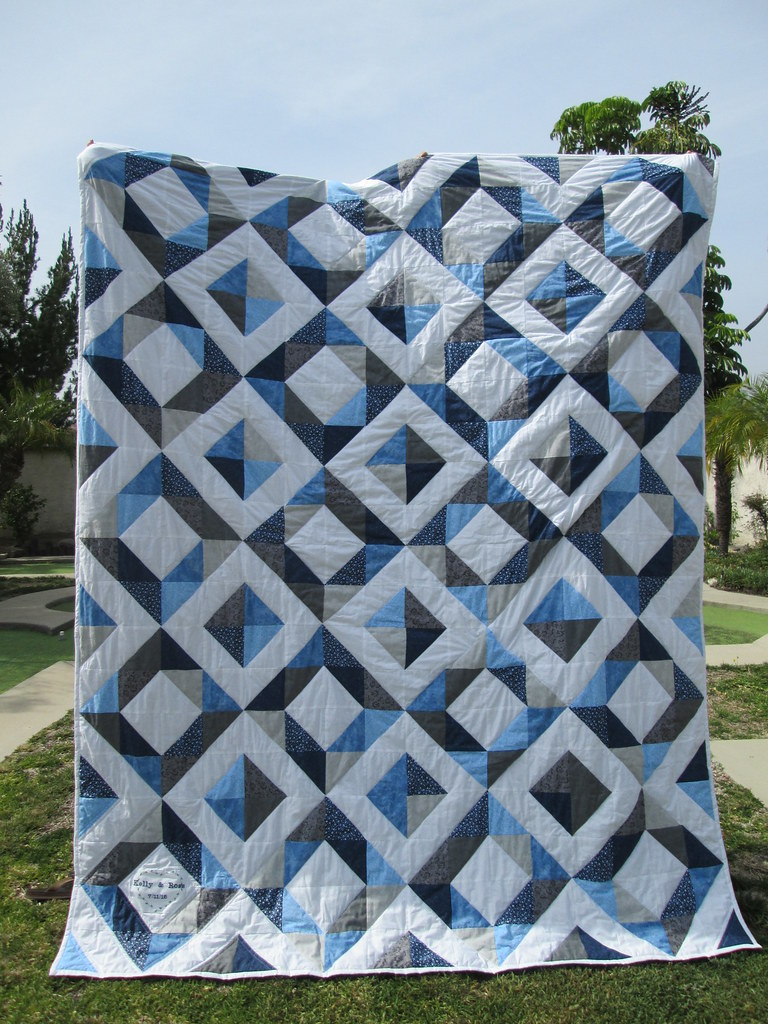
Kelly&Ross Quilt

Oh, the quilt. This is the first quilt I have ever made! I'm apparently an ambitious idiot. I made a queen sized quilt for my first quilt and quilted it on a standard home machine. In the above picture my mom and sister are standing on extra tall bar stools with arms stretched way out above their heads and to the sides and the quilt is still touching the ground, that's a massive quilt!

It took me about 2 solid months to finish this quilt, but that includes a whole week of staying up into the wee hours sewing.

I found this quilt on Pinterest that She Can Quilt made, and I thought it was the perfect first quilt pattern especially since the bride requested blues (so vague). I ended up at JoAnn pulling out all the blue quilting cottons trying to find 12 different blues that go together. It was harder than you think. There's a whole wall of quilting cottons and yet somehow, they don't all mesh. I ended up with 7 different fabrics with grays thrown into the mix, plus 2 patterned whites.

I used Craftsy's Magic 8 method for making all the HSTs which made everything pretty quick.


And to make it extra special, I added some machine embroidery with their names and their wedding date to the bottom left corner square. I'm lucky that my mom was able to do the machine embroidery for me on a piece of the white fabric and then I stitched it onto my quilt top instead of having the embroidery done directly onto the quilt top.
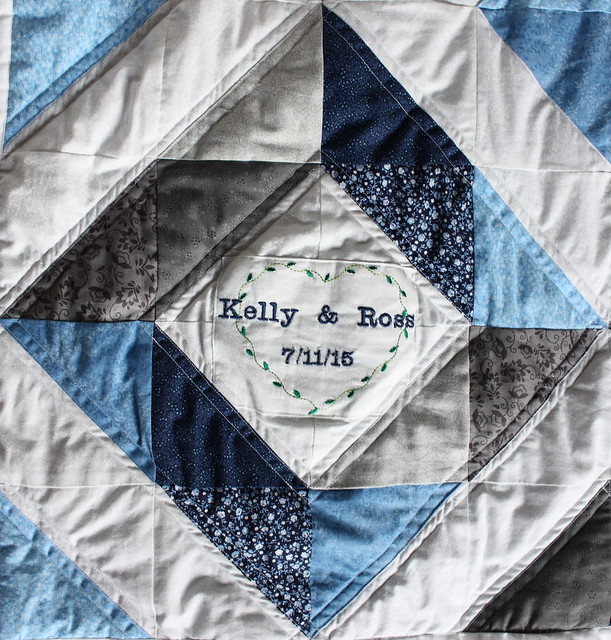
Kelly&Ross Wedding Quilt

The mitered corners on the binding turned out pretty well using this tutorial from Merriment Design. I had made the strips in straight of grain but had ironed them like double fold bias tape. The white was left over from the quilt top, and I like the crisp finish it adds.
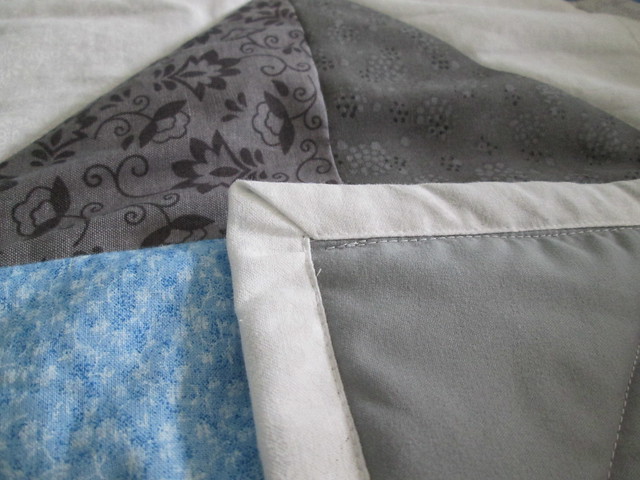
Kelly&Ross Quilt

What's this? Adorable kitty cat sitting outside my door? Boyfriend and I were attempting to take pictures of the quilt in the walkway outside my house, and my favorite neighborhood cat was hanging around. While we were occupied taking pictures, kitty darted inside the slightly ajar door to the house, but she came back out when I went in there to see where she had gone. I wish I could keep her forever, she so so sweet :)
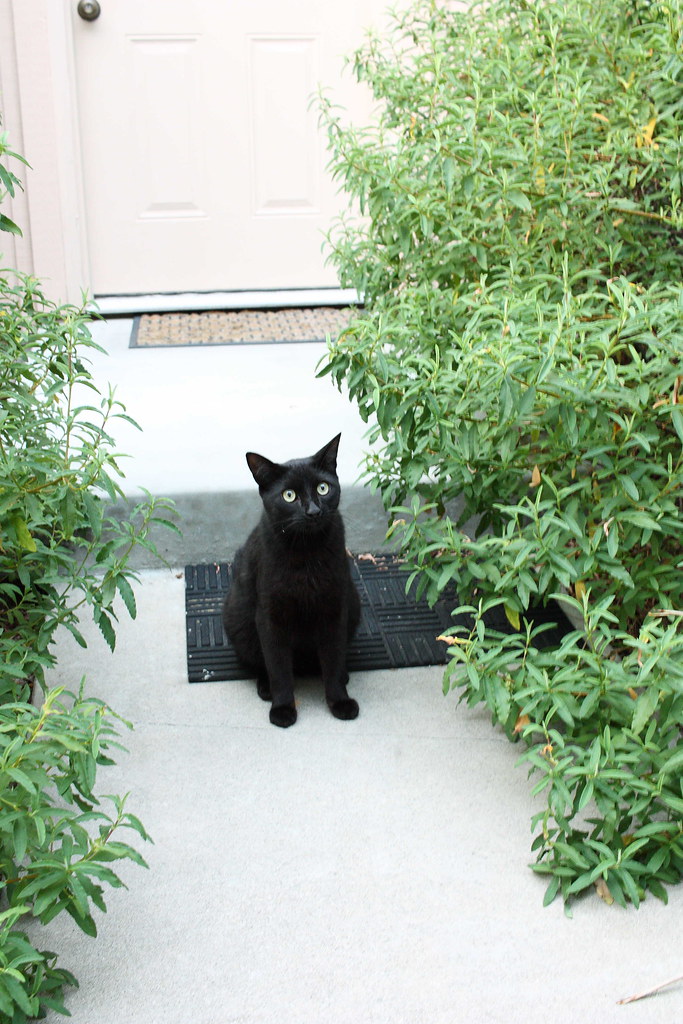
A Friendly Visitor

The piecing together of the quilt top went fairly smoothly, but when I got to the quilting, that's when I had a major meltdown.

A photo posted by @laura.isasif on


I used a queen size microfiber sheet for the backing, but as you can see, I had major problems with it shifting and getting bunched up while I was quilting. I bought one of those precut queen sized batting rolls from JoAnn, but I didn't have any safety pins, so I pinned it with straight pins which was a huge mistake. Having to roll it up to fit under the arm of the machine meant I basically needed a chain suit to prevent from getting poked all the time. I quilted it like She Can Quilt did by following the outside of the squares in the depression block style. I tried to do three lines of quilting, too, but I only had time to do one line of quilting due to serious set backs from unpicking bad quilting. I wasted at least 2 spools of thread attempting to quilt this damn thing. I stayed up until at least 3 am every night the week before the bridal shower to finish this quilt, but I did get it done by the deadline.

I had to gift wrap the top and bottom of a copy paper box because it was the only thing big enough to contain this quilt. Now that I've gone to a bridal shower, I've become initiated in the cult of bridal shower etiquette, and so there was a massive amount of ribbon on the box.


As an extra little something, I personalized this bamboo cutting board for the bridal shower too. My mom found this cute turtle shaped bamboo cutting board at TJMaxx I think, so I used my newest toy (the wood burning pen, see examples 1, 2) to add their names.
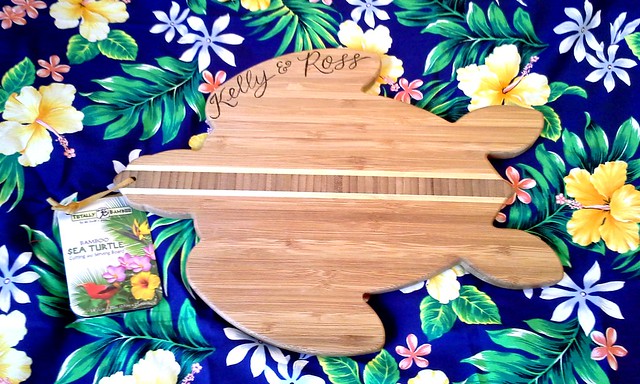
Kelly&Ross Woodburned Cutting Board

I practiced drawing out my letters in a few different ways, and then I used the calligraphy tip to burn the letters into the board. Bamboo is pretty tough to burn, but hopefully, it doesn't look too choppy.
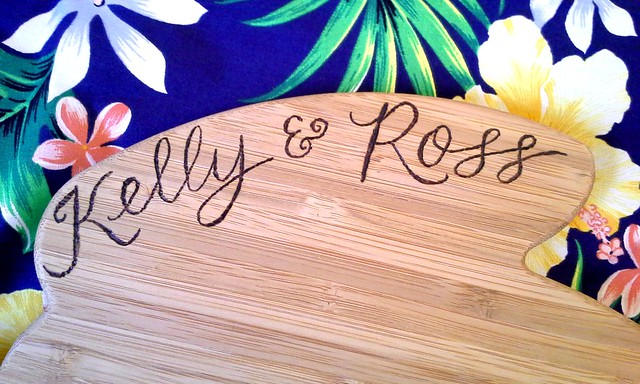
Kelly&Ross Woodburned Cutting Board

And here's just a couple of pictures from the picturesque wedding. This was the golf course/resort that the ceremony and reception were held at. The ceremony was set up just to the left of the shot (and my brother had to clean up the rose petals off the grass by hand after the ceremony was over :) haha) We were really high up in the mountains in Keystone, Colorado, about two hours west of Denver, probably about 10,000 ft elevation.

Keystone Ranch

And we stayed in a really lovely condo just a short drive away from the venue. This was the view just outside the window. Kind of unreal!
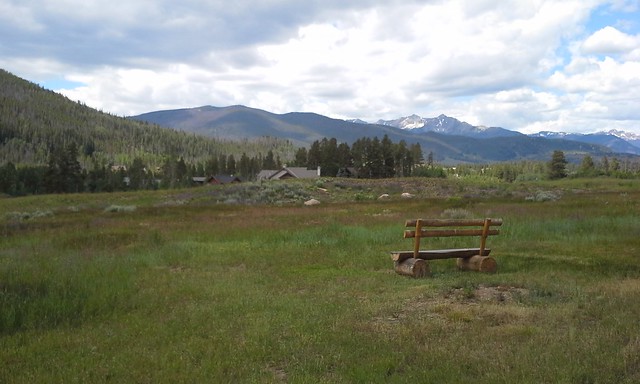
Keystone, CO

I just love that the flowers were blooming even in the middle of summer.

Keystone, CO


Lessons were learned in the making of my first quilt!
Namely,
1. Everything takes longer than you think. Especially because you have to give yourself time to mess up two or three times.
2. Taping down the back of the quilt and basting it all together with safety pins is a very good idea. Bad things happen when you don't.
3.  Do not choose a queen size quilt for your first quilt. Just don't. Unless you happen to be very ambitious like I was.
4. Don't forget to buy fabric for the binding! Especially if you're not working off of a pattern that reminds you about this. Fortunately, I had enough leftover from the quilt top.

Obviously if you've made it this far through the blog post, I haven't lied to you about how difficult it was. Because it was. It was very very hard. I may have cried a few times. It was worth it though. In the end, I was very pleased with how the quilt turned out.

Since it was so time consuming though, I don't foresee too many more quilts in my future. Finally, a hobby I don't love ;) I keep telling people, "This is not a relaxing hobby!!"

If I've left anything out that you want to know about the construction, ask me! I've started to forget every little thing I wanted to mention here, but I'm happy to answer any questions! I'm also here for moral support should you decide to tackle quilting :)

Monday, July 14, 2014

A little bit of crafting, a lot of sewing, and no blogging

My apologies to anyone still out there.. sorry I've been so lackluster around these parts!

But it's hard work keeping up the blog. For the most part, I've been doing a lot of uninteresting things, with the exception of a few big events. However, it's hard to set aside time to put together a blog post when that time could be spent frustratingly enjoyably sewing. Plus, I'm a little camera shy, and a lot of my recent makes involve me gussying myself up and preening for the camera (in a preferably picturesque locale). You can see why I don't do this.

Funnily enough, my friend just posted about blogging procrastination. It's a much funnier version of what this post essentially says (TL;DR Sorry I suck at blogging). Go check it out, she's a very funny lady.

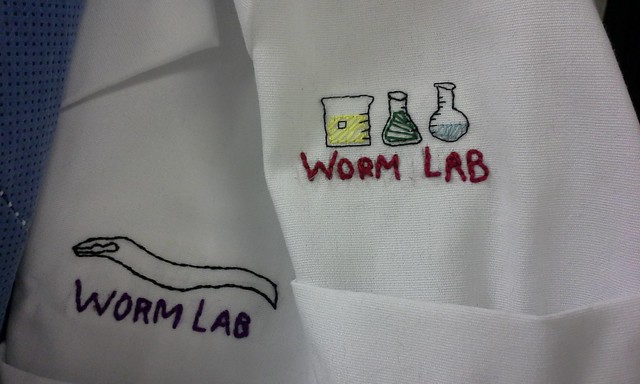
I thought I would just share this little phone snapshot of a bit of embroidery work that I did on some lab coats for work. The university provides us with lab coats with personalized embroidery but there's a turn around time of at least 6 weeks. And it didn't work out with a student worker, so we got these two with his name even though he'd been long gone. I took the liberty of unpicking/cutting off the embroidery and going over it with a little bit of hand embroidery of my own to hide the many pin holes left behind by the previous name.

20140710_174513

I'm hoping to up my blogging game in the coming months since I'm going to try and do Sally's summer stash-bust challenge. I've already technically finished a piece after June 21, but sadly I have no pictures to do it justice. So, I'm just going to have to suck it up and go out there dressed to the nines to pose for a self timer.  Blogging is weird, right?


Incidentally, you may still yet see some interesting side projects that I have been working on (cloth napkins! wood burning!)

Is blogging about your life weird when you don't do much? Or maybe it takes a certain kind of person to like blogging? Anyone else out there with me on this?

Tuesday, January 15, 2013

Veggie-tastic Crochet Case

I've been wanting to make a cute little crochet case for N for a while. Personally, I use an old Lisa Frank stationery binder to hold my hooks and various crochet odds and ends. 

If your new year's resolution is to crochet more, maybe this cute case will inspire you to take your crocheting with you everywhere.

Sorry I didn't take process photos, but I kind of winged it as I went, so I'll just explain my process.  Honestly, the whole thing is just sewing felt shapes to another big piece of felt.

I have a carrot scissors holder, eggplant safety pin tab, bell pepper needle holder, and beet hook slots.  These are all vegetables that we actually grew in our garden. 

I think other vegetables that would be cute here are mushrooms, ears of corn, peas in a pod, green onions, and tomatoes. Just try to pick vegetables that translate easily to graphic line drawings (for example, not round yellow onions because the shading and skin would be hard to convey with felt),

See the how-to below:
DPP_0193

Materials:
-2 full sheets of felt (any color) in standard 8.5x11"(?) size bought at Michaels
-Various scraps of colored felts for veggies
-2 Buttons and elastic or 2 pieces of ribbon
-Flat plastic sheets, I used part of the top of a sandwich party platter plus two pieces from a plastic school folder

All the pieces will be sewn onto the inner piece of felt and then the cover will be added with the plastic for stiffness.

1. Trim your inner felt piece so that it's a little smaller than your outer piece so that it will fold nicely.

2. Cut out all your shapes from various colored felts and make sure that they fit onto your inner piece.  The carrot should be big enough to cover most of the scissors but with the handles peeking out (see picture below)

3.  Do all the embroidery and top stitching of details before you sew anything down onto the inner piece of felt.

4. Working from left to right on my case, start with the carrot.  Sew down the greens first with an extra strip of green (with a buttonhole!) tacked to the bottom of the foliage.  Sew your button onto the carrot then sew the bottom v-edge of the carrot but not across the rounded top!  Gotta leave room to put the scissors in.

5. Bell pepper next. Sew down 2 strips of felt across the top of the bell pepper leaving spaces for needles to go through.  Sew around the outline of the pepper and its stem.

6. Eggplant. I actually hand stitched the eggplant because much less of it is tacked down to the felt to leave room for it to be lifted up to get safety pins in and out.  I sewed around the outside of the foliage and the outline of the eggplant down about an inch and then straight across to the other side. You will end up with a trapezoid-like shape of seams on the top of the eggplant.
DPP_0194

7. Beets! Sew down the greenery. Add a strip of beet color in the middle of the greenery and sew up the sides but not the top and bottom (the hook is going in there).  Finally, sew the beets on top and position so they are just barely covering the bottom of the greens.  Sew around the bottom of the beets and leave the top open so that the hooks will poke through (I top stitched the beets before hand to make them look more complete).
DPP_0195

8. Sew the little hot pepper onto the cover piece of felt.  Place and sew the button on.

9. Add the front cover! Sew a seam down the middle of the case for a center seam.  Carefully sew around the edges leaving the top open.  On the back side seam, tie your elastic into a loop and push the knot between the cover and inner felt pieces even with where the button is on the front.  Stitch over the elastic while doing the seam. Instead of elastic and button, you could use 2 pieces of ribbon for a tie closure.
DPP_0192

10. Adding the plastic.  Cut your plastic sheets to fit the front and back of the case and slip them in between the cover and inner felt pieces.  For the back piece of plastic, I used the top plastic cover from a sandwich party platter and cut it to size.  For the front, I used a beat up plastic file folder and cut 2 of the same size since they were a little flimsier than the sandwich tray.  Sew a seam across the entire top of the case to encase the plastic and sew the pieces of felt together.

Fin!  Now you have your own veggie-tastic crochet case to take your crocheting on the go - in style!

If you have any questions, feel free to leave a comment, I know there are a lot of words and not that many pictures, so ask away!

Wednesday, September 19, 2012

Pretty Stitchery

I think these are so pretty. I spotted them at an estate sale, and I just couldn't leave them even though I have no practical use for them.  They're hand made, so I think the slightly crooked stitching is really charming.

I have them hanging over my bed, and they are pretty much the only wall decoration that I have.

DPP_0160

DPP_0161

DPP_0162

DPP_0163

DPP_0164

I love that each of them has a different basket of vegetables.  It's possible that they might have been a kit to stitch (one of them still has the washable fabric marker on it).

Sunday, November 6, 2011

For the happy lovebirds

I made these as an anniversary gift a couple of months ago for my friends who got married last year.

I might be a terrible gift-giver because these are the most impractical thing ever. Especially for two young people with very little extra space in their apartment. But that's my thing I guess, giving impractical gifts to people.


Thursday, February 24, 2011

Paper, Embroidered

I was in charge of making up a little thank you card for a guest speaker who came to one of my club's meetings. I thought I'd try a little paper embroidery...this was not a particularly good idea. For many reasons, this was much harder than expected and came out not as pretty as I'd have liked. See my faux "calligraphy" on the envelope there?


Here's how I did it:
-Pushpin to make holes since I was using a blunt-tipped needle

-Weight 4 worsted yarn, stripped down to one strand (in lieu of embroidery floss)

-Chain stitches (I believe they are called) for the loopy petals on the flowers, everything else was straight stitch.

-Dafont.com for a calligraphy-looking font to semi-copy onto the envelope. I'm fancy like that.

Here's why it almost didn't work:

-Paper tears. The small pushpin holes were made bigger by the needle and yarn going through, so the holes were quite visible. Not especially pretty.

-The yarn was finicky. I mean that from pulling the yarn repeatedly through the cardstock-weight paper, it started to pull apart itself so that it was essentially unraveling itself. It's like when you pull putty and it gets really long and skinny in the middle then breaks? Yeah, like that.

-It was a card so of course there was going to be writing on the inside. But the inside was also the ugly backside of the yarn embroidery. Solution? Some pink construction paper glued down over it to hide the backside. Why didn't it work? The yarn was so lumpy in places (from loose ends and whatnot), the paper wouldn't glue down flat. Of course, when your paper isn't flat, glue sticks refuse to stick anything together. So, the inside was unflatteringly taped down with Scotch tape.


All in all, a good product. I probably wouldn't do it again unless I was embroidering with actual floss and on cloth.