
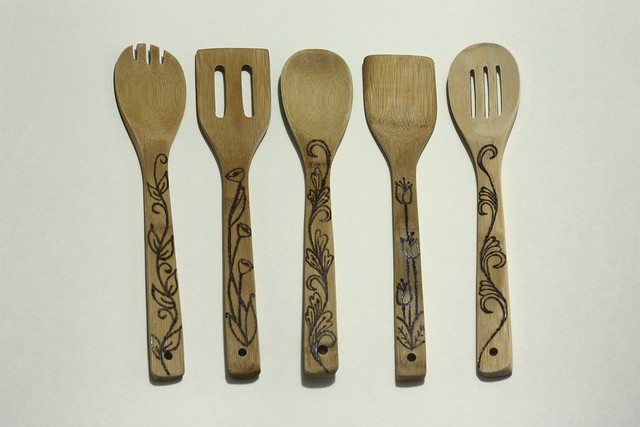
We love wooden spoons for just about everything in the kitchen; consequently, we have about 10. I've been having a good time burning fun little designs into a set of spoons we picked up at Bed Bath and Beyond for real cheap, so I figured other people might like them as holiday gifts! I'd consider these to be a great return on time investment, because it takes very little time to do, and they have a pretty big impress factor. I finished all of these while watching Tangled :)
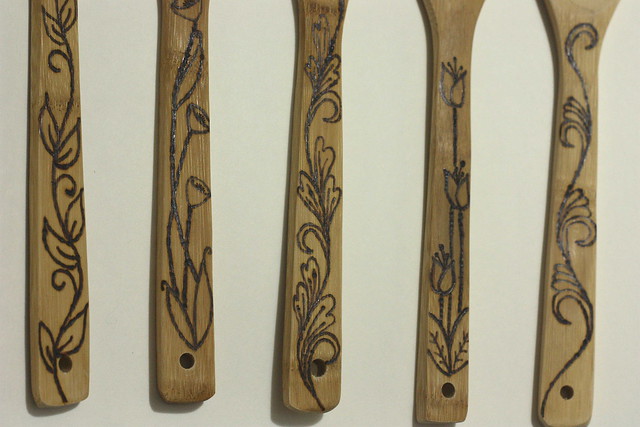
I found that the best designs for wood-burning beginners are embroidery designs and quilting lines (basically anything that has a nice clean line drawing). I used these pins as the basis for my designs, but I free-handed them, so I have no advice about tracing. I did pencil in my design first so I could get the spacing even, but feel free to just go for it.
This turned out to be quite the economical holiday gift, too, because I picked up this pack of 5 bamboo utensils at Ross for $5. I recommend picking utensils like these with flat handles because it gives a nice big surface to work on (I have also burned the classic wood spoons with thin round handles, and it's much harder to see the design/burn evenly). Personally, I prefer to burn the handles only as opposed to the bowl of the spoon because I don't want food to get stuck in the grooves. The pyrography tool itself can be found at Michael's, and I also saw lots of tip choices and even an alphabet set. I have the value pack that includes a universal tip, calligraphy tip, flow point, and fine tip.
I pretty much exclusively used the flow point and fine tip point for nice smooth lines, and the universal tip just a little for tiny fine lines.
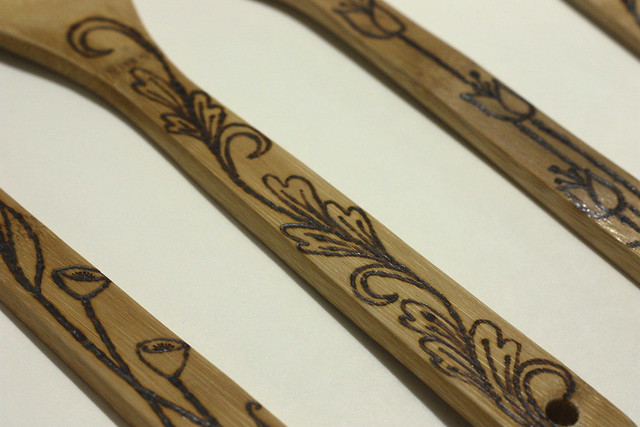
I found the bamboo pretty easy to burn, although it did seem like there was a bit of a waxy residue, it didn't seem to cause too much of an issue. Just go nice and slow and you can always touch up any lines by going over it again.
Next hurdle, learning how to do some shading!
As always, I would love to see your creations!
Wow, those look awesome--so professional! I'm impressed you free-handed the designs. The lines are so perfect and straight. How big is the burning tool? I've never seen one.
ReplyDeleteI've just bought a wooden utensils kitchen set and this diy is inspiring me so much! Really nice!
ReplyDeletexx Francine
www.francinesplace.blogspot.it
These look amazing! I can't believe you did this free-hand! (Well, I mean obviously I can, but this is well out of the realm of my abilities...)
ReplyDelete--Jenny :)