I've been wanting to make a cute little crochet case for N for a while. Personally, I use an old Lisa Frank stationery binder to hold my hooks and various crochet odds and ends.
If your new year's resolution is to crochet more, maybe this cute case
will inspire you to take your crocheting with you everywhere.
Sorry I didn't take process photos, but I kind of winged it as I went, so I'll just explain my process. Honestly, the whole thing is just sewing felt shapes to another big piece of felt.
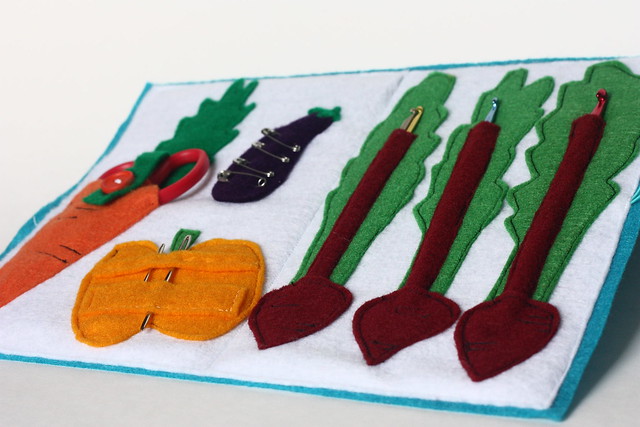
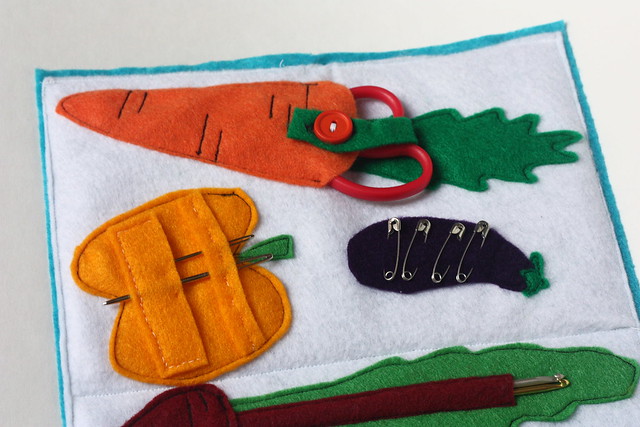
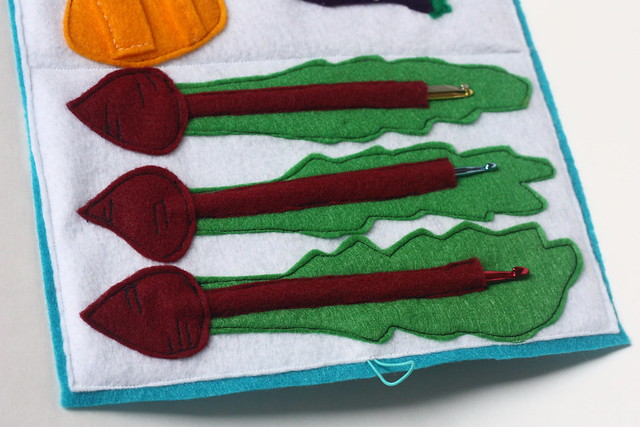
I have a carrot scissors holder, eggplant safety pin tab, bell pepper needle holder, and beet hook slots. These are all vegetables that we actually grew in our garden.
I think other vegetables that would be cute here are mushrooms, ears of corn, peas in a pod, green onions, and tomatoes. Just try to pick vegetables that translate easily to graphic line drawings (for example, not round yellow onions because the shading and skin would be hard to convey with felt),
See the how-to below:
 Materials
:
-2 full sheets of felt (any color) in standard 8.5x11"(?) size bought at Michaels
-Various scraps of colored felts for veggies
-2 Buttons and elastic or 2 pieces of ribbon
-Flat plastic sheets, I used part of the top of a sandwich party platter plus two pieces from a plastic school folder
All the pieces will be sewn onto the inner piece of felt and then the cover will be added with the plastic for stiffness.
1. Trim your inner felt piece so that it's a little smaller than your outer piece so that it will fold nicely.
2. Cut out all your shapes from various colored felts and make sure that they fit onto your inner piece. The carrot should be big enough to cover most of the scissors but with the handles peeking out (see picture below)
3. Do all the embroidery and top stitching of details before you sew anything down onto the inner piece of felt.
4. Working from left to right on my case, start with the carrot. Sew down the greens first with an extra strip of green (with a buttonhole!) tacked to the bottom of the foliage. Sew your button onto the carrot then sew the bottom v-edge of the carrot but not across the rounded top! Gotta leave room to put the scissors in.
5. Bell pepper next. Sew down 2 strips of felt across the top of the bell pepper leaving spaces for needles to go through. Sew around the outline of the pepper and its stem.
6. Eggplant. I actually hand stitched the eggplant because much less of it is tacked down to the felt to leave room for it to be lifted up to get safety pins in and out. I sewed around the outside of the foliage and the outline of the eggplant down about an inch and then straight across to the other side. You will end up with a trapezoid-like shape of seams on the top of the eggplant.
 7
7. Beets! Sew down the greenery. Add a strip of beet color in the middle of the greenery and sew up the sides but not the top and bottom (the hook is going in there). Finally, sew the beets on top and position so they are just barely covering the bottom of the greens. Sew around the bottom of the beets and leave the top open so that the hooks will poke through (I top stitched the beets before hand to make them look more complete).
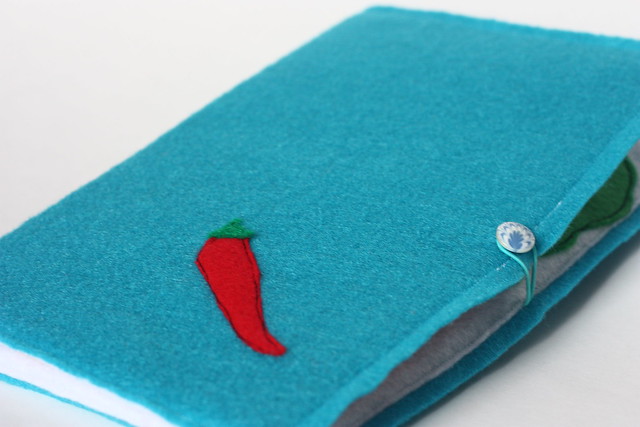
 8. Sew the little hot pepper onto the cover piece of felt. Place and sew the button on.
9
8. Sew the little hot pepper onto the cover piece of felt. Place and sew the button on.
9. Add the front cover! Sew a seam down the middle of the case for a center seam. Carefully sew around the edges leaving the top open. On the back side seam, tie your elastic into a loop and push the knot between the cover and inner felt pieces even with where the button is on the front. Stitch over the elastic while doing the seam. Instead of elastic and button, you could use 2 pieces of ribbon for a tie closure.
 10
10. Adding the plastic. Cut your plastic sheets to fit the front and back of the case and slip them in between the cover and inner felt pieces. For the back piece of plastic, I used the top plastic cover from a sandwich party platter and cut it to size. For the front, I used a beat up plastic file folder and cut 2 of the same size since they were a little flimsier than the sandwich tray. Sew a seam across the entire top of the case to encase the plastic and sew the pieces of felt together.
Fin! Now you have your own veggie-tastic crochet case to take your crocheting on the go - in style!
If you have any questions, feel free to leave a comment, I know there are a lot of words and not that many pictures, so ask away!