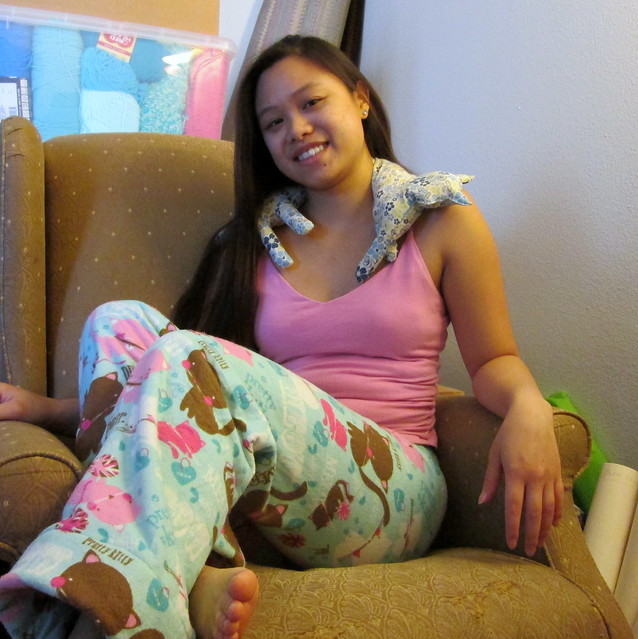
In honor of the Put A Cat on it! Sewalong I have kitted myself out in several pieces of cat related apparel/accessories! The toasty flannel/fleece cats pajamas make another appearance on the blog (previously talked about in this post); the newest addition is the thing around my neck, discussed below; and I'm even wearing kitty cat studs by Michelle Chang.
I had every intention of making a swishy sundress with a cat/floral cotton. I even went out to Yardage Town and bought some floaty georgette for the skirt. Alas, I moved to a new apartment in the middle of the month, and so my stuff is everywhere, and the sewing table has yet to be set up. (I don't even know where the fabric I bought for this ended up. And you can see the clear plastic bins of yarn and fabric behind my head which tells you what the state of the apartment is like.) I'll still make the aforementioned dress, but it may not get finished until next spring.
However! I have sewn a new cat related thing!
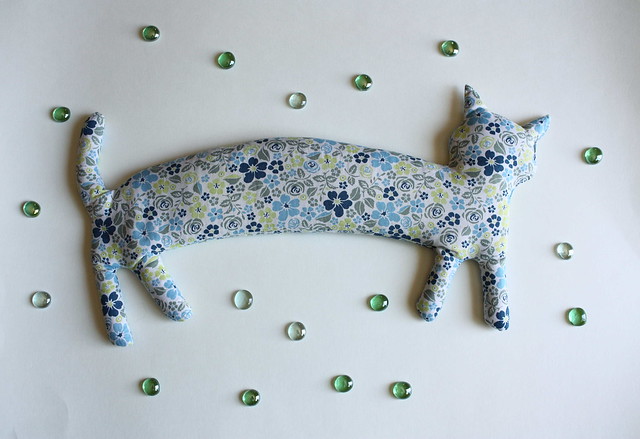
I saw this pin from Sweet Living Magazine and decided that I had to have that. I sometimes get these horrible neck spasms that leave my neck completely immobile for at least an entire day if not multiple days. Hot washcloths seemed to help a little, but they don't stay hot for very long, and they're wet. This seemed like the perfect solution!
There is no printable template in the magazine, so I had to draw my own. Less artistically inclined people may find this somewhat difficult, but I have two suggestions on that front.
1) Print out a line drawing of a cat in similar pose. Use the slash and spread method - cut the paper in half (head and front feet on one side, tail and back feet on other), insert and tape new piece of paper between the two halves and then connect the lines of the body.
2) Make a more 3D type model (like this DeviantArt user) and make a long rectangle with feet on either end. Then attach a stuffed head and tail after filling the main body.
I ended up using half a yard of quilting cotton and something like 3 pounds of rice? I took the concept one step further though and added scent to my rice!
I used:
- 8 oz. bottle of imitation vanilla (no need to use authentic since we're just here for the scent)
- cinnamon
- nutmeg
I put all the rice into one of those plastic produce bags from the grocery store, but a big ziploc will work too! Then, I added the whole bottle of vanilla, a bunch of cinnamon, and a couple dashes of nutmeg. Mix the whole bag together by mushing everything around and give it a sniff to see if you want more cinnamon or nutmeg. Once everything is pretty well coated, spread out the rice on a rimmed baking sheet in a thin layer. Now you have to patiently wait for it to dry before you can funnel it into your longcat. You could try putting the baking sheet into the oven to dry but I've never tried it and I didn't want to cook my rice.
Tip: don't over-stuff the longcat; it still needs to be flexible enough to drape around your shoulders and neck.
Longcat is perfect for sore muscles but also just to use as a heating pad when it's cold outside. I usually microwave it for about 2 minutes before using.
I don't usually join sewalongs mostly because I never finish anything in a decent amount of time, but I had to join a cat one! Thank you to Cation Designs for hosting and always providing us with plenty of Walnut pictures :)
As I may have hinted at before, in my handmade undies post, one of my oldest and dearest friends got married this year. As such, I have spared no expense in wedding gifts.
Beware: this is a very very long post. I have a lot to say, haha.
Let's have a look, starting with the biggest and baddest of them all:
The quilt.
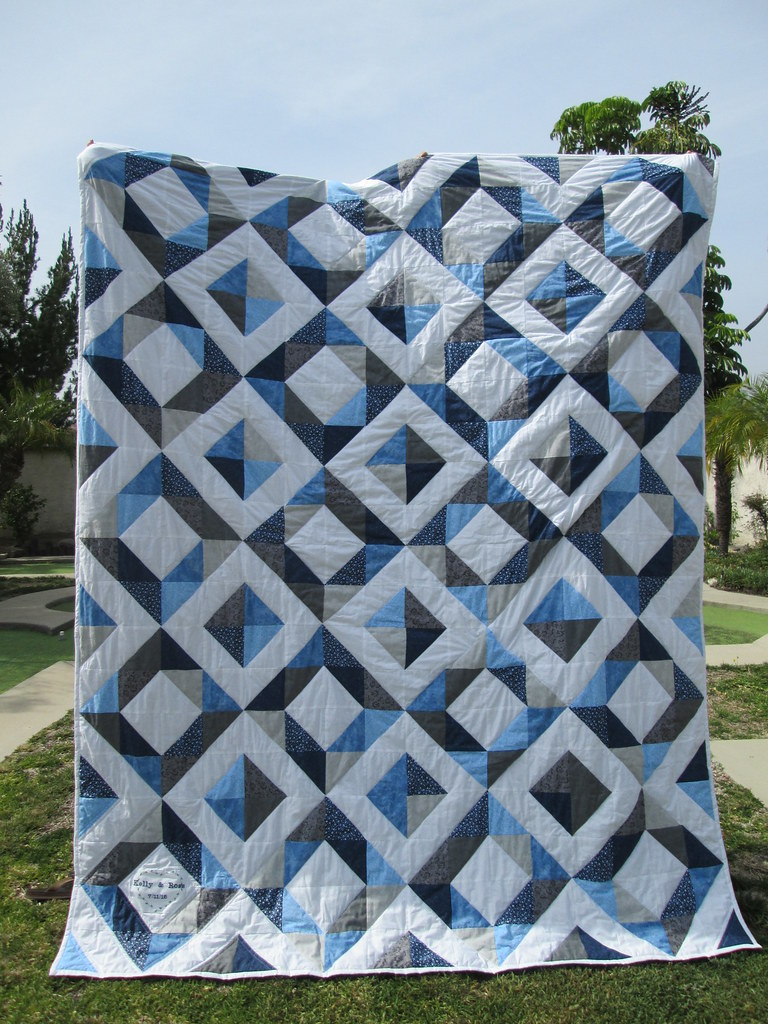
Oh, the quilt. This is the first quilt I have ever made! I'm apparently an ambitious idiot. I made a queen sized quilt for my first quilt and quilted it on a standard home machine. In the above picture my mom and sister are standing on extra tall bar stools with arms stretched way out above their heads and to the sides and the quilt is still touching the ground, that's a massive quilt!
It took me about 2 solid months to finish this quilt, but that includes a whole week of staying up into the wee hours sewing.
I found this quilt on Pinterest that She Can Quilt made, and I thought it was the perfect first quilt pattern especially since the bride requested blues (so vague). I ended up at JoAnn pulling out all the blue quilting cottons trying to find 12 different blues that go together. It was harder than you think. There's a whole wall of quilting cottons and yet somehow, they don't all mesh. I ended up with 7 different fabrics with grays thrown into the mix, plus 2 patterned whites.
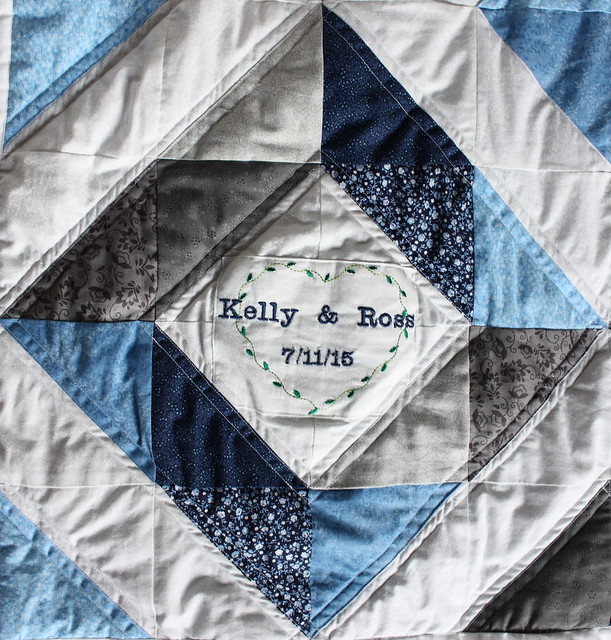
And to make it extra special, I added some machine embroidery with their names and their wedding date to the bottom left corner square. I'm lucky that my mom was able to do the machine embroidery for me on a piece of the white fabric and then I stitched it onto my quilt top instead of having the embroidery done directly onto the quilt top.
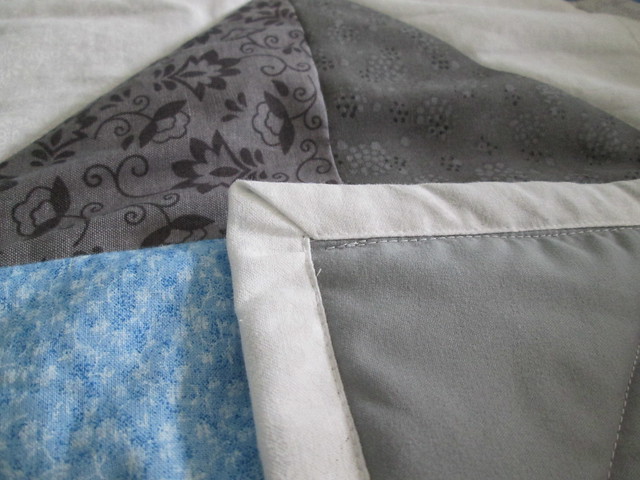
The mitered corners on the binding turned out pretty well using this tutorial from Merriment Design. I had made the strips in straight of grain but had ironed them like double fold bias tape. The white was left over from the quilt top, and I like the crisp finish it adds.
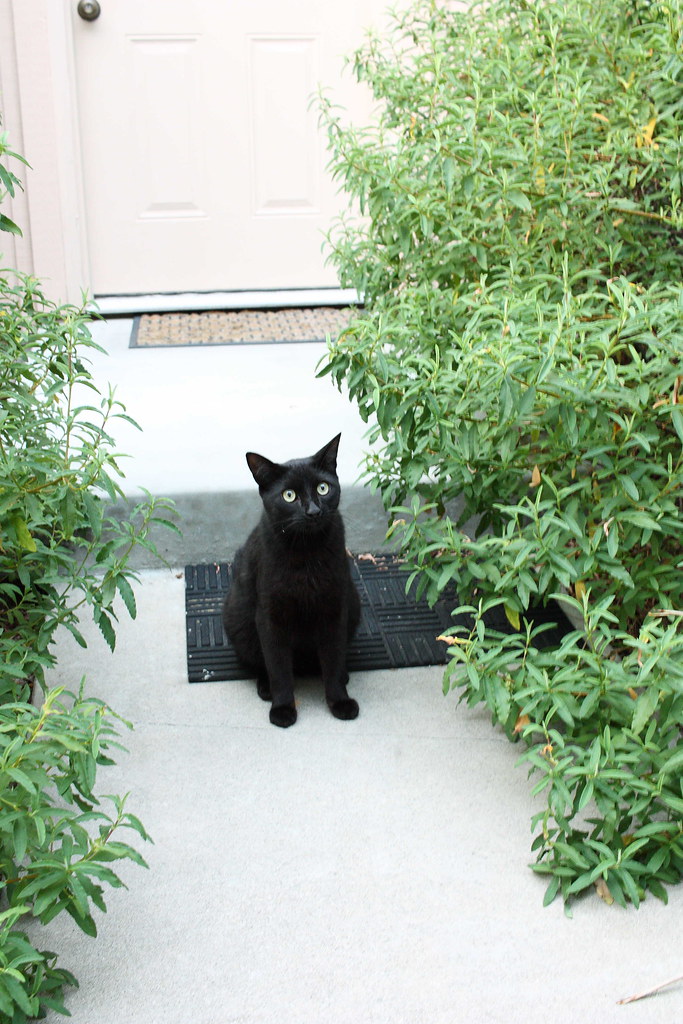
What's this? Adorable kitty cat sitting outside my door? Boyfriend and I were attempting to take pictures of the quilt in the walkway outside my house, and my favorite neighborhood cat was hanging around. While we were occupied taking pictures, kitty darted inside the slightly ajar door to the house, but she came back out when I went in there to see where she had gone. I wish I could keep her forever, she so so sweet :)
The piecing together of the quilt top went fairly smoothly, but when I got to the quilting, that's when I had a major meltdown.
I used a queen size microfiber sheet for the backing, but as you can see, I had major problems with it shifting and getting bunched up while I was quilting. I bought one of those precut queen sized batting rolls from JoAnn, but I didn't have any safety pins, so I pinned it with straight pins which was a huge mistake. Having to roll it up to fit under the arm of the machine meant I basically needed a chain suit to prevent from getting poked all the time. I quilted it like She Can Quilt did by following the outside of the squares in the depression block style. I tried to do three lines of quilting, too, but I only had time to do one line of quilting due to serious set backs from unpicking bad quilting. I wasted at least 2 spools of thread attempting to quilt this damn thing. I stayed up until at least 3 am every night the week before the bridal shower to finish this quilt, but I did get it done by the deadline.
I had to gift wrap the top and bottom of a copy paper box because it was the only thing big enough to contain this quilt. Now that I've gone to a bridal shower, I've become initiated in the cult of bridal shower etiquette, and so there was a massive amount of ribbon on the box.
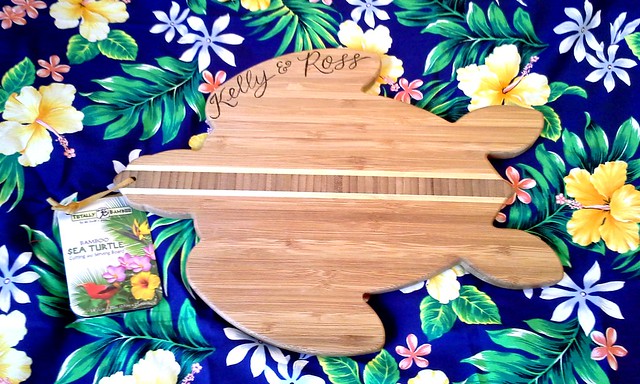
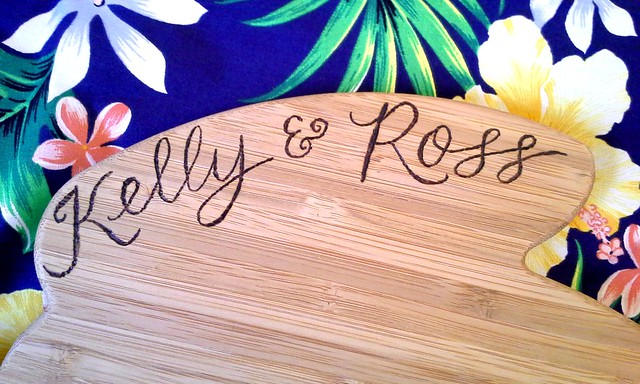
As an extra little something, I personalized this bamboo cutting board for the bridal shower too. My mom found this cute turtle shaped bamboo cutting board at TJMaxx I think, so I used my newest toy (the wood burning pen, see examples 1, 2) to add their names.
I practiced drawing out my letters in a few different ways, and then I used the calligraphy tip to burn the letters into the board. Bamboo is pretty tough to burn, but hopefully, it doesn't look too choppy.
And here's just a couple of pictures from the picturesque wedding. This was the golf course/resort that the ceremony and reception were held at. The ceremony was set up just to the left of the shot (and my brother had to clean up the rose petals off the grass by hand after the ceremony was over :) haha) We were really high up in the mountains in Keystone, Colorado, about two hours west of Denver, probably about 10,000 ft elevation.
And we stayed in a really lovely condo just a short drive away from the venue. This was the view just outside the window. Kind of unreal!
I just love that the flowers were blooming even in the middle of summer.
Lessons were learned in the making of my first quilt!
Namely,
1. Everything takes longer than you think. Especially because you have to give yourself time to mess up two or three times.
2. Taping down the back of the quilt and basting it all together with safety pins is a very good idea. Bad things happen when you don't.
3. Do not choose a queen size quilt for your first quilt. Just don't. Unless you happen to be very ambitious like I was.
4. Don't forget to buy fabric for the binding! Especially if you're not working off of a pattern that reminds you about this. Fortunately, I had enough leftover from the quilt top.
Obviously if you've made it this far through the blog post, I haven't lied to you about how difficult it was. Because it was. It was very very hard. I may have cried a few times. It was worth it though. In the end, I was very pleased with how the quilt turned out.
Since it was so time consuming though, I don't foresee too many more quilts in my future. Finally, a hobby I don't love ;) I keep telling people, "This is not a relaxing hobby!!"
If I've left anything out that you want to know about the construction, ask me! I've started to forget every little thing I wanted to mention here, but I'm happy to answer any questions! I'm also here for moral support should you decide to tackle quilting :)
Whoops! I kind of forgot I didn't talk about these cutting boards yet with my other Christmas gift handmades.
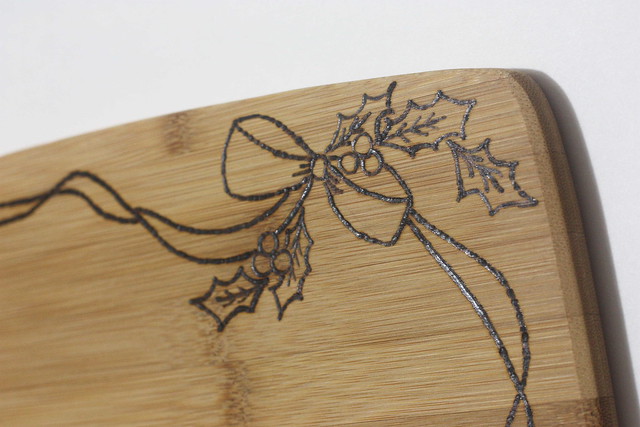
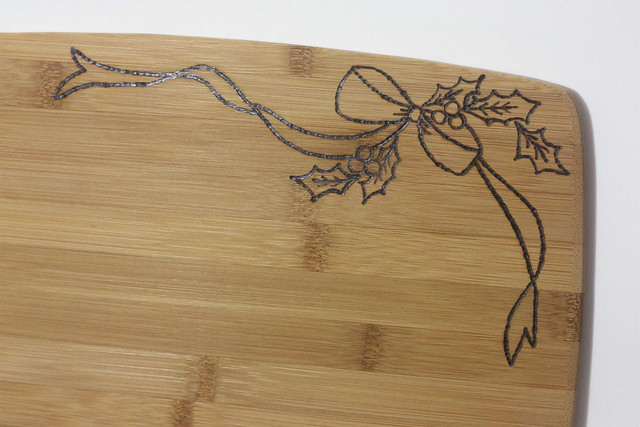
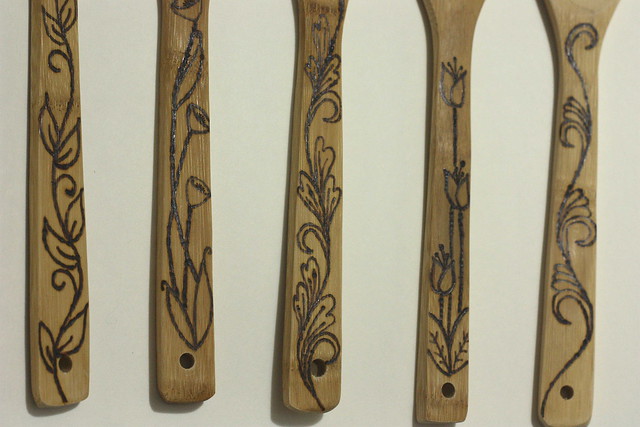
I bought a set of 3 different sized cutting bamboo cutting boards for about $10 at Ross. There's not too much to add about these that I haven't already said about the wooden spoons, so I'll let the photos speak for themselves. I used thesethreepins for the designs, but again, I have just free handed it onto the board with a pencil without tracing.
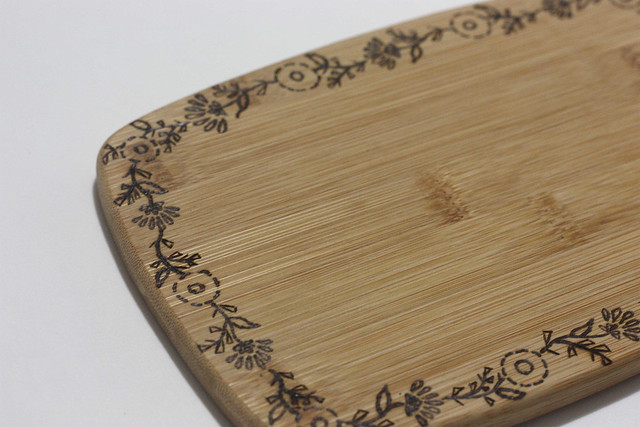
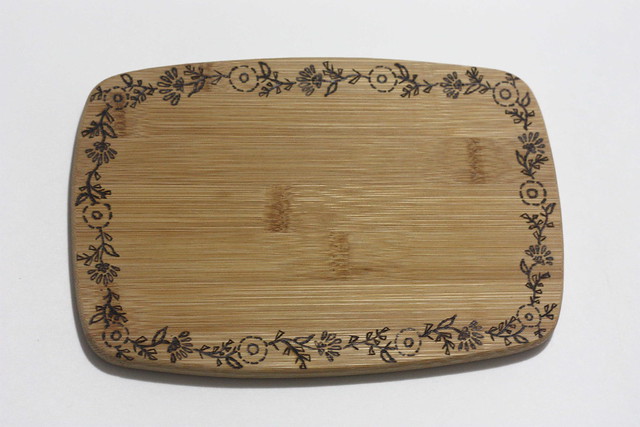
This one was the smallest board which is why I went with a full floral border. it was almost all done with my fine point tip with some of the small triangle leaves done with the universal tip.
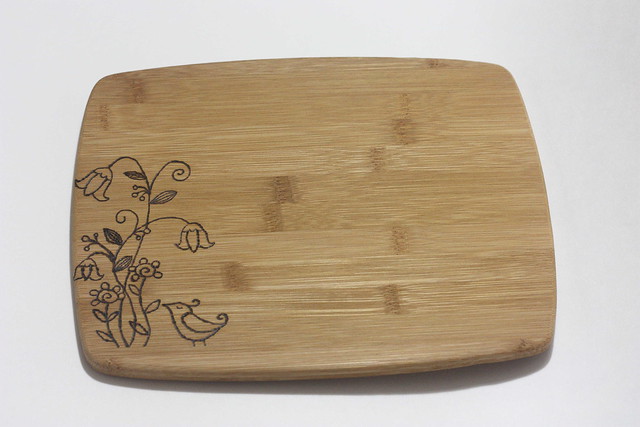
This was the medium sized one, and I used both the fine tip and the flow tip. It seemed a little like there was a waxy residue building up on my fine tip, so watch out for that if you also choose bamboo. How cute is this little bird?
And finally, this was the largest of the three, and the only one that I did in a more seasonal (holiday) design. I think I used the flow point exclusively on this one.
They're almost too pretty to use, but I do hope that their recipients will at least use them to serve cheese or something :)
Woodburning has been a really fun little thing to do and has great wow factor! I think my mom will be enlisting my services to do some more spoons for her sisters this year :)
I picked up pyrography/wood burning! Like I really needed a new hobby though ;)
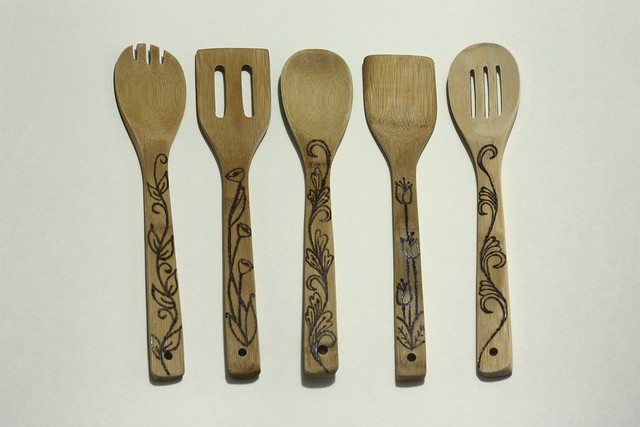
We love wooden spoons for just about everything in the kitchen; consequently, we have about 10. I've been having a good time burning fun little designs into a set of spoons we picked up at Bed Bath and Beyond for real cheap, so I figured other people might like them as holiday gifts! I'd consider these to be a great return on time investment, because it takes very little time to do, and they have a pretty big impress factor. I finished all of these while watching Tangled :)
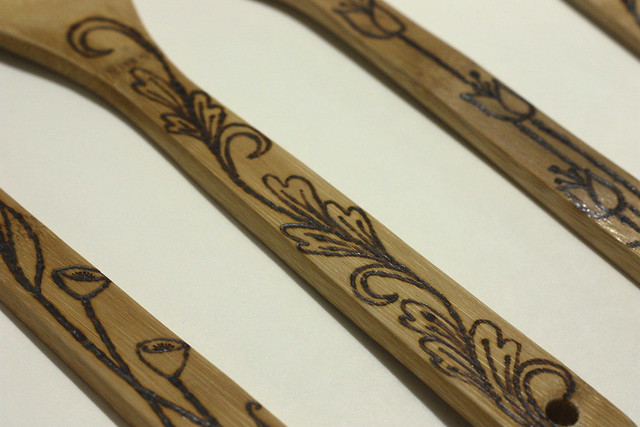
I found that the best designs for wood-burning beginners are embroidery designs and quilting lines (basically anything that has a nice clean line drawing). I usedthesepins as the basis for my designs, but I free-handed them, so I have no advice about tracing. I did pencil in my design first so I could get the spacing even, but feel free to just go for it.
This turned out to be quite the economical holiday gift, too, because I picked up this pack of 5 bamboo utensils at Ross for $5. I recommend picking utensils like these with flat handles because it gives a nice big surface to work on (I have also burned the classic wood spoons with thin round handles, and it's much harder to see the design/burn evenly). Personally, I prefer to burn the handles only as opposed to the bowl of the spoon because I don't want food to get stuck in the grooves. The pyrography tool itself can be found at Michael's, and I also saw lots of tip choices and even an alphabet set. I have the value pack that includes a universal tip, calligraphy tip, flow point, and fine tip.
I pretty much exclusively used the flow point and fine tip point for nice smooth lines, and the universal tip just a little for tiny fine lines.
I found the bamboo pretty easy to burn, although it did seem like there was a bit of a waxy residue, it didn't seem to cause too much of an issue. Just go nice and slow and you can always touch up any lines by going over it again.
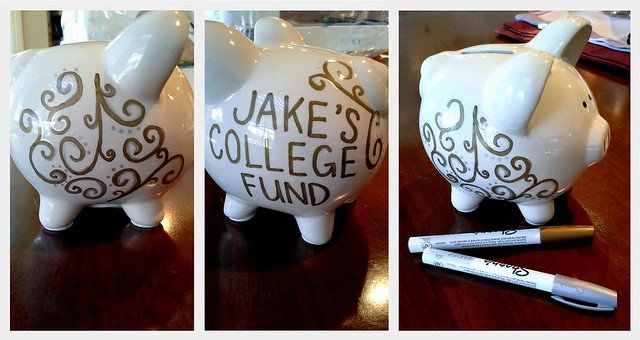
I just wanted to quickly share this little guy that I doodled on. My parents were giving a cash gift to my young 4 year old cousin for Christmas (by request of his mother who lives in a small SF apartment and is up to her ears in toys), and so we thought this would be a cute way to give the money.
This is just a plain white ceramic piggy bank - from Hobby Lobby I think, and I used gold and silver Sharpie paint pens to decorate both sides.
I filled one of the sides with some random swirls in gold and then added in dots and highlights with the silver. I actually had kind of a hard time coming up with nice swirls that weren't too hokey-looking (i.e. like something 10 year old me might have drawn in the margins of the class notes), but I think it turned out nice!
I'm hoping that by posting this, other people will be able to use this as inspiration (or a template!) if they also find it difficult to creatively fill a surface with doodles. (Side note: you know who is the freaking master of creative doodles? Alisa Burke. That is one talented lady.)
As always, I would love to see your DIY project if you make this!
My apologies to anyone still out there.. sorry I've been so lackluster around these parts!
But it's hard work keeping up the blog. For the most part, I've been doing a lot of uninteresting things, with the exception of a few big events. However, it's hard to set aside time to put together a blog post when that time could be spent frustratingly enjoyably sewing. Plus, I'm a little camera shy, and a lot of my recent makes involve me gussying myself up and preening for the camera (in a preferably picturesque locale). You can see why I don't do this.
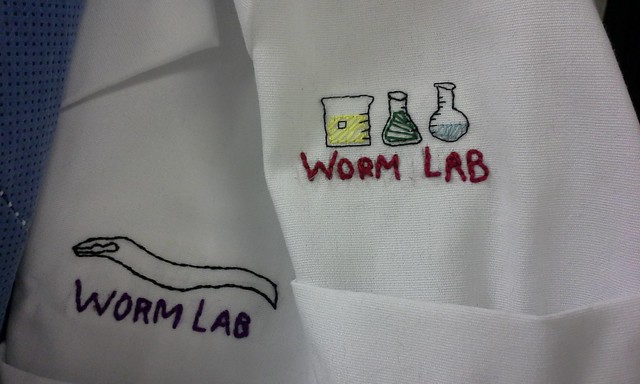
I thought I would just share this little phone snapshot of a bit of embroidery work that I did on some lab coats for work. The university provides us with lab coats with personalized embroidery but there's a turn around time of at least 6 weeks. And it didn't work out with a student worker, so we got these two with his name even though he'd been long gone. I took the liberty of unpicking/cutting off the embroidery and going over it with a little bit of hand embroidery of my own to hide the many pin holes left behind by the previous name.
I'm hoping to up my blogging game in the coming months since I'm going to try and do Sally's summer stash-bust challenge. I've already technically finished a piece after June 21, but sadly I have no pictures to do it justice. So, I'm just going to have to suck it up and go out there dressed to the nines to pose for a self timer. Blogging is weird, right?
Incidentally, you may still yet see some interesting side projects that I have been working on (cloth napkins! wood burning!)
Is blogging about your life weird when you don't do much? Or maybe it takes a certain kind of person to like blogging? Anyone else out there with me on this?
Ok, so this actually started out with an idea that I had after having lunch with my friend. She mentioned that she hadn't been taking her new laptop to classes because it was bigger than her previous case. Bingo! Perfect handmade gift for her birthday -- or if my track record with timely gift giving is any indication, more like for the holidays!
I figured, in my head, that I might try a basic zipper pouch tutorial, of which there are a million on craftgawker. Or at least I would try and cobble something together from a few different tutorials. And then, lo and behold, my past-self rewards my current-self after a casual perusal of my bookmarks folder (yes, yes, so sue me, I probably could better manage these things using Pinterest). This design*sponge tutorial! Woo! Exactly what I wanted :) Mostly because I love the idea of the wrap-around zipper so it's not so ... over-sized clutch looking?
The lovely case from the Design*Sponge tutorial! Admittedly, I don't love plaid (but just about everyone else in the world does), but I love that cool metal zipper and contrast lining.
Materials:
-I bought a half-yard of this luscious soft and fluffy fleecy stuff at Joann's in this beautiful buttery yellow. Can you tell I love this stuff? It's pretty damn expensive (at least to me) for a fleece, but if you can catch it at full price and then use a 50% off coupon, I would love to buy 2.5-3 yards and back a yummy lap/couch blanket with this. Anyways, the tutorial suggests that you need a half yard of the inner material, but really, you could probably do with a quarter yard or less since you buy the fabric on the fold (if that makes sense? You only need a maximum of a half yard of single fold fabric). But bonus! Now I have a little leftover, what should I make with it?
-Plus, I totally scored on the Star Wars fabric, since there was just under a yard left on the bolt, so I got it half off! Joann's actually had a small selection of different kinds of Star Wars fabrics, 3 or 4 different prints I think, but I liked this one the best because of the graphic geometric look of it. I also saw some other great nerdy prints... :)
-I also bought some metal D-rings because I kind of wanted to make this a wearable laptop case, if I could swing it, instead of something you put inside your backpack or work tote because I assume that's what my friend's problem was in the first place.
-Long zipper, probably a 22" one, I fortunately had this navy blue one that I bought at an estate sale.
-And to top it all off, a salvaged luggage strap for carrying. I almost bought some webbing and notions while at Joann's, but I figured I had enough junk lying around at home that I must have at least one spare strap from some bygone luggage.
Look at my corners! So neat and clean! And check out those cheeky little tab holders for my D-rings. I had to hunt carefully to find and cut out the faction symbols....and then re-cut them because I forgot to give myself a seam allowance.
It was super easy to follow this tutorial since there were some really detailed process shots. The only part where I got kind of confused was where the bottom part was sewn up to meet the zipper seams. I couldn't really get the foot to go over the zipper bulk, so I ended up ladder stitching the rest of it.
Sorry to make you go through all that introduction, but ta-da! The finished product!
I'm really very pleased with myself for making this! I think it looks really nice, no extremely obvious mistakes :)
After making this and then letting it sit for a while, I decided to make a few changes:
1. Nix the D-rings and the strap and just leave it as a fun little case protector. The tabs were too flimsy to really do a good job, I think it would have worked a lot better with webbing underneath the tab, and probably also a slightly different design with the webbing wrapped around the bottom to give it strength.
2. Give the fleece a haircut near the zipper. Can you see all that fluff near the teeth? The zipper kept catching as I was testing it out, so I just took my scissors and trimmed it down. It wasn't too difficult, I just had to be careful to not cut a hole in my lining.
I really hope my friend likes it and uses it! I always worry that I end up making really weird things that people won't actually use.
[I'm back! I wasn't really gone, though. I'm going to let the cat out of the bag here and say that I had planned to move to North Carolina (!) for a job but ended up backing out. That's why I was planning to give myself a month or two to pack up and settle my affairs here in San Diego. Instead, I'm looking for a job locally instead. Any San Diego biochemists in the house? Shoot me an email!]
Calf pants ... get it? A whale calf made out of pants? Heh, just me? Ok.
Isn't he a cutie? Even with all his crooked stitching and lumpiness.
The talented lady who thought of this idea kindly translated her instructions into English here! I think this is the best use of old jeans that I've ever seen :) I kind of want to take some old gray jeans and turn them into a shark!
I had a pair of jeans that I wore to pieces (specifically, I had an embarrassing hole in the crotch area), but I hated to get rid of them, and I was pretty sure they were even beyond what Goodwill would accept.
I love that this idea very cleverly uses the right and wrong sides of the denim to create color contrast.
So I decided to expand on my little explanation tutorial from previously (my refashioned hair ties) with a few more pictures. I'm still rocking the colorful elastics everyday, and they've been holding up pretty well. If crazy 2/3/4 color hair ties aren't your thing, you can certainly make one with all black elastics, I have. And I know a lot of girls actually like to hide their hair ties under a small wrapped bunch of hair, but try these out for exercising.. or something! I bike to work everyday, so a not-too-fussy ponytail is critical.
Let's dive in!
If you have a lot of hair elastics that look like this, these are the perfect candidates for turning into multi-stranded hair ties.
1. Cut off the stretched out portion between the ends of the elastic. (I love my new/old scissors! I got them at an estate sale lately for basically nothing, and they're still sharp!)
2. Align the ends of all your hair ties and put them in a pretty color order!
3. Use a binder clip to secure the ends of the elastics as arranged about half and inch from the ends as shown. Make sure that they are all very close together.
4. Sew all the ends together with a hand needle and some thread, any color is fine really. Just go back and forth several times and in all random directions, just make sure it's secure. I sewed through the elastic as well as the colored casing so that the elastic couldn't pull away and become stretched out again so easily.
5. Secure your sewn end to a table/desk. I used a large binder clip and then put just the very end of the elastics under the clip, just to hold in place while you braid.
6. Braid! I used this fabulous tutorial for the four-stranded braid from Rock Mosaic. You can, of course, do a regular three-stranded braid or a two-stranded twist. Make sure it's a tight braid and go all the way to the very end of the elastics as much as possible. Secure the end of your braid with a second binder clip and sew those ends together as well.
7. With both ends sewn up, join the two ends together (be careful not to twist!) as shown and sew the two ends to each other.
8. All done! The braided elastic is much tenser than any single elastic alone. Plus, your new colorful hair tie also doubles as a pretty bracelet when you're not wearing your hair up!
If you make one, post a picture, I'd love to see! I like the idea that there are other people out there with fun hair elastics too :)
So, remember my key necklace? I believe I promised that I would show you how lazy cheap people (like me) make charm necklaces. As mentioned, I got some split rings, but I didn't really think it through. I didn't realize that split rings require special pliers to get them open so that you can get your charm on. I live far from the craft store, so it's not easy to make a quick jaunt down there for every little thing (plus I don't want to buy more tools that I'll only use once). If you're going to be attaching lots of charms or just generally using many split rings, then by all means, use split ring pliers. They're definitely easier, I'm sure.
Putting a single charm onto a necklace? Then let's dive right in:
1. (World's Tiniest Proposal?) Get your split ring and find where the ends of the ring are
2. Use a pair of fingernail clippers (I have a pair that I don't use because I somehow have several) and carefully "clip" between one of the ends and the ring so that the end lifts up away from the ring slightly.
3. Carefully wedge a flat tool underneath the lifted edge while still opening the ring with the clippers.
4. Wedge the tool further under so that the ring opens up more. It has to be far enough away from the very end so that a charm can be slipped on.
Add your charm and slide it all the way around until it locks in to the middle of the ring, just like putting a key on a key ring.
Done!
Maybe this was slightly harder, especially if your fine motor skills aren't up to snuff, but it was cheaper, right?
Who's with me on this? Anyone else grappled with split rings before?
My newest necklace! I'm not much of a jewelry maker or wearer, but I've been wanting to make this because I had all the supplies except extra jump rings to put the damn charm on the necklace. I liked this small, unobtrusive key charm (picked up for free via Diamonds International, haha), but I didn't like the dingy brassy finish or that it would probably not react too well to lots of wearing.
My sister bought me some nail polish during her recent polish shopping spree, I love the color, but I do not wear nail polish. Making a faux enamel key is the next best use, right? It's really easy, just coat your charm with a few thin coats of nail polish, let dry between coats, until it has completely covered the base color. I topped mine off with some clear nail polish to make it super smooth and hopefully chip-free.
I also tried free lensing to get this picture! Taking macro shots are impossible with the Fifty, so I thought I'd try free lensing in order to get super close. Free lensing is also apparently impossible for me because I could hardly hold my lens still enough to get a clear shot, and I was already using a tripod. These two were the only clear-ish shots that came out, but I do kind of like the interesting pink cast in the second.
Stay tuned for an interesting faux-torial on how to use split rings without buying the coordinating pliers! :)
I love wrapping things with brown paper grocery bags because I'm cheap, they're free, and I can usually dress them up a little.
I love that Fabric Paper Glue has the same idea for wrapping things with kraft paper. She has a really useful tip on how to make these envelopes for wrapping oddly shaped things.
I was actually just wrapping that crochet case, and even though it is rectangular it was soft and fairly difficult to wrap properly. I didn't go all out with rubber cement, just some good old clear packing tape did just fine.
Plus, I love hang tags. It's the little details that shine when the wrapping is plain. The hang tag made out of an old clothing price tag (nice cardstock ^^), pretty multicolor cotton yarn, and a shiny medallion sticker, just for fun.
So, I have very thick, long hair. I know, what a tragedy. Well, it's a tragedy for my hair rubber bands because they tend to get severely stretched out after a short while, but I can't bear to throw them out. Because I'm cheap. But we all knew that. I usually buy my elastics in bulk in LA, so they come in weird colors if you don't get the all-black set.
So I devised a way to extend the life of my hair ties while also creating fun little things for my hair which I usually wear in a ponytail to work.
I like this little method because I usually will wrap a single rubber band 3 times around my ponytail to secure it, but with the doubled up elastic, I only need 2 wraps to secure it.
I have little names for them, is that weird?
Rainbow Sherbet (left), Hot Topic (middle), Winter Wonderland (right)
Here's the how-to: (which is more like just explaining my process. Go ahead and get crazy with it)
-Cut apart your old, stretched out rubber bands so that you have one long piece.
-Use a binder clip to secure multiple bands together at the same length and hand sew them together as if you were starting a friendship bracelet.
-Braid your 3 strands together or twist 2 together (like the pink and black in the middle of my photo).
-Use another binder clip to keep the braid intact and sew together the ends of the bands.
-Bring your two ends together to reform your elastic and sew the elastic shut so that it looks like one continuous loop (so sew the elastics end-to-end not side-to-side).
-And you're done! Rock that pony!
I've been wanting to make a cute little crochet case for N for a while. Personally, I use an old Lisa Frank stationery binder to hold my hooks and various crochet odds and ends.
If your new year's resolution is to crochet more, maybe this cute case
will inspire you to take your crocheting with you everywhere.
Sorry I didn't take process photos, but I kind of winged it as I went, so I'll just explain my process. Honestly, the whole thing is just sewing felt shapes to another big piece of felt.
I have a carrot scissors holder, eggplant safety pin tab, bell pepper needle holder, and beet hook slots. These are all vegetables that we actually grew in our garden.
I think other vegetables that would be cute here are mushrooms, ears of corn, peas in a pod, green onions, and tomatoes. Just try to pick vegetables that translate easily to graphic line drawings (for example, not round yellow onions because the shading and skin would be hard to convey with felt),
See the how-to below:
Materials:
-2 full sheets of felt (any color) in standard 8.5x11"(?) size bought at Michaels
-Various scraps of colored felts for veggies
-2 Buttons and elastic or 2 pieces of ribbon
-Flat plastic sheets, I used part of the top of a sandwich party platter plus two pieces from a plastic school folder
All the pieces will be sewn onto the inner piece of felt and then the cover will be added with the plastic for stiffness.
1. Trim your inner felt piece so that it's a little smaller than your outer piece so that it will fold nicely.
2. Cut out all your shapes from various colored felts and make sure that they fit onto your inner piece. The carrot should be big enough to cover most of the scissors but with the handles peeking out (see picture below)
3. Do all the embroidery and top stitching of details before you sew anything down onto the inner piece of felt.
4. Working from left to right on my case, start with the carrot. Sew down the greens first with an extra strip of green (with a buttonhole!) tacked to the bottom of the foliage. Sew your button onto the carrot then sew the bottom v-edge of the carrot but not across the rounded top! Gotta leave room to put the scissors in.
5. Bell pepper next. Sew down 2 strips of felt across the top of the bell pepper leaving spaces for needles to go through. Sew around the outline of the pepper and its stem.
6. Eggplant. I actually hand stitched the eggplant because much less of it is tacked down to the felt to leave room for it to be lifted up to get safety pins in and out. I sewed around the outside of the foliage and the outline of the eggplant down about an inch and then straight across to the other side. You will end up with a trapezoid-like shape of seams on the top of the eggplant.
7. Beets! Sew down the greenery. Add a strip of beet color in the middle of the greenery and sew up the sides but not the top and bottom (the hook is going in there). Finally, sew the beets on top and position so they are just barely covering the bottom of the greens. Sew around the bottom of the beets and leave the top open so that the hooks will poke through (I top stitched the beets before hand to make them look more complete).
8.Sew the little hot pepper onto the cover piece of felt. Place and sew the button on.
9. Add the front cover! Sew a seam down the middle of the case for a center seam. Carefully sew around the edges leaving the top open. On the back side seam, tie your elastic into a loop and push the knot between the cover and inner felt pieces even with where the button is on the front. Stitch over the elastic while doing the seam. Instead of elastic and button, you could use 2 pieces of ribbon for a tie closure.
10. Adding the plastic. Cut your plastic sheets to fit the front and back of the case and slip them in between the cover and inner felt pieces. For the back piece of plastic, I used the top plastic cover from a sandwich party platter and cut it to size. For the front, I used a beat up plastic file folder and cut 2 of the same size since they were a little flimsier than the sandwich tray. Sew a seam across the entire top of the case to encase the plastic and sew the pieces of felt together.
Fin! Now you have your own veggie-tastic crochet case to take your crocheting on the go - in style!
If you have any questions, feel free to leave a comment, I know there are a lot of words and not that many pictures, so ask away!
I love prettily wrapped presents. It's also like how I love making beautiful cards but then have nothing to write inside of them, haha! I'm usually super cheap about things, so I oftentimes wrap things in brown paper bags from the grocery store.
I had this brown cardboard box from the 85 degree bakery in Irvine that was perfect for wrapping up a shirt.
I loved this idea from Crafts Unleashed via Craftgawker. I have limited access to craft stores in my area, so I didn't want to go out and buy wreath forms. I opted to make the whole wreath out of rosemary since it grows wildly abundant here in SD. Beware, working with the rosemary does make your hands pretty sticky. But it smells so lovely :)
The close up!
I just used 3 woodier sprigs of rosemary and made them into a roughly triangle/circle shape and used wire to bind the stems together. Then, I added sprigs on top of the round to make the whole thing fuller and tied them on with a little bit of white thread where needed. I made a big red bow out of felt (here's a good little picture tutorial) and then tied the wreath to the package. Ta da!
I love beautiful handmade cards, but I find it difficult to make 8-10 of them all at once. Plus, when you're pressed for time, it's all you can do to jot down thank you notes and get them mailed off.
Here's how I dressed up a pack of cards that I picked up from Michael's dollar bins (in just 3 easy steps!):
I love Melissa's modern calligraphy style, and I would have totally printed these out in a heartbeat, but alas, I am out of color ink on my printer, and I already had these in my stash.
1. Add a pretty sentiment to the front of the card.
2. Just add a fancy envelope seal, also picked up in the dollar bin at Michael's.
3.Add "faux-calligraphy" for the address like Melissa's and hop off to your local post office for some pretty postage stamps. Try Centeria for your look-a-like calligraphy from dafont.com.
4. [optional] Beam stupidly at the post office lady when she admires your hand lettered letters, and tell her proudly, that, yes, you did do those all by hand.
Obviously, these still require a neat bit of handiwork, but I find that they have a nice hand made touch without having to design and make up a whole card from scratch.
Also, I love these Staedtler triplus liners, they come in a bunch of colors and have a 0.3 mm nib. And the reason they're called triplus is that the barrel of the pen is actually a triangular prism, so no more pens rolling off the desk :)