Monday, March 30, 2015

Claire's Itty Bitty Dress

Obviously I've been on an Itty Bitty Baby Dress sewing binge, and I'm setting new finishing records every time I sew this. This one took me just 2 hours and that was with futzing around with the cutting layout and stopping to take a bunch of process pictures.

This particular bundle is for my coworker and his wife who just had their first baby girl, Claire!
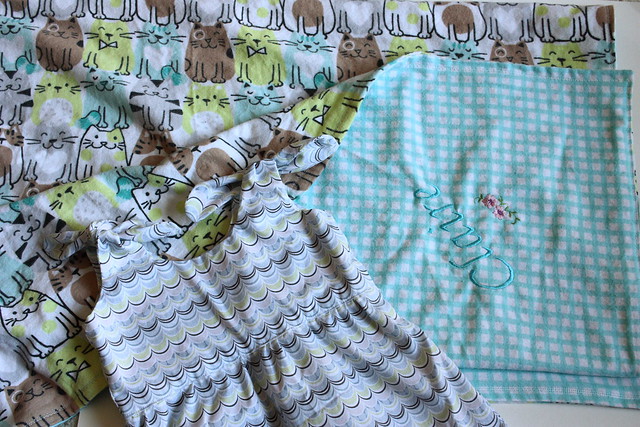
Claire's Itty Bitty Dress and Blanket

Can we talk about this flannel? How cute are those cats?? If it was remotely acceptable, I would literally own 100 simple flannel blankets with all the cute prints I keep coming across (I have, as of now, only one such blanket with adorable zebras on it that I totally swiped from my mom's stash, which was definitely earmarked for a baby.) This is a current(!) print that they are selling at JoAnn, so you can totally get some if your store has any left :)

The simple blanket is just two pieces of flannel (44" square) sewn right sides together and then flipped RS out and top stitched with a decorative stitch. I'm very fortunate to have access to my mom's fancy embroidery machine, and so I usually ask her to embroider the name of the new babe on one of the corners.

I did take step-by-step photos of putting the entire dress together from cutting to finishing (because I do love me a good hand holding photo tutorial), but I thought it might violate the spirit in which Rae shares this pattern, so I have just pulled out a couple of photos on my clean finished lining which is not covered in the original instructions.

So jumping into the middle of construction here...

Lining the Itty Bitty Baby Dress

I'm at the point here where I have attached the two bodice pieces together on one side only and attached the whole skirt piece to the bodice (I only cut one super long skirt piece instead of two). I used my go-to tutorial for making that clean side seam which I'll show more of below.

Lining the Itty Bitty Baby Dress

It's a little difficult to tell since I used the same fabric to line the bodice, but I have folded the dress right sides together and matched up the unsewn side seam.
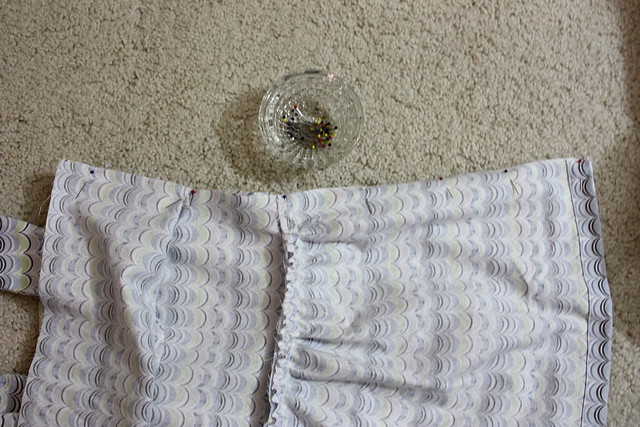
Lining the Itty Bitty Baby Dress

And then flip up the lining and sew all the way down that seam (from left to right in my picture). I like to do it this way because then I only have to finish one side seam below where the bodice is joined to the skirt as opposed to doing this twice with two side seams if you cut two skirt pieces.
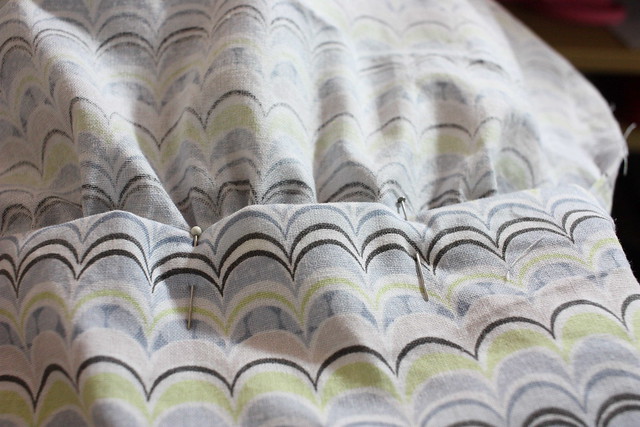
Lining the Itty Bitty Baby Dress

And the final step in my construction (because I don't use piping) is to fold under the lining and enclose the waist seam on the inside of the dress. Then, on the outside, top stitch near the edge of the waist seam taking care to catch this folded under lining on the inside.

Leave me a comment if you would like me to talk you through this in a little more detail (or if this is just plain confusing)! Happy sewing!

Monday, February 23, 2015

Itty Bitty Baby Sister Dresses

Ahh, I'm getting to that age where everyone gets married and has kids. Or I guess I work with people who are all having babies.

I always give embroidered baby blankets to people, and I always used to do stuffed animals (Atlas, Avery, and Ronan), but babies do not appreciate those and tiny clothes are just so cute! Aren't I the best coworker ever??

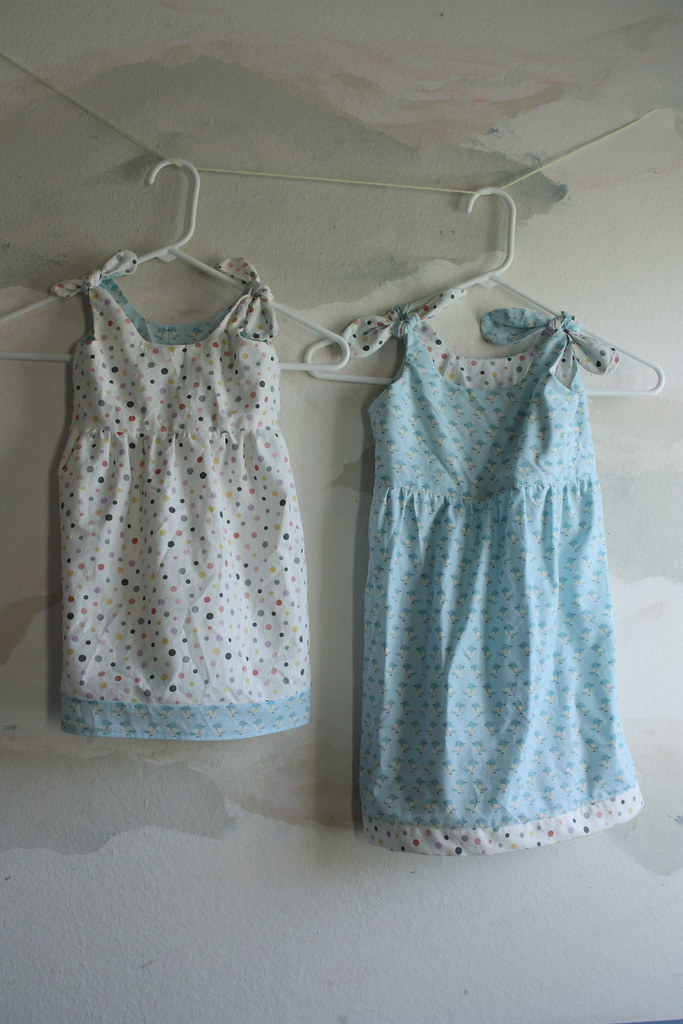
My coworker had her second baby at the very end of September last year, and I finally got around to getting a blanket and dress made for her. I wanted to do some cute matchy-matchy sister dresses for her older daughter, Avery, and for the baby, Allison.

I used this adorable (and free!) pattern from Made by Rae and the associated 3T toddler enlargement.
I did not adjust the 3T at all and made it straight from the pattern, however; for the baby dress, I did enlarge the pattern so I'm guessing it may be around the 6-9 mo. mark?

I used a yard of each fabric but I did have to seam two of the lining pieces in the smaller dress in order to get everything cut out, and the skirt on the bigger dress is not as big as written in the instructions. Side note: I was originally going to make each dress with self fabric for the lining and bought some other fabric for one of these, but I loved it so much, I swiped it for myself and substituted this dotty cream colored cotton I already had. Then I had the brilliant idea to mix up the patterns for two matching dresses since the cream and birdies went together so well. I love when these kinds of things come together without planning :)

DPP_0447

DPP_0451

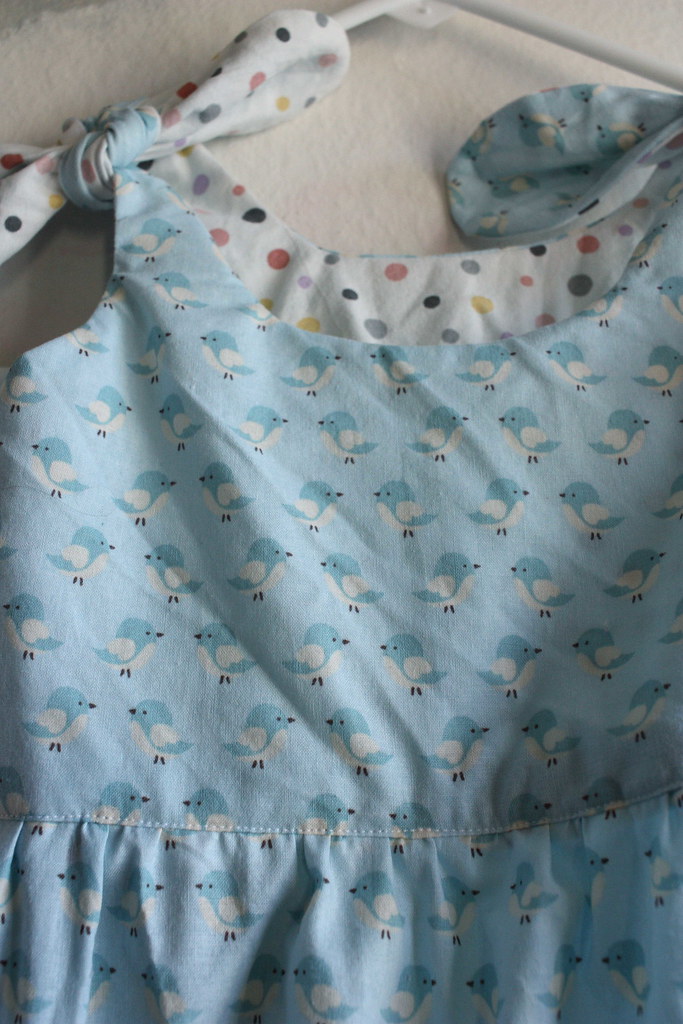
You can see here that I had to seam the lining piece, and since I made the 3T size out of the birdies, only one of the lining pieces has birds. The other is the dots again.

DPP_0450

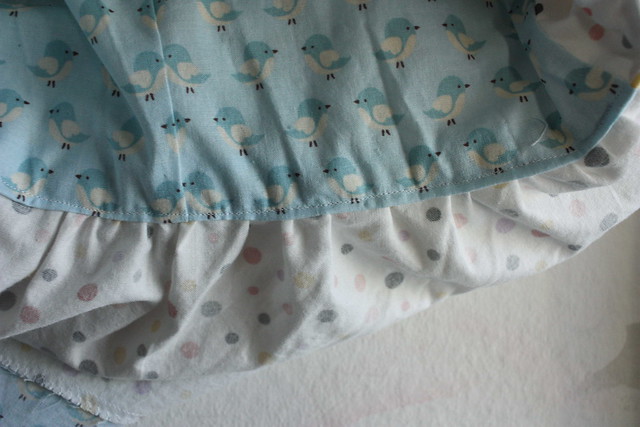
I did not use piping at the waist because I was trying to keep my cost per project low, and I didn't want to buy (or sew in) any piping. I ended up having to top stitch the waist to tack down the lining.

DPP_0454

Inside shot of the lining enclosing the waist seam. I actually shot some more pictures detailing how I constructed this type of dress from start to finish which I will share next time!

DPP_0449

Approximately 10 inches is a fine length for the smaller skirt, and there is an extra ~1.5 inches from the band. I probably cut this one a little too long.

DPP_0452

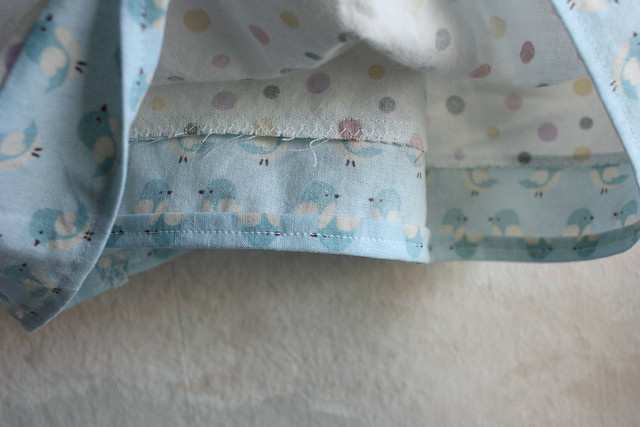
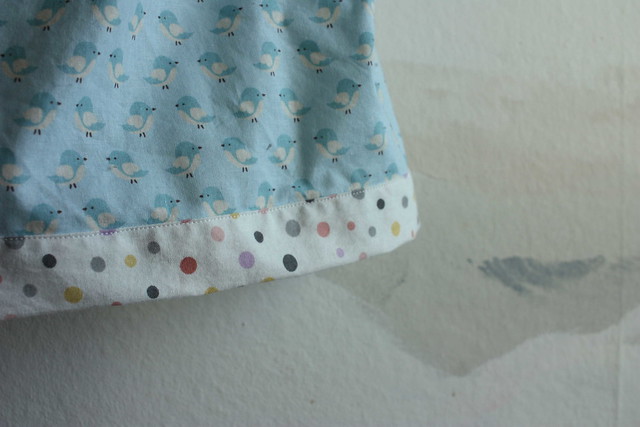
I cut a 3 inch piece for the contrasting hem, but I failed to think about how the bird placement would be when I folded it in half, so I had to get creative about what I was going to do. I ended up doing the fold over twice hem for the bottom, and then zig-zagging the raw edges so I could keep two rows of birds on the outside.

DPP_0448

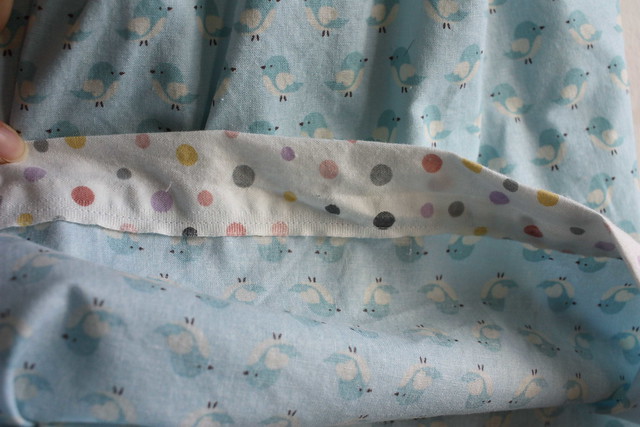
This is how I actually intended this band to be attached. Brief summary of the process: Match edges RS together, sew a 1/4" seam, flip and press, fold under slightly more than half so the edge will be caught by another row of stitching and press, and top stitch close to the edge.

DPP_0453

And here's the inside, you can see I used the selvage to avoid having to do another double hem. But hopefully this makes the above instructions make more sense, and you can see that all the raw edges are enclosed.

DPP_0455

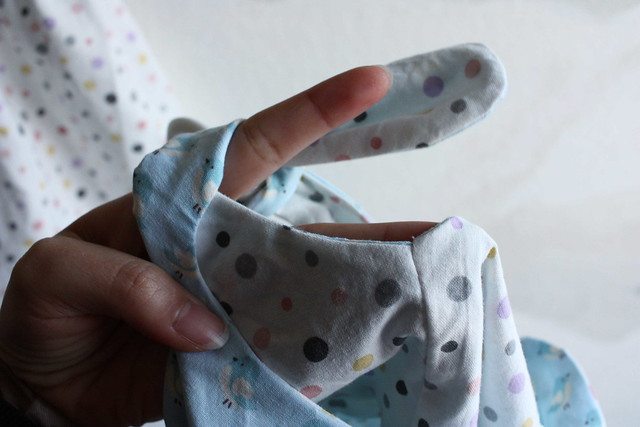
I clean finished the armholes and side seams! The instructions that come with the dress don't really say much about this part, but I like a clean finish, and it was easy. Again, more photos on the process next time!

DPP_0456

Clean inside and out on both dresses :) I like to enclose raw seams as much as possible without having to resort to zig-zagging all the edges. I mean, what's the point of having a full lining otherwise?

Whew! That was a lot to say about these baby dresses, but I just love them so much! And they're so easy to make, the second one only took me 2 hours to make, and I am definitely getting faster. No closures and mostly straight lines makes the whole thing so simple, and it doesn't make me feel too bad when the babies inevitably grow out of it in a few months.

Anyone else being inundated with babies? And don't you just love all the tiny adorable clothing options? (I promise I have zero baby fever, let me be your baby's cool aunt!)

Monday, February 9, 2015

DIY Woodburned Utensils

I picked up pyrography/wood burning! Like I really needed a new hobby though ;)

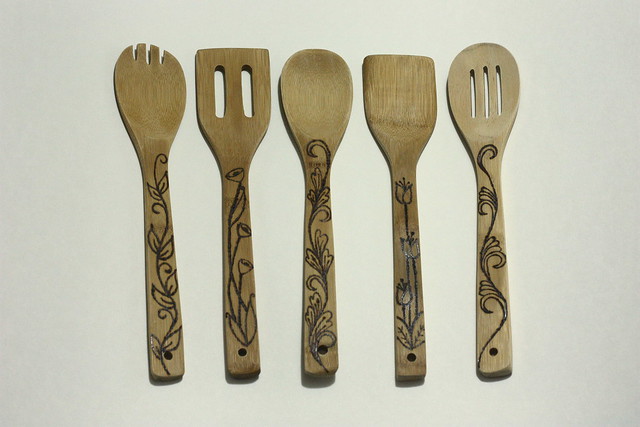
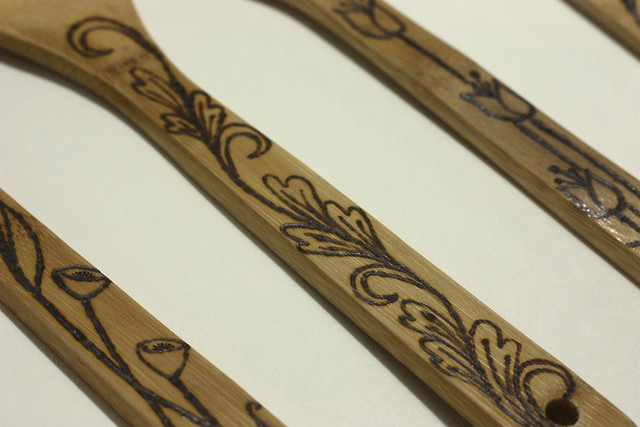
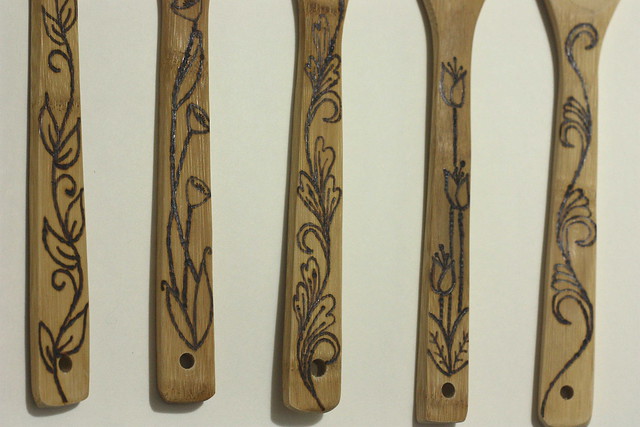
We love wooden spoons for just about everything in the kitchen; consequently, we have about 10. I've been having a good time burning fun little designs into a set of spoons we picked up at Bed Bath and Beyond for real cheap, so I figured other people might like them as holiday gifts! I'd consider these to be a great return on time investment, because it takes very little time to do, and they have a pretty big impress factor. I finished all of these while watching Tangled :)

I found that the best designs for wood-burning beginners are embroidery designs and quilting lines (basically anything that has a nice clean line drawing). I used these pins as the basis for my designs, but I free-handed them, so I have no advice about tracing. I did pencil in my design first so I could get the spacing even, but feel free to just go for it.

This turned out to be quite the economical holiday gift, too, because I picked up this pack of 5 bamboo utensils at Ross for $5. I recommend picking utensils like these with flat handles because it gives a nice big surface to work on (I have also burned the classic wood spoons with thin round handles, and it's much harder to see the design/burn evenly). Personally, I prefer to burn the handles only as opposed to the bowl of the spoon because I don't want food to get stuck in the grooves. The pyrography tool itself can be found at Michael's, and I also saw lots of tip choices and even an alphabet set. I have the value pack that includes a universal tip, calligraphy tip, flow point, and fine tip.

DIY Woodburned Spoons and Spatulas

I pretty much exclusively used the flow point and fine tip point for nice smooth lines, and the universal tip just a little for tiny fine lines.

DIY Woodburned Spoons and Spatulas

I found the bamboo pretty easy to burn, although it did seem like there was a bit of a waxy residue, it didn't seem to cause too much of an issue. Just go nice and slow and you can always touch up any lines by going over it again.

DIY Woodburned Spoons and Spatulas

Next hurdle, learning how to do some shading!

As always, I would love to see your creations!

Friday, January 30, 2015

Philadelphia Art Museum

Since I'm such a SoCal girl, snow is still magical to me, so I couldn't resist taking some pretty snow pictures while I was in Philadelphia. I'm just glad I didn't get stuck at the airport like last year!

DPP_0441

20150130

DPP_0443

I've been to the snow in the mountains before, but it just feels so different to see snow in such an urban setting. I would love to live in a snowy area - I think I'd make a good East Coaster ;)

Monday, January 26, 2015

Jake's College Fund Piggy Bank

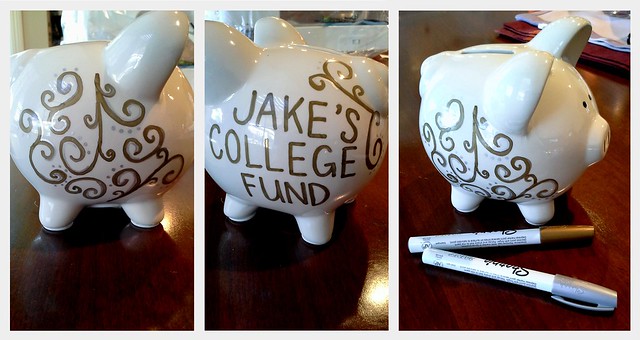
I just wanted to quickly share this little guy that I doodled on. My parents were giving a cash gift to my young 4 year old cousin for Christmas (by request of his mother who lives in a small SF apartment and is up to her ears in toys), and so we thought this would be a cute way to give the money.

This is just a plain white ceramic piggy bank - from Hobby Lobby I think, and I used gold and silver Sharpie paint pens to decorate both sides.

I filled one of the sides with some random swirls in gold and then added in dots and highlights with the silver. I actually had kind of a hard time coming up with nice swirls that weren't too hokey-looking (i.e. like something 10 year old me might have drawn in the margins of the class notes), but I think it turned out nice!

college fund piggy bank

I'm hoping that by posting this, other people will be able to use this as inspiration (or a template!) if they also find it difficult to creatively fill a surface with doodles. (Side note: you know who is the freaking master of creative doodles? Alisa Burke. That is one talented lady.)

As always, I would love to see your DIY project if you make this!

Monday, January 19, 2015

Neapolitan Baby Set

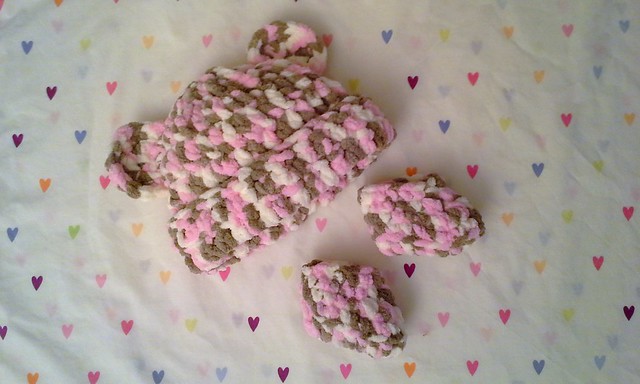
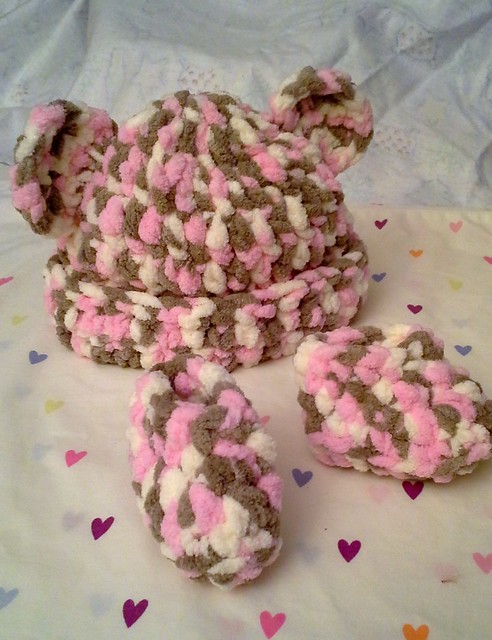
First up in the holiday making craze is this adorable Neapolitan colored baby hat and booties set.  This one has been a surprising favorite among Ravelers because y'all are just suckers for tiny things with ears aren't you?

Neapolitan Baby Bear Hat

You can see more of the specifics and my notes about the patterns and yarn on Ravelry: hat and booties. I made the 6 month size for the hat and rolled the brim up.

Neapolitan Baby Bear Hat

It was super easy to whip this up, I finished both the hat and booties in a couple of hours during the post-Christmas dinner lull. We even went out and bought a skein of this Bernat baby blanket and a J hook at Wal-mart on Christmas eve because my mom just decided that she needed a handmade gift for a baby shower like now. 

Everyone loved these when I finished, so they make a great project especially for new crocheters - very fast with super bulky yarn and maximum cuteness! I hope it fits!

Wednesday, January 14, 2015

Here's to 2015.

This more or less captures the essence of my holidays (but my life is not as cute as this illustration).

There was a lot of crafting, cat petting, eating, and snuggling up in my new giant scarf and pj pants.

Will you keep me warm this winter
Illustrations from a McDonald's ad (with this adorable song) if you can believe it :)

Will you keep my heart out of the cold

I just got back from Philadelphia, so I've been getting back into the swing of things with work and cleaning my room after the craftermath of the holidays. Look for a couple of handmade gift posts coming soon!

In other news, I've joined Instagram! You can follow me if you like - it'll mostly be craft WIPs, bikes, guinea pigs, and San Diego!

Let's hope 2015 is a more productive year around the blog :)