In pursuit of my knitting goals, I decided I definitely needed to learn stranded color work, aka fair isle because there are so many pretty patterns out there I want to knit!
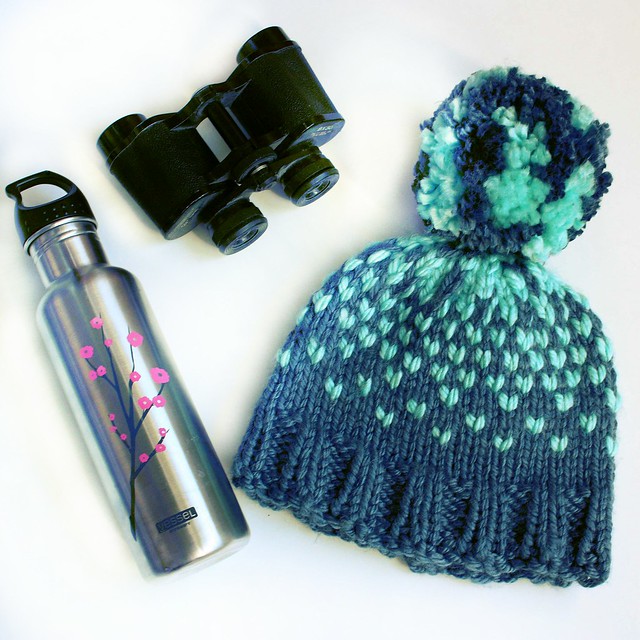
I was given a skein of Red Heart Grande (80% acrylic/20% wool) which is a super super bulky yarn. Perhaps one of the chunkiest yarns I have ever seen. A chunky easy stranded color work project seemed like a good way to use up this random yarn. I used Calzetta as the actual pattern for the hat and applied the color chart from ombre slouch hat. Fortunately, I had some nicely coordinating yarn already in my stash to use for the main color.
A couple things that I learned from this project:
-I need to do a better job on the ribbing. It has no recovery so just stays majorly stretched out, but the whole hat is stiff enough to stay on the head I think.
-The stranded work was actually not too hard to do, but I did majorly get the skeins tangled up with each other. I think I might be able to solve that problem using a yarn guide. I can't knit English/throwing so I can't do the one color each hand that some people can do. It's supposed to be easier to knit fair isle continental, so I'm hoping that holds true for me too.
-Also, you can see that I wasn't able to work the full chart, and that I probably should have started earlier too, but I thought I was supposed to work 5" from the ribbing not 5" from the cast on edge, so I had to start decreasing much earlier than I expected.
-On that note, I probably should have given up working the chart on the decreases as they have ended up a little muddied. But I couldn't shake the idea that I wanted a full transition to the second color on the top.
-And unrelated to this specific pattern, but nonetheless about this hat: pompoms turn out bigger than you think! Clearly I have gone way off the deep end with this softball sized pompom, but it's still kind of fun :) I made my own cardboard pompom maker using this DIY (also good for making shapes inside pompoms).
This year I am resolving to do something about my yarn stash. And finish all my outstanding WIPs.
I'm not doing too bad in the WIPs arena. I'm doing Finish It February hosted by Lina Knits on Ravelry, so I've already got a pair of socks and a hat finished. Then I'll just have one sock that needs a mate, sleeves and ribbing on my pullover sweater, and decisions about my cardigan. The cardigan doesn't have much left to go, just part of a sleeve then a button band, but it's not well made (I was accidentally doing backwards YOs so the stitch pattern doesn't really pop) so I may frog it. Or not. I may finish it for practice and then try to block it to open up the eyelet pattern. Also, I knitted it in cotton, so I don't know what I would do with all that cotton if I did frog it. Thoughts?
Knit goals for the year
-Finish the WIPs
-Knit a hat for Nathan's dad for Christmas (nothing like starting early!)
-Learn brioche
-Practice stranded colorwork
-Generally improve my knitting ability
-Work on my 500 hats project (see below!)
Ok! I think these are pretty doable!
Now let's talk about the yarn stash. Oh the yarn stash. There's nothing like moving to put your hoarding stash into perspective. I've got 2 clear 55 gallon buckets stuffed full of yarn and then random little skeins stashed all over the place. A lot of it is super saver that I used to use when I made a lot of amigurumi. The amigurumi production has since slowed way down, and I'm focusing more on wearables at the moment.
Thus was born The 500 Hats Project! #500knithats
(Bonus points to whoever can tell me where the name comes from)
I want to use up the yarn to make hats for charity. But it's not as simple as all that. I want to improve my knitting skills at the same time. So I'm hoping with each successive hat, the techniques will get slightly fancier. At the moment, I haven't decided on a charity to donate the hats to. They may go to a local charity here in San Diego, or I may send them elsewhere, you know, where it's actually cold. Leave a comment if you have any particular charity in mind!
Disclaimer: I may not actually make a total of 500 hats, I just want to use up my yarn stash, so whatever the yield is, that's what it'll be. Unless anyone wants to join me?
Ok, yes it is February, isn't it? Let's just say Happy Lunar New Year and pretend like I've been getting my act together to revive this old blog a little bit ;) Here's hoping for a little more regular posting since I actually do have a lot of projects to share!
Brief administrative aside: I tried to implement Disqus on my blog a few months ago so I could reply to all your lovely comments, but the damned thing doesn't play nice with Blogger - in fact, it's a known issue. So, I've reverted back to the native Blogger comment form which is good enough (you'll just have to come back to see my reply or do email notifications of replies), let me know if it's not working since I half-assed the uninstall of Disqus.
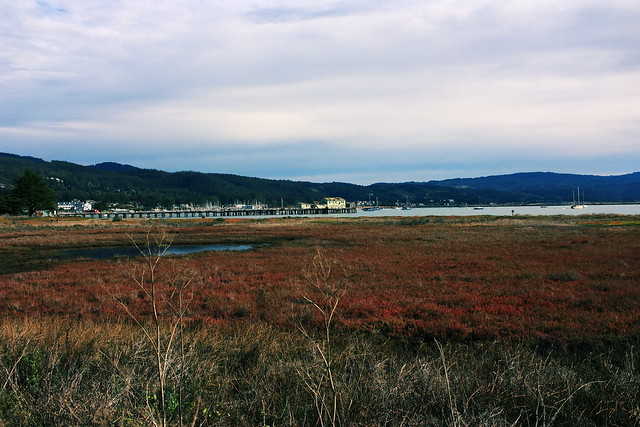
Anyways, have some photos of Half Moon Bay where I briefly visited while I was in Northern California over the holidays.
More new posts hopefully coming soon! Let me know if there's anything in particular you'd like to see more of here :)
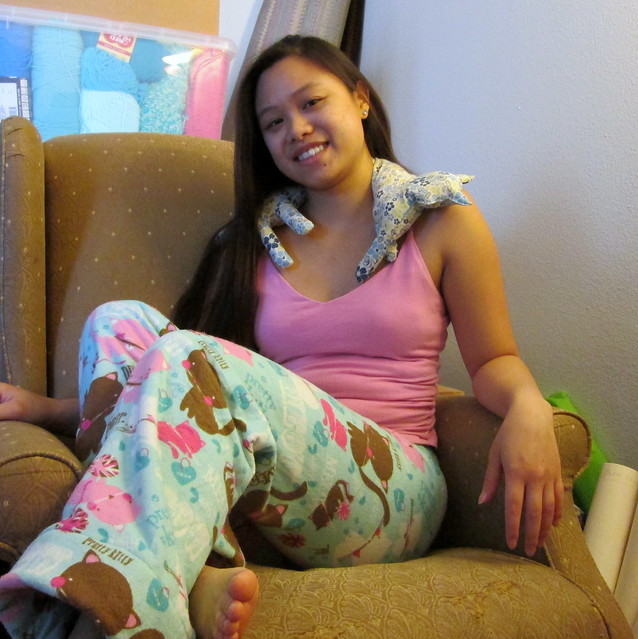
In honor of the Put A Cat on it! Sewalong I have kitted myself out in several pieces of cat related apparel/accessories! The toasty flannel/fleece cats pajamas make another appearance on the blog (previously talked about in this post); the newest addition is the thing around my neck, discussed below; and I'm even wearing kitty cat studs by Michelle Chang.
I had every intention of making a swishy sundress with a cat/floral cotton. I even went out to Yardage Town and bought some floaty georgette for the skirt. Alas, I moved to a new apartment in the middle of the month, and so my stuff is everywhere, and the sewing table has yet to be set up. (I don't even know where the fabric I bought for this ended up. And you can see the clear plastic bins of yarn and fabric behind my head which tells you what the state of the apartment is like.) I'll still make the aforementioned dress, but it may not get finished until next spring.
However! I have sewn a new cat related thing!
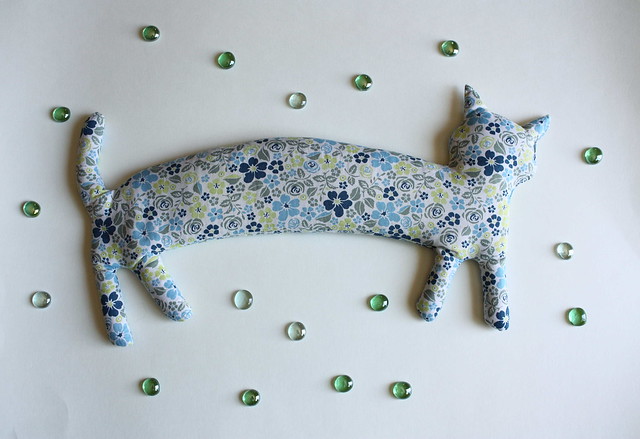
I saw this pin from Sweet Living Magazine and decided that I had to have that. I sometimes get these horrible neck spasms that leave my neck completely immobile for at least an entire day if not multiple days. Hot washcloths seemed to help a little, but they don't stay hot for very long, and they're wet. This seemed like the perfect solution!
There is no printable template in the magazine, so I had to draw my own. Less artistically inclined people may find this somewhat difficult, but I have two suggestions on that front.
1) Print out a line drawing of a cat in similar pose. Use the slash and spread method - cut the paper in half (head and front feet on one side, tail and back feet on other), insert and tape new piece of paper between the two halves and then connect the lines of the body.
2) Make a more 3D type model (like this DeviantArt user) and make a long rectangle with feet on either end. Then attach a stuffed head and tail after filling the main body.
I ended up using half a yard of quilting cotton and something like 3 pounds of rice? I took the concept one step further though and added scent to my rice!
I used:
- 8 oz. bottle of imitation vanilla (no need to use authentic since we're just here for the scent)
- cinnamon
- nutmeg
I put all the rice into one of those plastic produce bags from the grocery store, but a big ziploc will work too! Then, I added the whole bottle of vanilla, a bunch of cinnamon, and a couple dashes of nutmeg. Mix the whole bag together by mushing everything around and give it a sniff to see if you want more cinnamon or nutmeg. Once everything is pretty well coated, spread out the rice on a rimmed baking sheet in a thin layer. Now you have to patiently wait for it to dry before you can funnel it into your longcat. You could try putting the baking sheet into the oven to dry but I've never tried it and I didn't want to cook my rice.
Tip: don't over-stuff the longcat; it still needs to be flexible enough to drape around your shoulders and neck.
Longcat is perfect for sore muscles but also just to use as a heating pad when it's cold outside. I usually microwave it for about 2 minutes before using.
I don't usually join sewalongs mostly because I never finish anything in a decent amount of time, but I had to join a cat one! Thank you to Cation Designs for hosting and always providing us with plenty of Walnut pictures :)
As I may have hinted at before, in my handmade undies post, one of my oldest and dearest friends got married this year. As such, I have spared no expense in wedding gifts.
Beware: this is a very very long post. I have a lot to say, haha.
Let's have a look, starting with the biggest and baddest of them all:
The quilt.
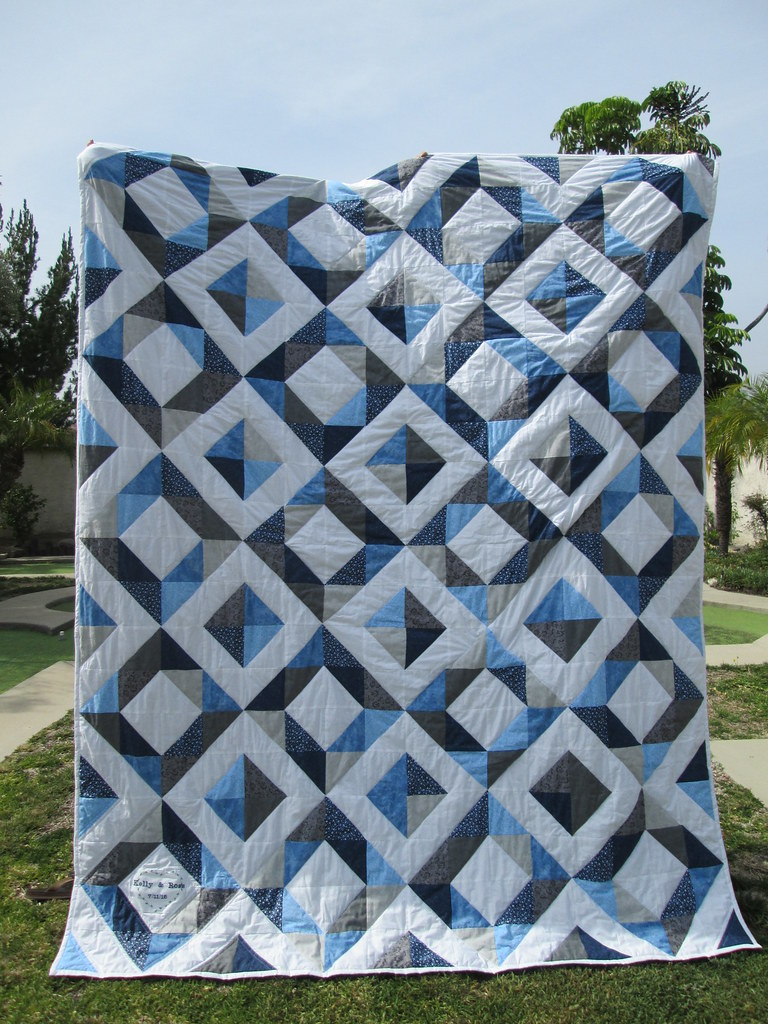
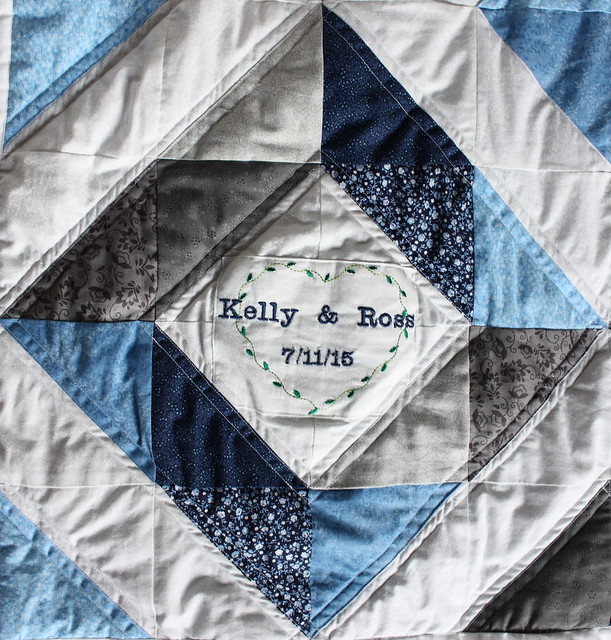
Oh, the quilt. This is the first quilt I have ever made! I'm apparently an ambitious idiot. I made a queen sized quilt for my first quilt and quilted it on a standard home machine. In the above picture my mom and sister are standing on extra tall bar stools with arms stretched way out above their heads and to the sides and the quilt is still touching the ground, that's a massive quilt!
It took me about 2 solid months to finish this quilt, but that includes a whole week of staying up into the wee hours sewing.
I found this quilt on Pinterest that She Can Quilt made, and I thought it was the perfect first quilt pattern especially since the bride requested blues (so vague). I ended up at JoAnn pulling out all the blue quilting cottons trying to find 12 different blues that go together. It was harder than you think. There's a whole wall of quilting cottons and yet somehow, they don't all mesh. I ended up with 7 different fabrics with grays thrown into the mix, plus 2 patterned whites.
And to make it extra special, I added some machine embroidery with their names and their wedding date to the bottom left corner square. I'm lucky that my mom was able to do the machine embroidery for me on a piece of the white fabric and then I stitched it onto my quilt top instead of having the embroidery done directly onto the quilt top.
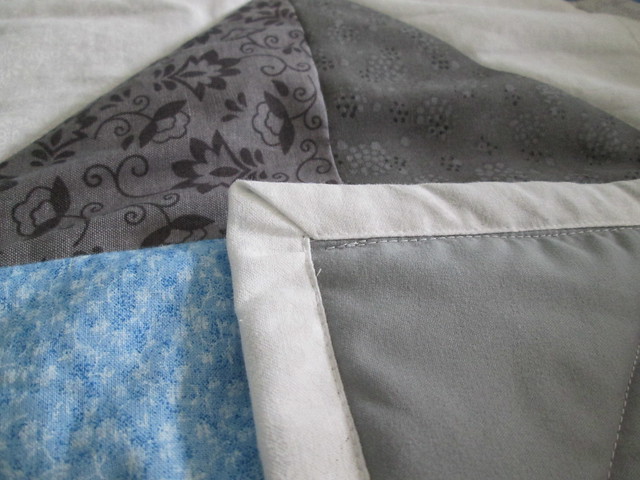
The mitered corners on the binding turned out pretty well using this tutorial from Merriment Design. I had made the strips in straight of grain but had ironed them like double fold bias tape. The white was left over from the quilt top, and I like the crisp finish it adds.
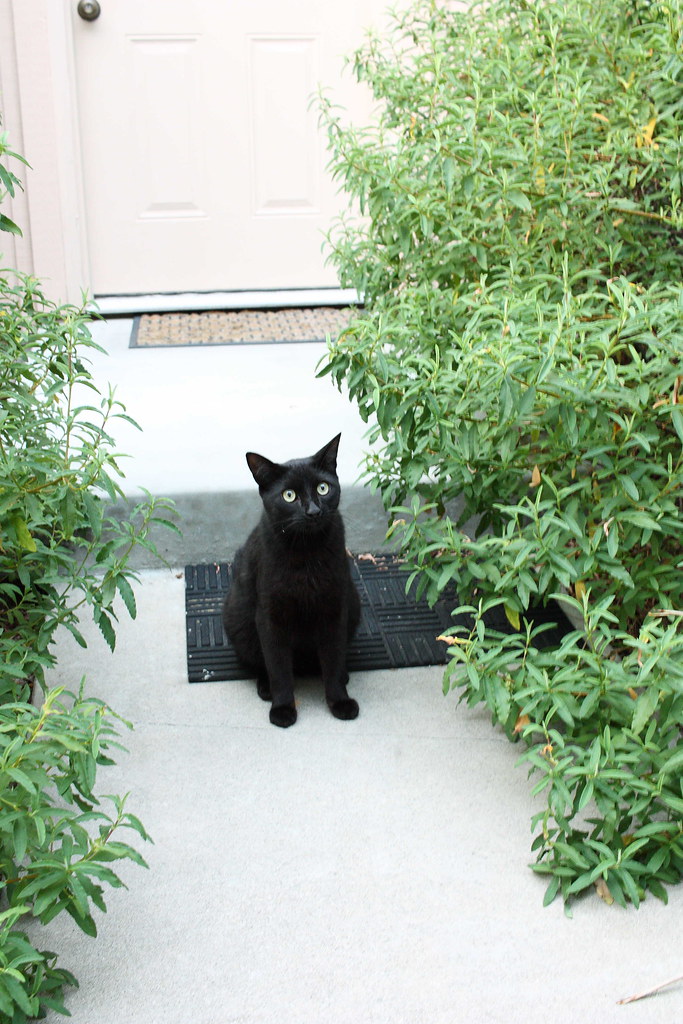
What's this? Adorable kitty cat sitting outside my door? Boyfriend and I were attempting to take pictures of the quilt in the walkway outside my house, and my favorite neighborhood cat was hanging around. While we were occupied taking pictures, kitty darted inside the slightly ajar door to the house, but she came back out when I went in there to see where she had gone. I wish I could keep her forever, she so so sweet :)
The piecing together of the quilt top went fairly smoothly, but when I got to the quilting, that's when I had a major meltdown.
I used a queen size microfiber sheet for the backing, but as you can see, I had major problems with it shifting and getting bunched up while I was quilting. I bought one of those precut queen sized batting rolls from JoAnn, but I didn't have any safety pins, so I pinned it with straight pins which was a huge mistake. Having to roll it up to fit under the arm of the machine meant I basically needed a chain suit to prevent from getting poked all the time. I quilted it like She Can Quilt did by following the outside of the squares in the depression block style. I tried to do three lines of quilting, too, but I only had time to do one line of quilting due to serious set backs from unpicking bad quilting. I wasted at least 2 spools of thread attempting to quilt this damn thing. I stayed up until at least 3 am every night the week before the bridal shower to finish this quilt, but I did get it done by the deadline.
I had to gift wrap the top and bottom of a copy paper box because it was the only thing big enough to contain this quilt. Now that I've gone to a bridal shower, I've become initiated in the cult of bridal shower etiquette, and so there was a massive amount of ribbon on the box.
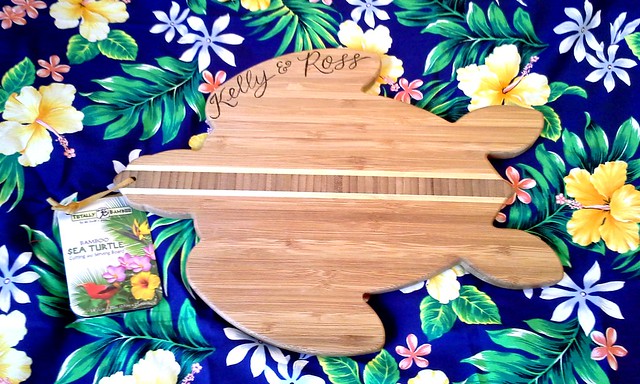
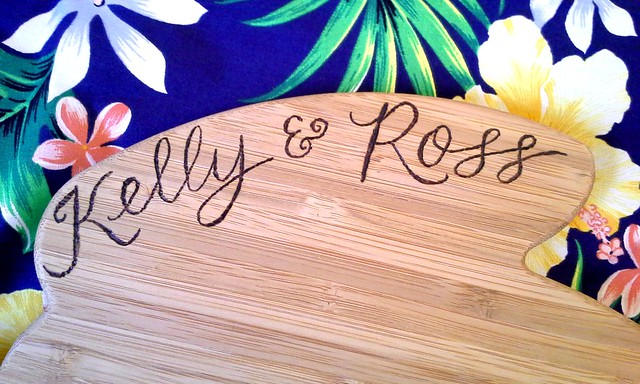
As an extra little something, I personalized this bamboo cutting board for the bridal shower too. My mom found this cute turtle shaped bamboo cutting board at TJMaxx I think, so I used my newest toy (the wood burning pen, see examples 1, 2) to add their names.
I practiced drawing out my letters in a few different ways, and then I used the calligraphy tip to burn the letters into the board. Bamboo is pretty tough to burn, but hopefully, it doesn't look too choppy.
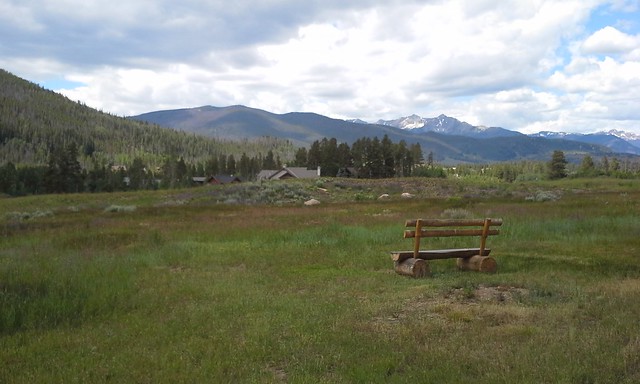
And here's just a couple of pictures from the picturesque wedding. This was the golf course/resort that the ceremony and reception were held at. The ceremony was set up just to the left of the shot (and my brother had to clean up the rose petals off the grass by hand after the ceremony was over :) haha) We were really high up in the mountains in Keystone, Colorado, about two hours west of Denver, probably about 10,000 ft elevation.
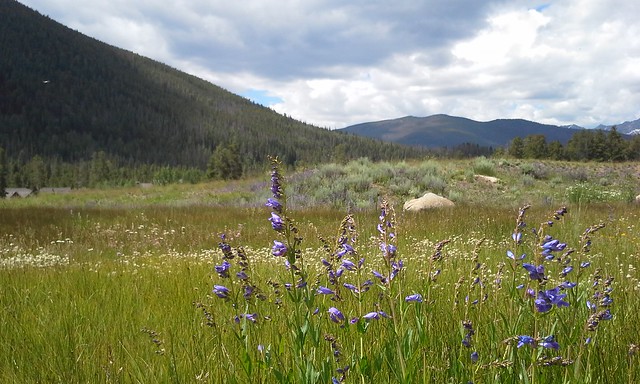
And we stayed in a really lovely condo just a short drive away from the venue. This was the view just outside the window. Kind of unreal!
I just love that the flowers were blooming even in the middle of summer.
Lessons were learned in the making of my first quilt!
Namely,
1. Everything takes longer than you think. Especially because you have to give yourself time to mess up two or three times.
2. Taping down the back of the quilt and basting it all together with safety pins is a very good idea. Bad things happen when you don't.
3. Do not choose a queen size quilt for your first quilt. Just don't. Unless you happen to be very ambitious like I was.
4. Don't forget to buy fabric for the binding! Especially if you're not working off of a pattern that reminds you about this. Fortunately, I had enough leftover from the quilt top.
Obviously if you've made it this far through the blog post, I haven't lied to you about how difficult it was. Because it was. It was very very hard. I may have cried a few times. It was worth it though. In the end, I was very pleased with how the quilt turned out.
Since it was so time consuming though, I don't foresee too many more quilts in my future. Finally, a hobby I don't love ;) I keep telling people, "This is not a relaxing hobby!!"
If I've left anything out that you want to know about the construction, ask me! I've started to forget every little thing I wanted to mention here, but I'm happy to answer any questions! I'm also here for moral support should you decide to tackle quilting :)
You'll remember that I have gone to my first bachelorette party recently-ish in June. Exhibit A) Lingerie. There was also a strong suggestion that we all wear brightly colored clothes while the bride-to-be wore white so we could get a good photo I guess. Aaand since my wardrobe is mostly gray, white, or crazy prints, (and I can't leave well enough alone) I decided I needed a brightly colored shirt or dress in a solid.
I settled on the easy Kirsten Kimono Tee from Maria Denmark since it seemed fairly quick and easy. No setting in sleeves! The pattern is free, which yay!, you just have to sign up for her newsletter.
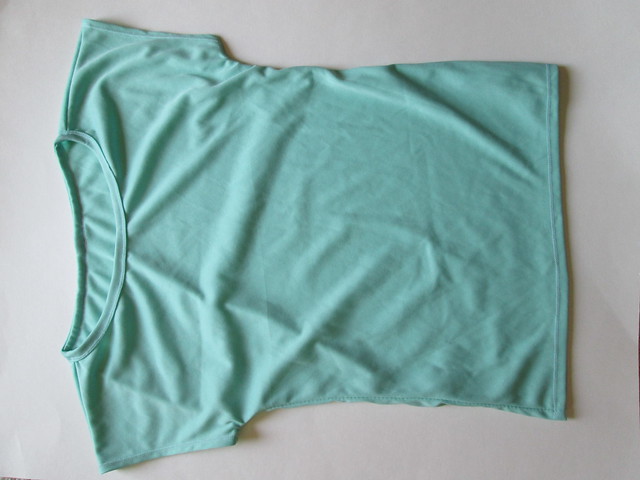
I made my first knit garment! It was surprisingly painless!
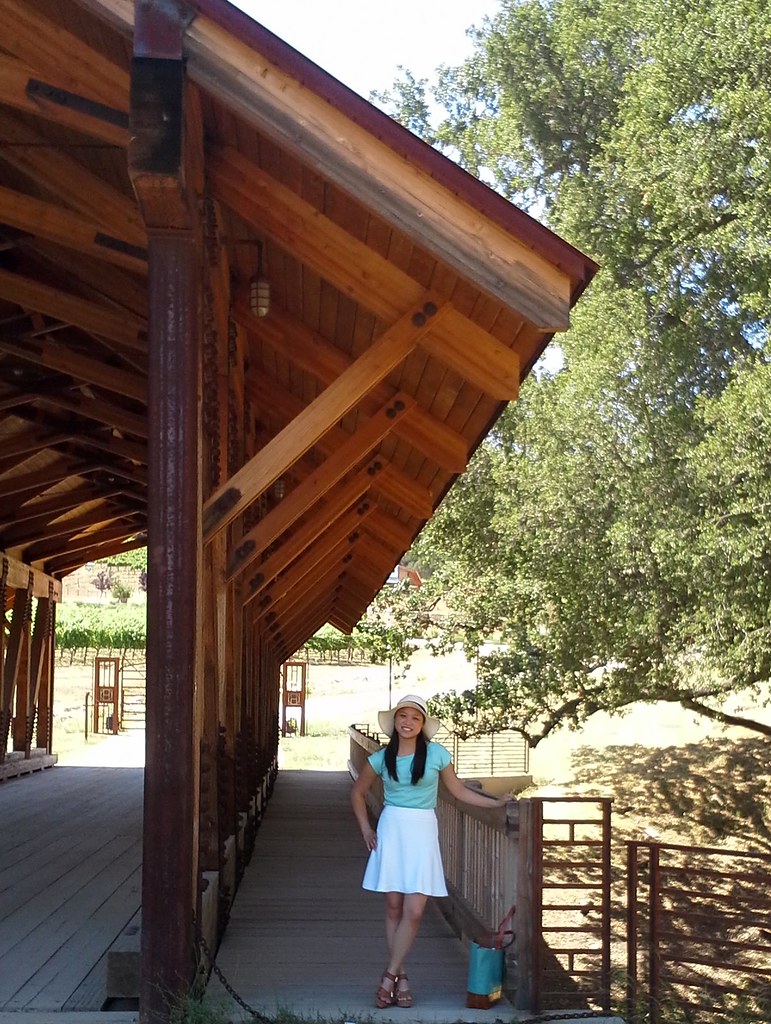
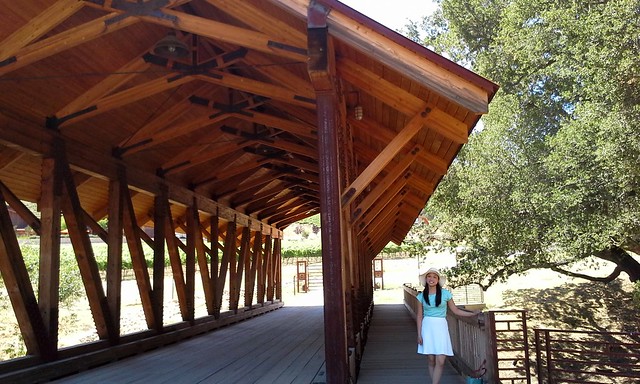
Isn't this covered bridge fabulous? I paired my new colorful tee with a white Express skirt obtained secondhand from a friend of my mother's. Side note about this skirt: Brand new with tags on, and the first time I washed it (granted the tag did say dry clean only) the hem fell out. I had to catch stitch the hem back before I could wear it, but it just goes to show you how shoddily made fast fashion is - even from what I would consider a somewhat nicer brand like Express.
I didn't have time to go to the fabric store before I needed to leave for the weekend, so I had to stash dive for something suitable. I had some dark gray, dark purple, and mostly white florals in the stash, how surprising. Fortunately, I had somewhat recently picked up some mystery knits from an estate sale, and there were definitely some bright jewels in the mix.
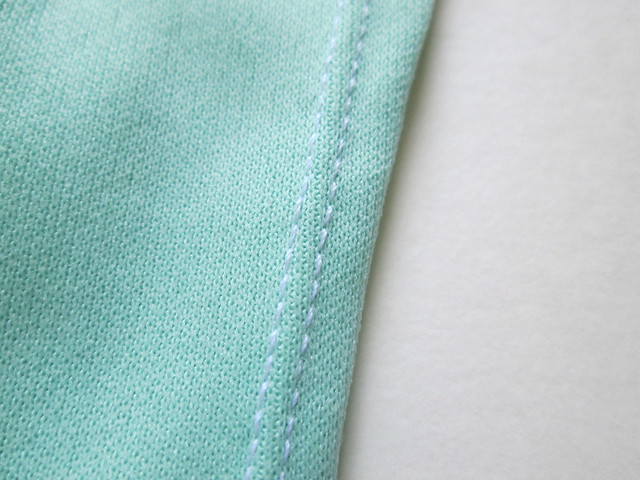
Yay for first time twin needling success! All my hems look so much nicer with the twin needle. I just used a single fold hem and left the edges raw inside.
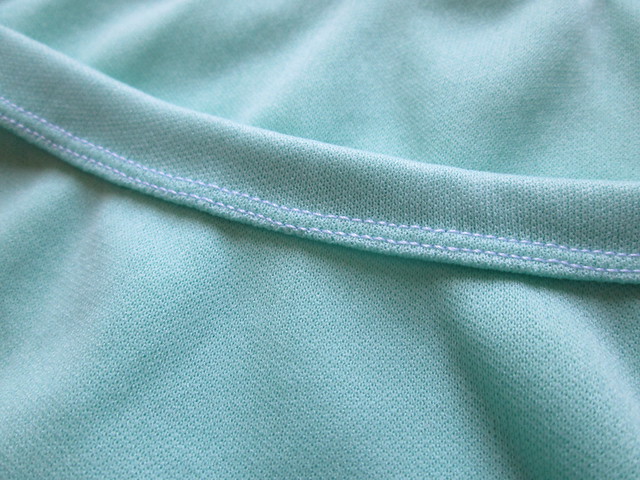
A tried a bound neckline using this tutorial from Megan Nielsen, and I think it looks pretty good! It's a little thick due to my fabric, but it's nice. I got some skipped stitches with the twin needle, but I'm not sure how to fix it.
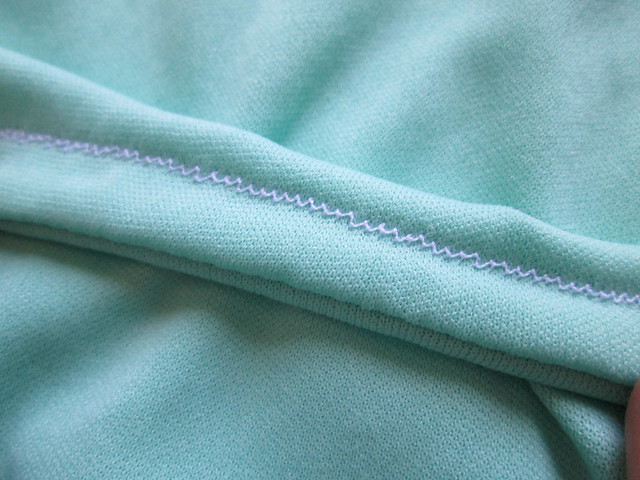
Here's the inside of my neckline. Everything is nicely enclosed, I do wish I had used a matching thread instead of white though.
Details: Pattern: Kirsten Kimono Tee from Maria Denmark Size: XS Fabric: Mystery knit from estate sale, maybe ~1 yard Notions: ball point needle and twin needle Size Alterations: None Design Changes: None Techniques used: Bound neckline Construction Notes: The pattern instructions are quite good and this is an easy pattern to begin with. I used a straight stitch on the shoulder seams, zig zag on the side seams, and twin needle for all the hemming. I used a ball point needle when I wasn't using the twin needle since it's supposed to help with knits. Will you make it again? Definitely! Next time, I need to pick a drapey knit instead of the more stable mystery knit I used. It makes the sleeves stand out a little too much instead of falling nicely. I think it will make a good t-shirt dress too with a gathered skirt. Final thoughts: This was a really easy sew and a great beginner knit pattern. The fabric I used has kind of an athletic feel to it, and I wasn't super impressed with it when I had finished sewing it. It's just a little plain in this solid color I think. It'll have to be dressed up with a good statement necklace or something (which I had intended to borrow from my sister on this trip, but she forgot to pack it). I do have a gray t-shirt knit with great fluid drape that will make a great Kimono Tee in the future.
Now that the technical sewing stuff is out of the way, here's some more pictures from our weekend in Paso Robles.
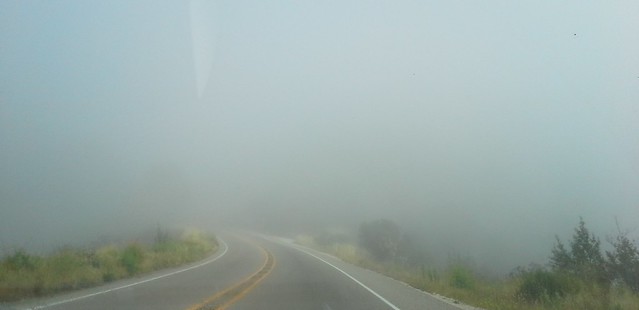
There was some insanely thick fog outside of Santa Barbara, but then we got high enough in the mountain that the fog instantly cleared. I loved the fog though. It was a crazy long drive between LA and Paso Robles, ugh.
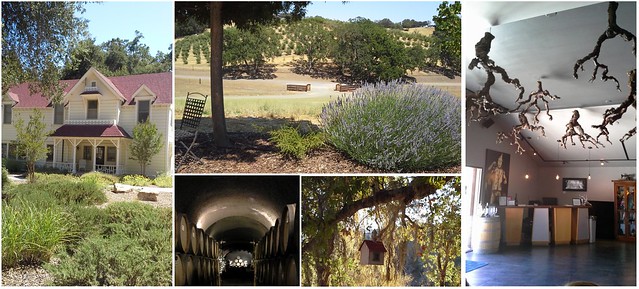
We visited quite a few wineries on Friday and Saturday, there were quite a few picturesque places even if it was surprisingly windy. Also at the place in the center top, there were so many roaming kitties that let me pet them :)
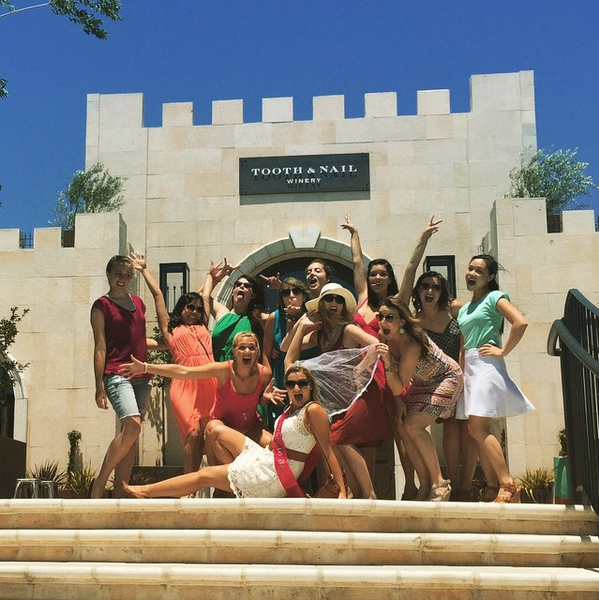
The full bachelorette entourage.
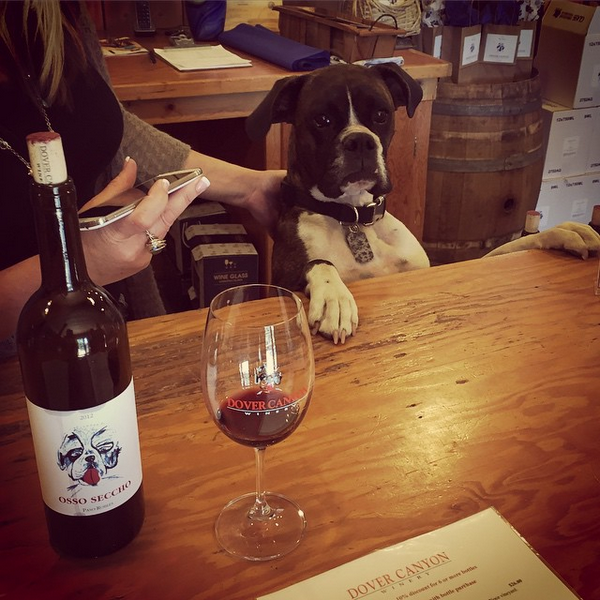
Is this boxer from Dover Canyon not the most adorable thing ever?
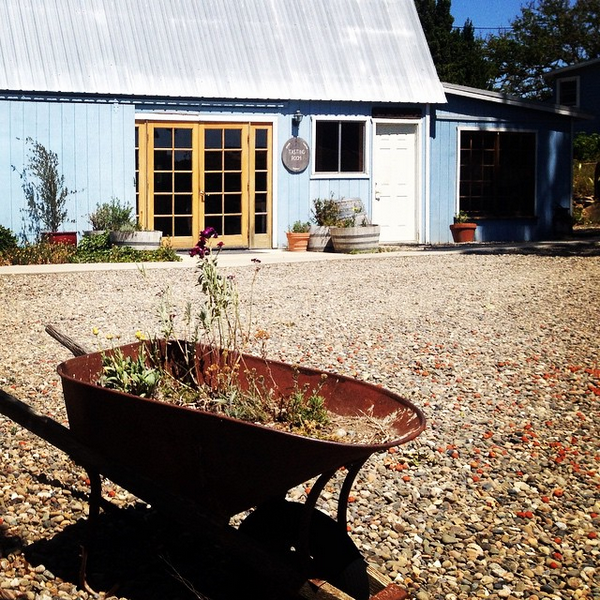
This was surprisingly one of the rare views of the vineyard. There was a great covered patio overlooking this.
It was quite a whirlwind weekend, but Paso Robles is quite lovely and quintessential Central Valley.
I sincerely apologize to anyone who may find the contents of this post offensive; however, I press on in the name of sewing! Also, I promise there are no pictures of my giant biking thighs modeling this thing *shudder*.
As you may have seen on my Instagram, I have just recently completed my first pair of hand made underwear!
Back story: I'm going to a bachelorette party this weekend, and the hosts had played this game at previous parties in which all the guests bought a piece of lingerie for the bride-to-be that represents themselves. The game part of this is that the bride will have to match up the lingerie with the person who brought it, and if she gets it wrong, the person is allowed to task her with some dare/command etc. I had no idea what to do about this (what is my spirit lingerie?), so I just went with handmade and hopefully the bride gets what is going on here.
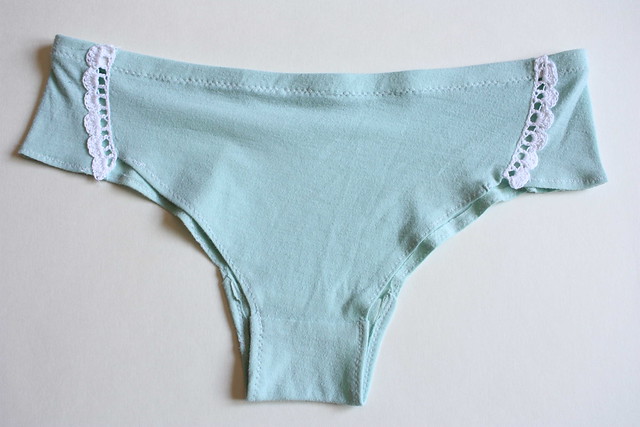
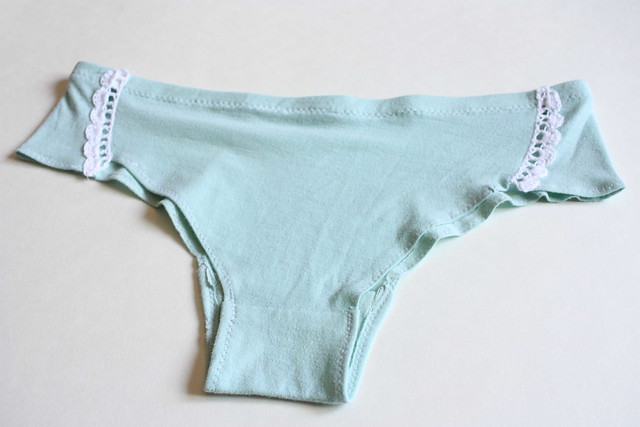
And here's the finished product!
Not too shabby for my first attempt, huh? I had initially printed out the free Indigo Orchid bikini pattern, but due to a technical error with the pdf, I didn't have all the pieces properly scaled and couldn't print out another one. So, I hacked up an old pair and drafted my own pattern! I did use the crotch gusset from the pattern since I at least had that piece. I was able to cut all the pieces out of the back of an old t shirt plus a little bit from the front!
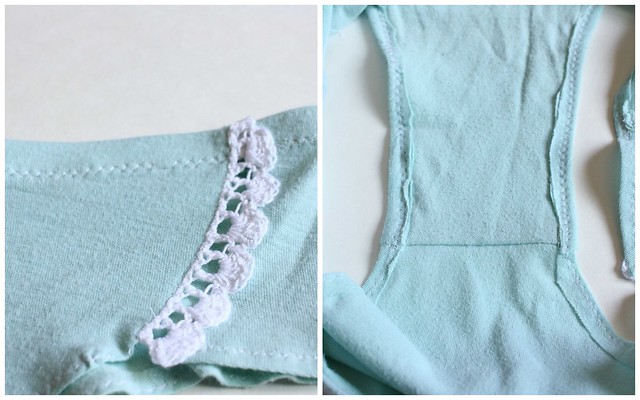
I used the instructions from the pattern (found here) to sew these up. Look at that nicely concealed crotch seam :)
The lace insert was added also using Indigo Orchid's helpful tutorial. Apparently, the sexy cutout is what makes it "lingerie", so let's go with that. I'll talk more about the lace insert later because I think it's the other special detail that makes it "me".
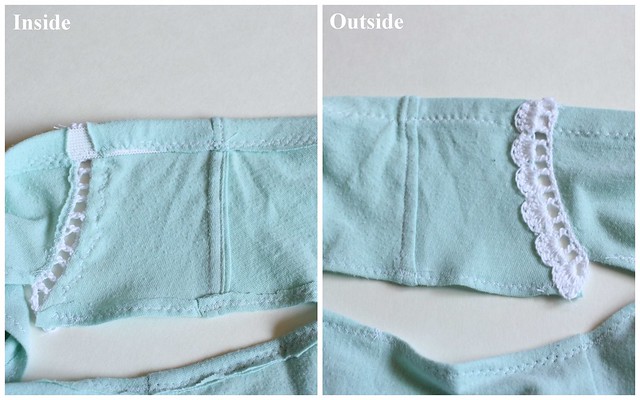
And you can see here how the fabric has been cut away and folded back to make it see through under the lace - a true insert and not just an applique. Also, can I point out my beautiful side seams? Those are french seamed and then top stitched down to make them lay flat and look pretty inside and out.
The elastic was added using Lladybird's very simple and useful tutorial which was probably a better way to go than threading it through a turned down hem due to that screwy portion behind the lace insert. The leg holes are just turned under and stitched, and they're a bit wavy but look fine on the body (I tried them on with my own underwear on also, so they're still clean!)
And finally, the lace! I crocheted those little lacy bits with some cotton thread and a teeny tiny hook. I tested out quite a few different stitch patterns before I made up this one myself. Side note: either crochet patterns have gotten harder to read or I have completely lost my touch. I got totally confused on several of them, but in my defense I was looking at a few vintage patterns. I decided to make a pattern that has a nice open stitch so you actually get the full effect of the insert, but it also has a feminine scalloped edge but not too complicated!
Here's the basic idea:
Ch 27.
Row 1: DC into 3rd ch from hook. Ch 1, sk 1, DC 1. Repeat across. Ch 3, turn.
Row 2: 5 DC into 2nd ch sp from Row 1. Sk 1 ch sp for each shell. Repeat across and FO.
I foresee actually making myself more underwear in the future, they're so easy! And I wish my current underwear was a little more low rise, so hopefully this is the solution.