If you are in need of the best pick-me-up this (cold) winter, then save the date for the annual Gaslamp Pet Parade. This Sunday, December 8, parade starts at 2:30 pm! More information at their website. Free to watch! You know you want to :)
If you really need more convincing, I took a couple pictures at last year's parade. It's mostly doggies, but there's a few kitties and horses thrown in for good measure. It's just fun to see all the little costumes.
I think this fluffy little guy ended up being best in show. His human was controlling the car with his iPad, isn't that an incredible setup?
Lots of sweet dogs dressed up, mostly in Christmas gear, but a few standouts like these in "other" genres. I love the lion haircut, so funny!
I guess this is officially a thing now, cute dogs in toy vehicles?
Monday, December 2, 2013
Sunday, October 27, 2013
A Dinosaur for Atlas
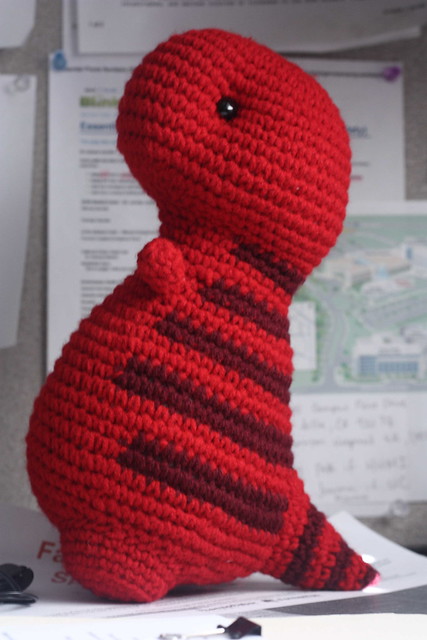
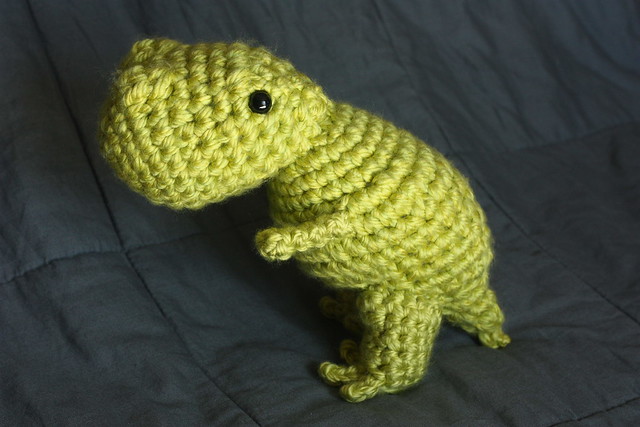
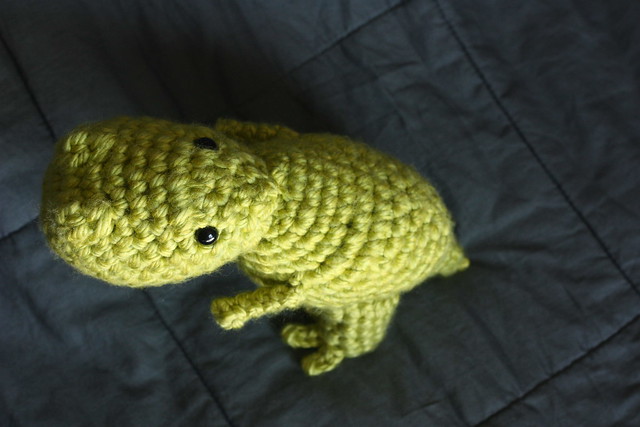
I made this sweet, sweet t-rex for my coworker who was pregnant. Yep, was pregnant, as in, I made this for her baby shower gift, and then baby Atlas decided to come a month early! We cancelled the baby shower, and just had her come pick up her gifts with baby in tow. So, on the plus side, little baby at work :) But on the minus side, no baby shower cake :( I know, priorities, right?
Here's the Ravelry page for Timothy the T-rex from Bluephone studios. Oh my gosh, I am like drooling over all the patterns from Bluephone. Everything is freaking adorable. I just loved this pattern, it's a great design, and easy enough to make again and again without getting tired of it.
I know I made the colorway from the pattern photo, but I thought this was the cutest for a baby boy without being ubiquitous blue. Plus, red was the color family of yarn that I actually had a good matching stripe color.
When making this up, I tried to avoid weaving in ends in the body stripes by carrying the color through the rest of the stitches until I reached the next stripe. I really wanted all my loose ends to be secure since this is probably destined for a rough toddler. I am usually really lazy about knotting my loose ends inside the piece since most of my things are bought by college age students.
I'm kind of mad about the eyes since I tried to put them in straight, but they somehow ended up a little crooked, so they're not perfectly straight with the indentation in the head. I try not to look at it too hard.
Don't his little useless arms just kill you?
Wednesday, October 16, 2013
Scribbled - My First Dress!
You guys, I made my very first dress! Like I cut out a paper pattern and everything!
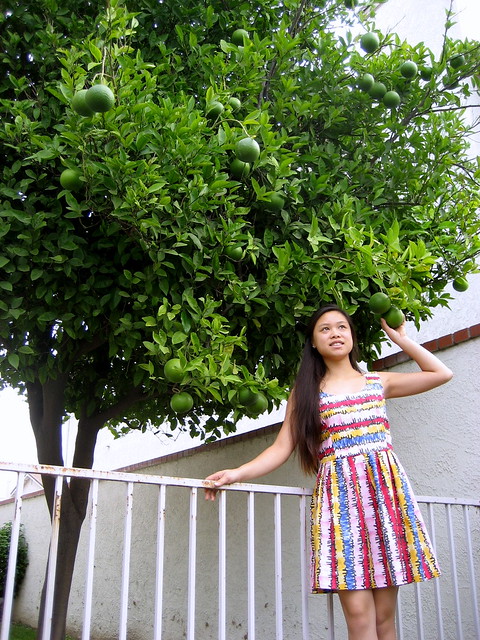
(Boo, I forgot to bring my camera home to take pictures, so I had to make do with a little powershot point and shoot. Sorry for the low quality.)
I bought a handful of patterns from an estate sale for 10 cents a piece, so I figured it was pretty low stakes to start cutting into one of them. I still haven't cut into some of the basic Butterick patterns that I bought from JoAnn's for a $1 each because I'm still too scared to mess them up.
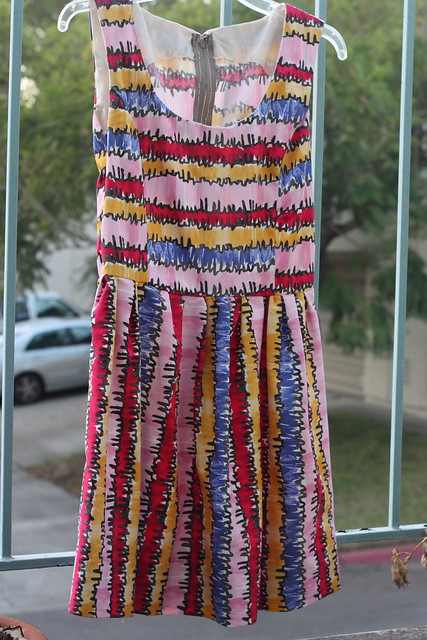
This is McCall's 2604, View E, cut in a size 8, except that I hacked off the paneled skirt at the natural waist. So it's basically a princess seamed bodice with a gathered skirt. Also, I'm also going to call this a "softly pleated" skirt instead of gathered because I gathered the skirt by hand and didn't exactly distribute evenly around the waist.
I made this out of 1.5 yards of a Lisette fabric from JoAnn's, some kind of cotton twill, I think, so it's pretty stiff. It was really tough to squeeze the dress out of so little fabric, which is why I ended up cutting off the pattern skirt since the pieces wouldn't fit on the fabric. The only fabric left from cutting this out is the little U left from the neckline! I actually cut the facings out of muslin because I couldn't squeeze it onto the main fabric.
I actually made this to wear to someone's wedding, and I really wish I had gotten pictures of it while I was there because the venue was gorgeous! It was at the Redwood Gardens in Sebastopol, CA. Seriously fairy tale-like grounds. Looking back though, it's a tad bright and over-the-top for a wedding. Probably should have stuck with something monotone, but this was the fabric that I had in my stash.
Woohoo for laziness! This is an extremely ugly zipper color that doesn't match anything since I got it at an estate sale, but it was the only one in my stash that was long enough, and as a bonus, it already had the hook part of the eye tacked onto the top of the zipper tape! And because I don't know what happened to the eye that should have gone with this hook, I just sewed on a jewelry split ring :)
And would you look at those catch-stiched facings? I actually did that after I wore the dress for the first time because I couldn't stop fiddling with those damn things. It looks so much nicer now, even though it still looks pretty horrific on the inside.
My beautiful hand-picked zipper! And almost-matched pattern! This tutorial from Sewaholic literally held my hand as I did this for the first time, and it looks great!
Can I let you in on a little secret? Most of the reason I did a hand-picked zipper was not actually because I wanted it to be invisible. Even though I admit it looks really nice now that I've done it. It's because (A) I don't actually know how to sew in a zipper and (B) I'm not sure I even own a damned zipper foot.
More beautiful catch-stitching. And another wonderfully instructive tutorial from Sewaholic on how to catch-stitch.
(Boo, I forgot to bring my camera home to take pictures, so I had to make do with a little powershot point and shoot. Sorry for the low quality.)
I bought a handful of patterns from an estate sale for 10 cents a piece, so I figured it was pretty low stakes to start cutting into one of them. I still haven't cut into some of the basic Butterick patterns that I bought from JoAnn's for a $1 each because I'm still too scared to mess them up.
This is McCall's 2604, View E, cut in a size 8, except that I hacked off the paneled skirt at the natural waist. So it's basically a princess seamed bodice with a gathered skirt. Also, I'm also going to call this a "softly pleated" skirt instead of gathered because I gathered the skirt by hand and didn't exactly distribute evenly around the waist.
I made this out of 1.5 yards of a Lisette fabric from JoAnn's, some kind of cotton twill, I think, so it's pretty stiff. It was really tough to squeeze the dress out of so little fabric, which is why I ended up cutting off the pattern skirt since the pieces wouldn't fit on the fabric. The only fabric left from cutting this out is the little U left from the neckline! I actually cut the facings out of muslin because I couldn't squeeze it onto the main fabric.
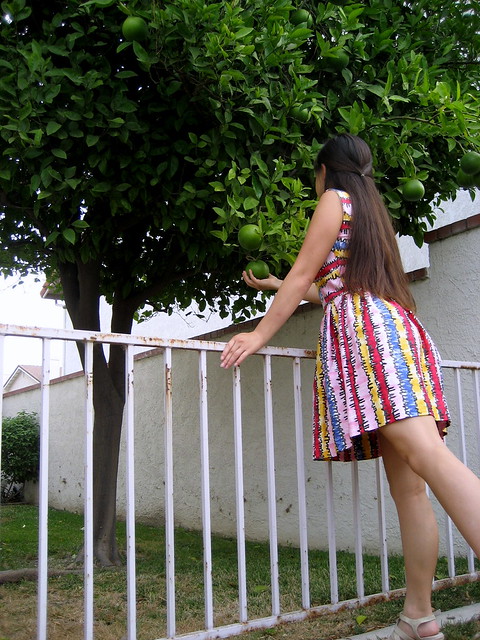
I actually made this to wear to someone's wedding, and I really wish I had gotten pictures of it while I was there because the venue was gorgeous! It was at the Redwood Gardens in Sebastopol, CA. Seriously fairy tale-like grounds. Looking back though, it's a tad bright and over-the-top for a wedding. Probably should have stuck with something monotone, but this was the fabric that I had in my stash.
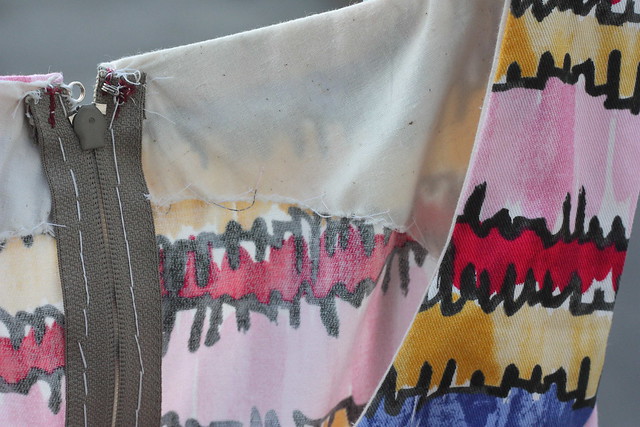
Woohoo for laziness! This is an extremely ugly zipper color that doesn't match anything since I got it at an estate sale, but it was the only one in my stash that was long enough, and as a bonus, it already had the hook part of the eye tacked onto the top of the zipper tape! And because I don't know what happened to the eye that should have gone with this hook, I just sewed on a jewelry split ring :)
And would you look at those catch-stiched facings? I actually did that after I wore the dress for the first time because I couldn't stop fiddling with those damn things. It looks so much nicer now, even though it still looks pretty horrific on the inside.
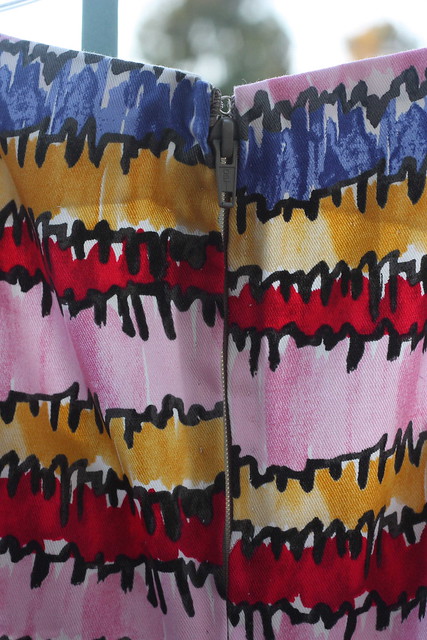
My beautiful hand-picked zipper! And almost-matched pattern! This tutorial from Sewaholic literally held my hand as I did this for the first time, and it looks great!
Can I let you in on a little secret? Most of the reason I did a hand-picked zipper was not actually because I wanted it to be invisible. Even though I admit it looks really nice now that I've done it. It's because (A) I don't actually know how to sew in a zipper and (B) I'm not sure I even own a damned zipper foot.
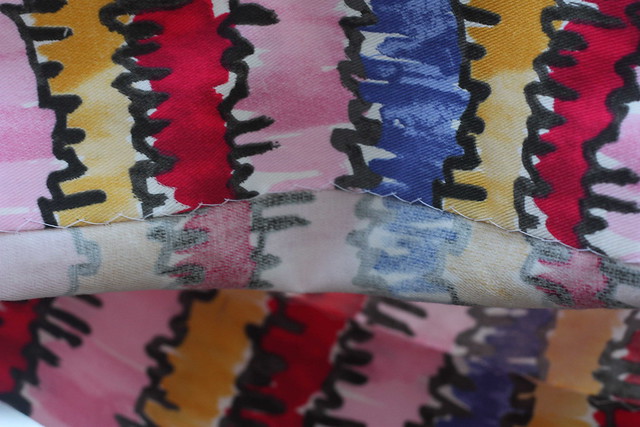
More beautiful catch-stitching. And another wonderfully instructive tutorial from Sewaholic on how to catch-stitch.
Tuesday, October 15, 2013
Scottie Dog Pajama Shorts
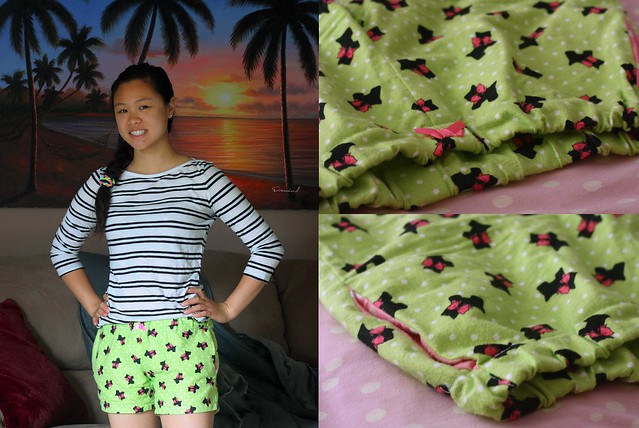
I love this cute little print! This is actually the first (big) sewing project I've tackled since 8th grade, I think.
My college had this fun club that was just starting out, called Sew Awesome, and this was one of the projects they planned, so it was completely free to me! I immediately zoomed over to this whimsical flannel print when I saw it. They provided a basic shorts pattern (here's a similar free one). Fit is not too essential since it is an elasticated waist, and they are supposed to be a little loose and comfy for lounging.
I actually added in-seam pockets (using this Burdastyle tutorial), but I didn't make my pockets big enough because I used a scrap of contrasting flannel. Big enough for a lens cap, I guess?
I also unfortunately made my shorts too tight, so they're not actually all that great for sitting around in. A little tight in the crotch and the leg openings.
And, finally, I added a little pink bow to the front since the front and back looked basically the same to me! I guess I could have stitched a fake fly front, but I was done fiddling with these by that point.
(Also, remember my fun hair tie from here? Proof that I actually wear what I DIY.)
Monday, October 7, 2013
Shaped Dumplings
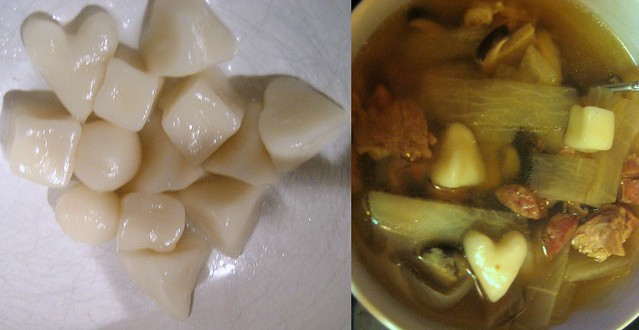
These were the product of a happy accident.
I didn't add quite enough water to my dumpling dough (even though I've made it many times before), so it ended up being a little drier than usual and pretty tough to roll into neat balls that would stick together.
I made like 3 balls before I gave up and started to make little cubes instead. N joined in and made pyramids since he decided cubes and spheres were too hard to make. Plus, I added a little heart out of the last of the dough for a little fun :)
All of the shapes cooked up fine, I usually let them float around on the surface for a minute or two before fishing them out of the water.
Give shaped dumplings a try, they make your soup cute!
Tuesday, October 1, 2013
Calf Pants
[I'm back! I wasn't really gone, though. I'm going to let the cat out of the bag here and say that I had planned to move to North Carolina (!) for a job but ended up backing out. That's why I was planning to give myself a month or two to pack up and settle my affairs here in San Diego. Instead, I'm looking for a job locally instead. Any San Diego biochemists in the house? Shoot me an email!]
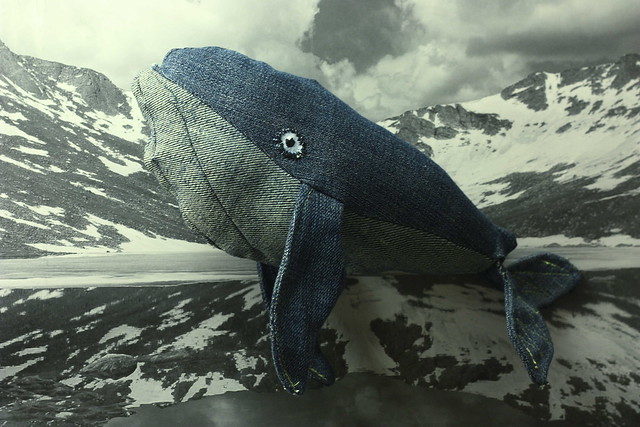
Calf pants ... get it? A whale calf made out of pants? Heh, just me? Ok.
Isn't he a cutie? Even with all his crooked stitching and lumpiness.
The talented lady who thought of this idea kindly translated her instructions into English here! I think this is the best use of old jeans that I've ever seen :) I kind of want to take some old gray jeans and turn them into a shark!
I had a pair of jeans that I wore to pieces (specifically, I had an embarrassing hole in the crotch area), but I hated to get rid of them, and I was pretty sure they were even beyond what Goodwill would accept.
I love that this idea very cleverly uses the right and wrong sides of the denim to create color contrast.
Isn't he cute? Now, who do I give him to?
Wednesday, July 24, 2013
Life Lately
Big things are happening over here! I'm making some major life changes, so it'll be a little quiet around the blog here. I'll probably still pop in with a few posts here and there as I finish up random projects (and believe me, I have a ton of crochet projects on the docket). Things probably won't be back to normal until at least October, so please stick around? I promise this is not a permanent hiatus!
Friday, July 19, 2013
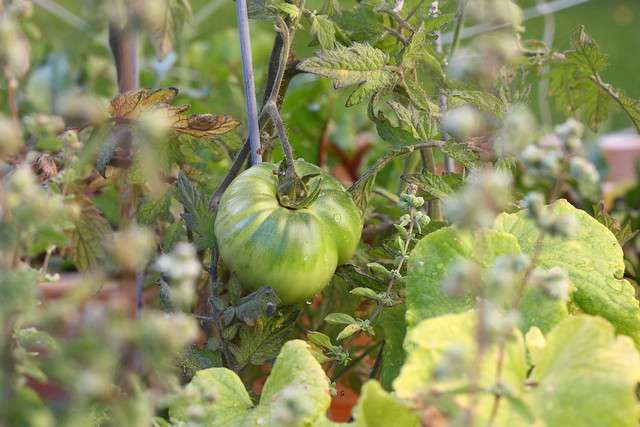
Our late spring/early summer garden
Warning, this post is very picture heavy!
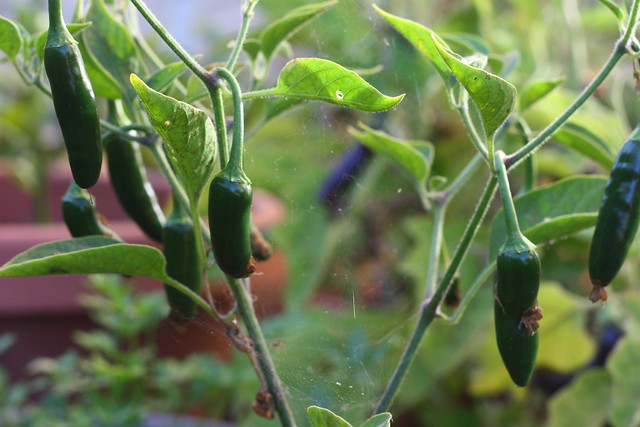
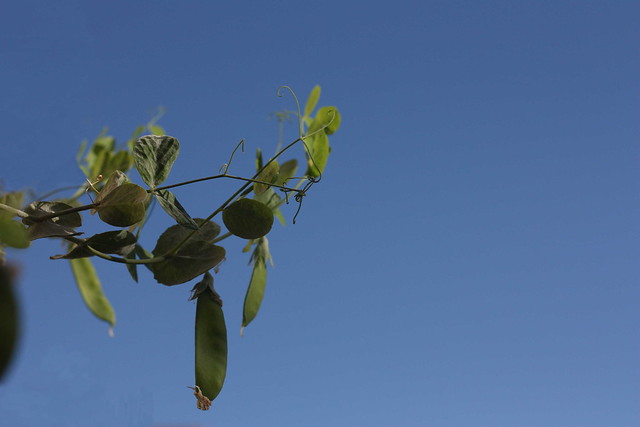
We are having pretty decent success with our container garden this year. We have quite a variety of things: cherry and heirloom Mr. Stripey tomatoes, snow peas, marjoram, rosemary, thyme, parsley (or is it cilantro?), bell peppers, Japanese eggplants, cucumbers, Serrano peppers, Anaheim peppers, sweet peas, and beets.
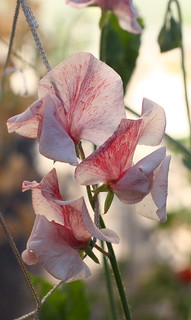
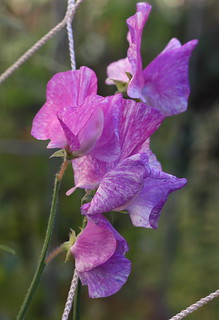
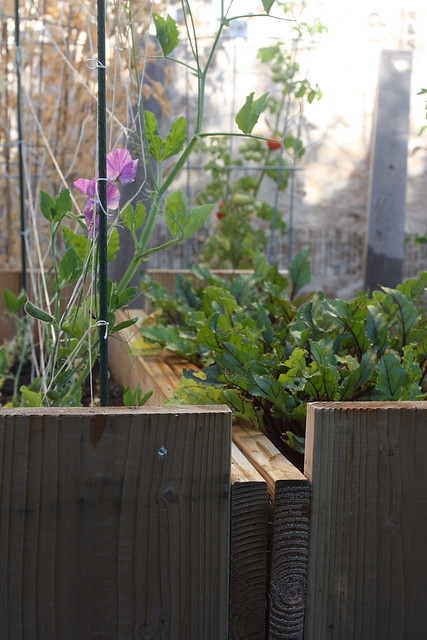
These are Scented Streamer sweet peas that we bought a packet of seeds of at the Flower Fields in Carlsbad last year. They smell amazing! They were definitely late bloomers, these are the first flowers since they were planted in like February in our big trough. All of the seeds sprouted but only one or two of them actually grew :( I'm hoping things are looking up now!
I think these Japanese eggplants are so neat! They have spikes in the middle of the leaves, how weird is that? Plus, these things are pretty much a miracle since we tried to grow black beauty eggplants last year and those always blossomed but never fruited.
And these are our awesome handmade wooden troughs! Sweet peas in the left and beets on the right. Each trough is made out of one long board that was cut into four pieces, it's about 4 feet long so it holds a ton of dirt. We just screwed the boards onto the sides using long wood screws and at the same time learned the importance of drilling pilot holes :)
Thursday, July 11, 2013
Multi-Stranded Hair Elastics [A Photo Tutorial]
So I decided to expand on my little explanation tutorial from previously (my refashioned hair ties) with a few more pictures. I'm still rocking the colorful elastics everyday, and they've been holding up pretty well. If crazy 2/3/4 color hair ties aren't your thing, you can certainly make one with all black elastics, I have. And I know a lot of girls actually like to hide their hair ties under a small wrapped bunch of hair, but try these out for exercising.. or something! I bike to work everyday, so a not-too-fussy ponytail is critical.
Let's dive in!
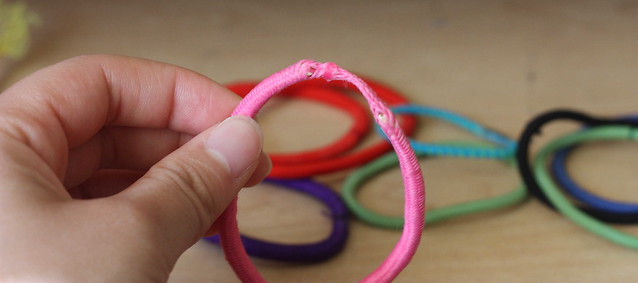
If you have a lot of hair elastics that look like this, these are the perfect candidates for turning into multi-stranded hair ties.
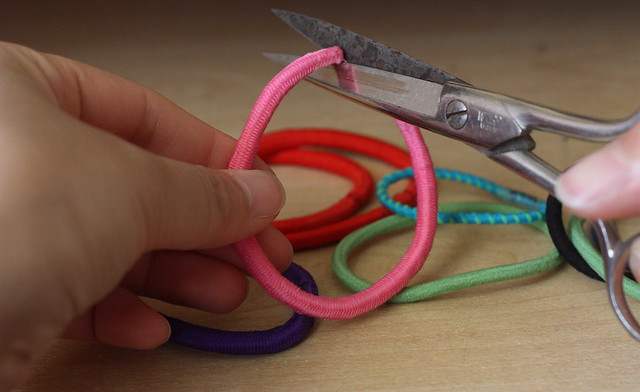
1. Cut off the stretched out portion between the ends of the elastic. (I love my new/old scissors! I got them at an estate sale lately for basically nothing, and they're still sharp!)
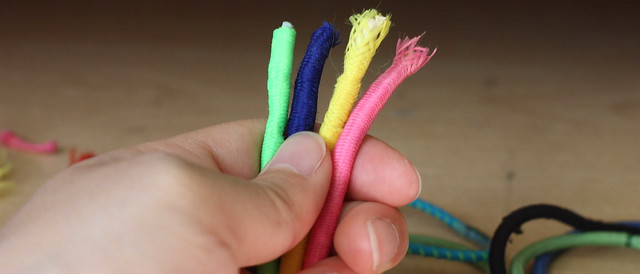
2. Align the ends of all your hair ties and put them in a pretty color order!
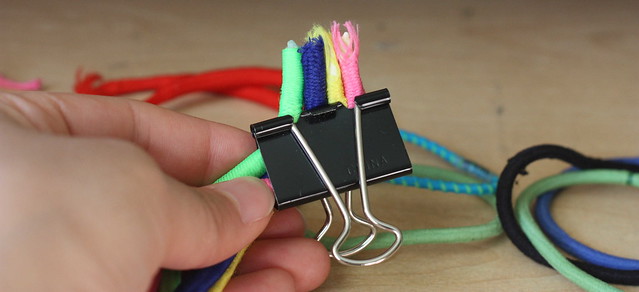
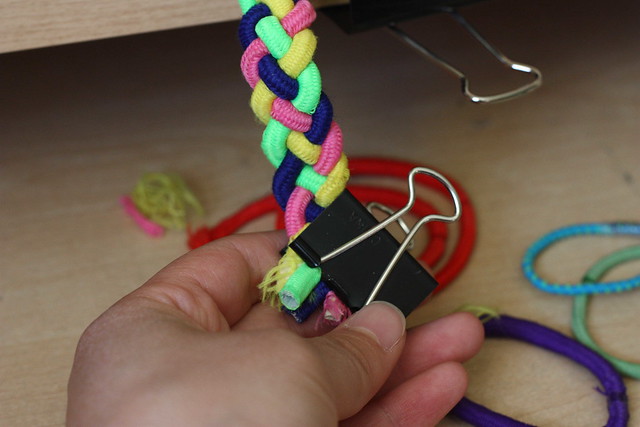
3. Use a binder clip to secure the ends of the elastics as arranged about half and inch from the ends as shown. Make sure that they are all very close together.
4. Sew all the ends together with a hand needle and some thread, any color is fine really. Just go back and forth several times and in all random directions, just make sure it's secure. I sewed through the elastic as well as the colored casing so that the elastic couldn't pull away and become stretched out again so easily.
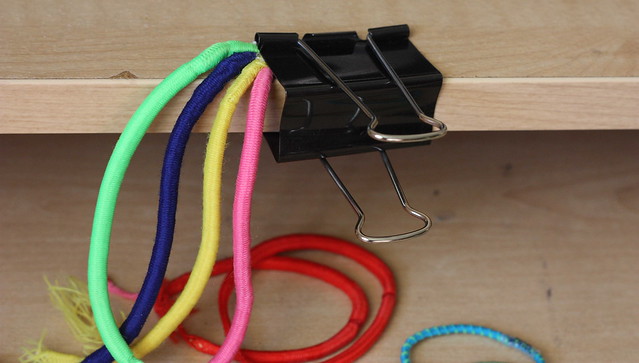
5. Secure your sewn end to a table/desk. I used a large binder clip and then put just the very end of the elastics under the clip, just to hold in place while you braid.
6. Braid! I used this fabulous tutorial for the four-stranded braid from Rock Mosaic. You can, of course, do a regular three-stranded braid or a two-stranded twist. Make sure it's a tight braid and go all the way to the very end of the elastics as much as possible. Secure the end of your braid with a second binder clip and sew those ends together as well.
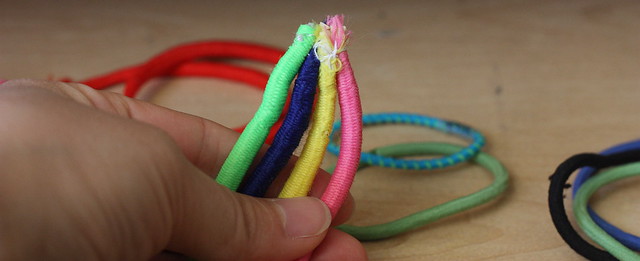
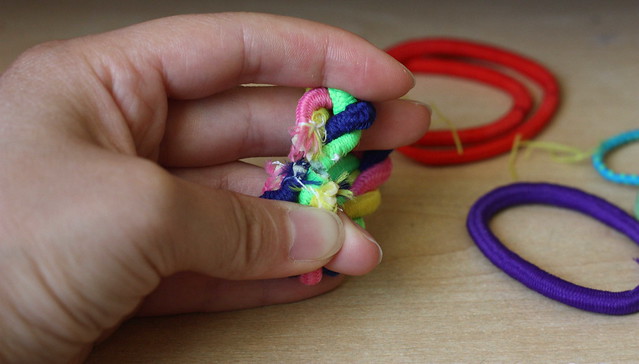
7. With both ends sewn up, join the two ends together (be careful not to twist!) as shown and sew the two ends to each other.
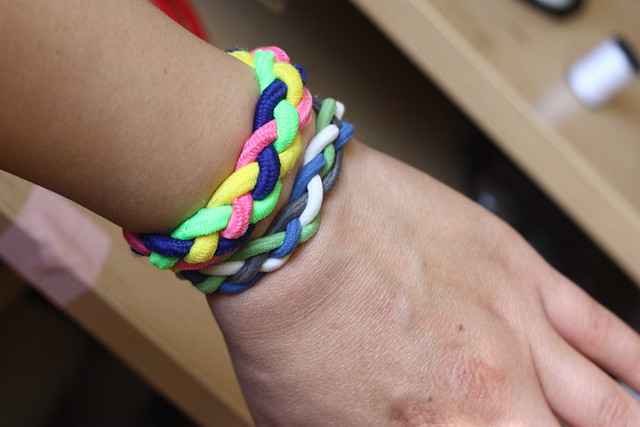
8. All done! The braided elastic is much tenser than any single elastic alone. Plus, your new colorful hair tie also doubles as a pretty bracelet when you're not wearing your hair up!
If you make one, post a picture, I'd love to see! I like the idea that there are other people out there with fun hair elastics too :)
Sunday, July 7, 2013
I have a big head...and little arms...
Ok, I have quite a lot of notes/adjustments on this pattern by Elizabeth Mareno.
I did use a chunky yarn instead of worsted, and I ended up using somewhat more than 1 skein of Lion Brand Hometown.
Head: Made as written in pattern (ignore the stitch counts in parentheses because they apparently are a little wonky/not quite right)
Eyebrows/Eyes/Teeth: Not made. Could not understand, for the life of me, what the eyebrow directions meant. I prefer a pretty safety eye anyway. No teeth embroidery either as it creeped me out a little.
Neck and Body: All rounds made as usual except multiple rounds of SC around were omitted. Meaning that, where noted, I made one row of single crochets but then did not make the next one or two rounds of single crochet (ex: R10-12, I only made R10 and then skipped to R13).
Front Arms: Not made as written. I ended up with teeny little sticks for arms because I liked it better.
Round 1: Ch 2, 3 SC in 2nd ch from hook
Round 2-4: SC around.
F/O (Make 2)
Back Legs: Made 2 of the Left Leg pattern but fastened off after round 7 (did not work 8 or 9). Sewed on both legs using same technique as my hippo - more underneath the body than sticking out from the sides.
He's very front heavy and can't stand up on his own :( But this is what I think of, haha!
And this!
Ok, ok, enough of the tiny arm jokes. At least he ended up cute in the end!
Monday, July 1, 2013
Guess what? Pork Butt!
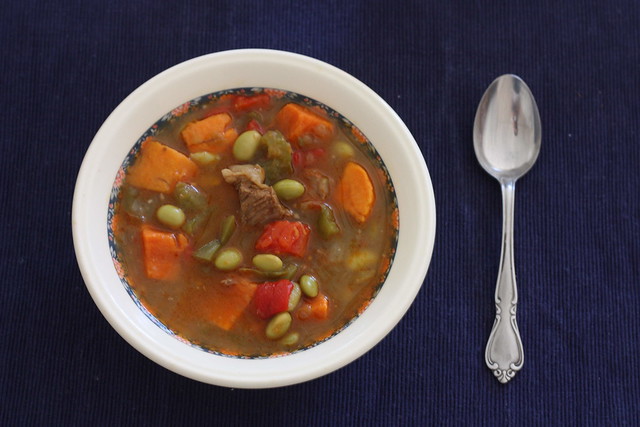
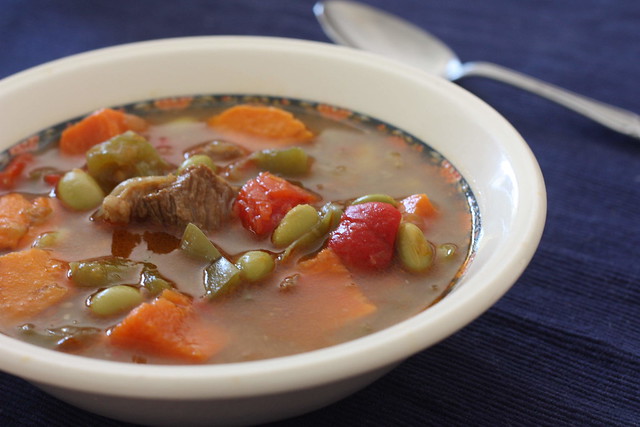
This is a wonderful recipe for a Miso Pork Stew by Ming Tsai via Food Gal! I love it, it's so delicious and flavorful. It does take a long time to make, but it's totally worth it. We like to start it after lunchtime on the weekend and then it's ready for dinner.
I find that it's really easy to broil your peppers in the toaster oven if you cut them up into four parts, then the skin will be blistered enough to peel off. Plus, buy the pre-shelled edamame beans, then you can just dump them into your pot, isn't convenience food nice?
This definitely makes enough for a giant pot of leftovers. I recommend that after refrigerating over night that you skim the fat off the top. I'll give you a hint, it's the thick orange squishy looking layer on top and even though it looks like it might be sweet potato, definitely skim that off as much as you can.
Saturday, June 29, 2013
My heart beets for a good pun
**A quick administrative note! Just a reminder, as I'm sure you are all aware, Google Reader is shutting down on July 1st, so be sure to switch your subscriptions over to a new service. Personally, I'm using Feedly - it has both an add-on for Firefox and a web-only version, and it has a one-click sync with Google Reader, so it will automatically import all your subscriptions and saved articles. I think a lot of people also like Bloglovin, so you might also give that one a try if you haven't already picked a new reader. That's all, happy reading!**
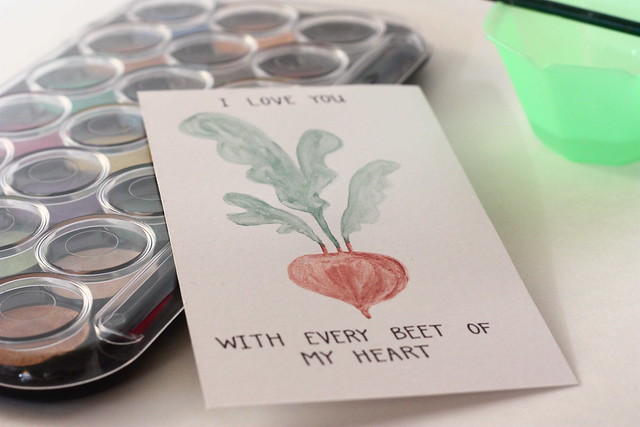
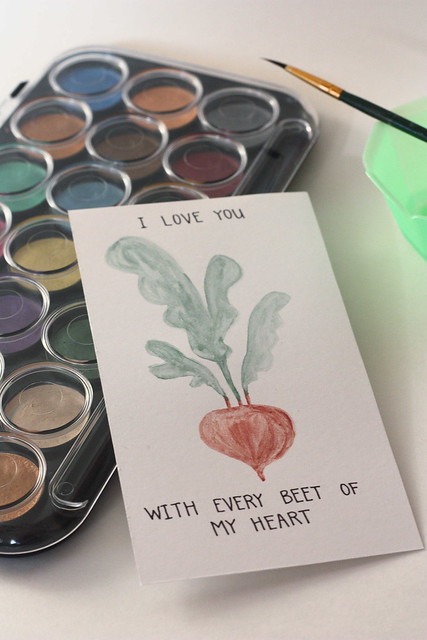
Ooh, a rare art project from me :) I don't really do much in the way of classical art projects - I'm more crafty than artistic I guess. I made this little painting for N for his birthday this year. We kind of have a thing about beets, we're even growing a whole trough of them!
I used a small spare piece of Bristol paper (it's like a nice cardstock) and these really cool pearlescent watercolors. They give your illustration a nice shimmer at the right angle; I regret I couldn't really take a good picture of it.
Sunday, June 23, 2013
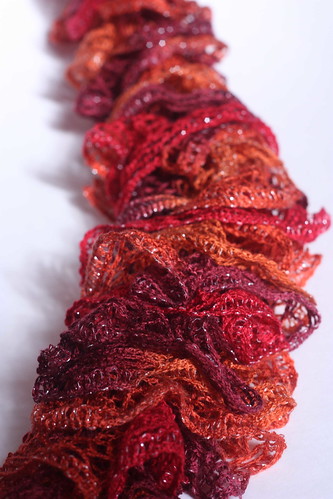
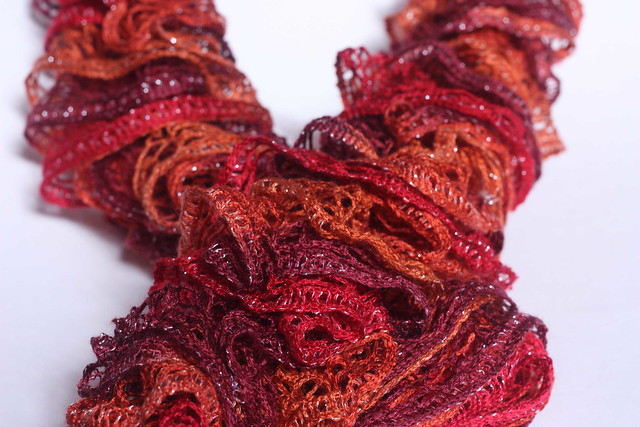
Sparkly Ruffle Scarf
Another knit project!
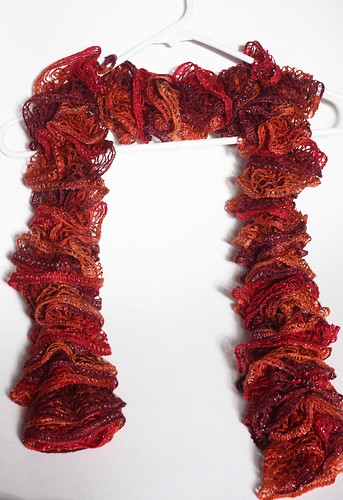
My mother saw this at some craft fair or something and got it in her head that I could totally make this. At least I got a nice pair of bamboo knitting needles out of it?
It's just one ball of those popular sashay ruffle yarns or whatever brand it is that's the newest novelty yarn. Honestly, it was a huge pain in the ass to work with. You had to stop every three rows or so and stretch out the mesh some more, and I couldn't really find a good way to hold the yarn while I worked it. And on top of all that, there was a damn break/knot in the middle of the ball. Like the yarn had broken and then somebody just tied a big old knot to put it back together. This really made things worse because the mesh can't be stretched out when there's a knot tying all the strands together.
Anyways, frustrations and complaints aside, it's kind of an interesting scarf. Not something I would wear, but I could see how other people would be into it. It's surprisingly heavy since it looks all light and floofy.
Anyone else worked with cool/frustrating novelty yarns lately?
Sunday, June 16, 2013
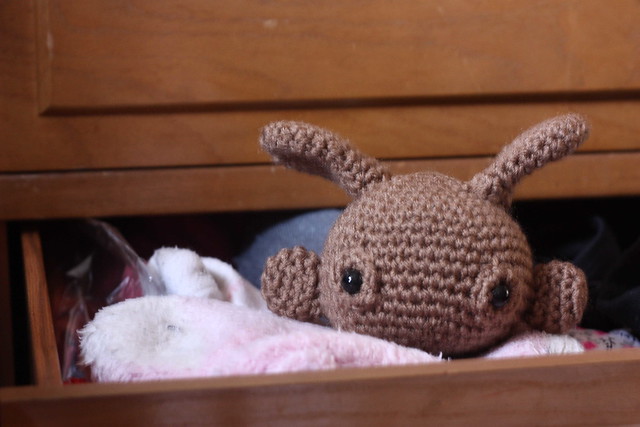
Dust Bunny (or Fish bunny depending on how you look at it)
Ok, honestly, this pattern was kind of dumb. I thought, "Oh! I'll just whip this up really quick. No problem. One hour, tops!" Nope, unfinished bunny parts rolled around in my bag for weeks, and I refused to sew the damn thing together. I was mostly unmotivated by the fact that I thought it was ugly. I don't even know what possessed me to make it in the first place. It looks like a fish the way its paws stick out to the side!
This is another Voodoo Maggie pattern. People probably generally enjoy the simplicity of the pattern, so it's probably not the pattern's fault. It's really probably my fault for picking such a dull brown.
See how much I disliked this? I couldn't even bother to take a clear picture..
This is another Voodoo Maggie pattern. People probably generally enjoy the simplicity of the pattern, so it's probably not the pattern's fault. It's really probably my fault for picking such a dull brown.
See how much I disliked this? I couldn't even bother to take a clear picture..
Sunday, June 9, 2013
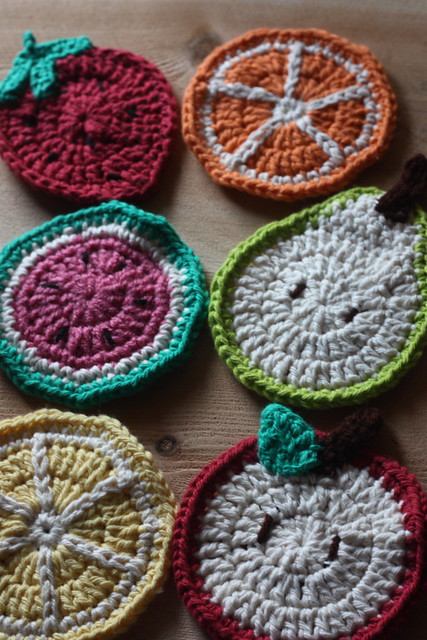
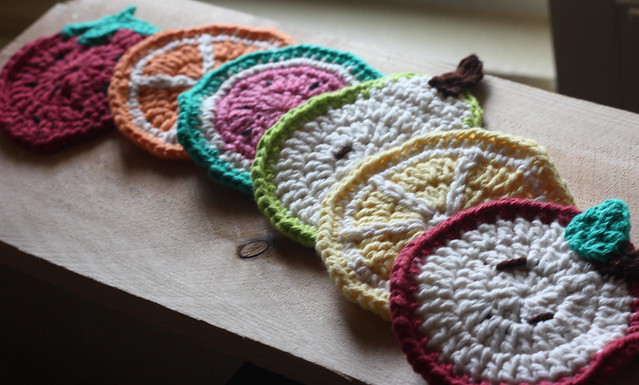
Cotton Fruit Coasters
When these popped up on Craftgawker, I loved it! We stayed with some relatives on our state national parks trip, so I thought these would make the perfect host/hostess gifts!
I used cotton yarn instead of acrylic as noted in the original pattern since cotton is much more absorbent for sweaty drinks. (Except for the pink of the watermelon since I didn't have any pink cotton yarn. And I regretted it greatly because I don't like the texture)
Get the free pattern over at Repeat Crafter Me!
A few notes on the patterns:
For the pear and apple, I added a pattern of [inc, 1 sc] around the circular part of the green edge so that the coaster would stay flatter.
For the orange and lemon, I actually embroidered lazy daisy-type chain stitches instead of doing surface slip stitching.
Aren't these great little favors? And super quick to whip up!
I find that the patterns really lend themselves to variation fairly well although these several fruits are really the most recognizable.
Variations!:
-pink grapefruit from the lemon pattern (pink inside, yellow rind)
-kiwi with slight modifications to the lime pattern (green inside, brown outside, dark brown seeds)
-avocado (pear pattern, green inside, dark brown outside, light brown pit)
I think it could also be really cute to do a hamburger and make all the parts and stack 'em up with a little toothpick!
I think I'll make these variations (I've already mostly made the kiwi) for the next time I need little gifts.
Wednesday, June 5, 2013
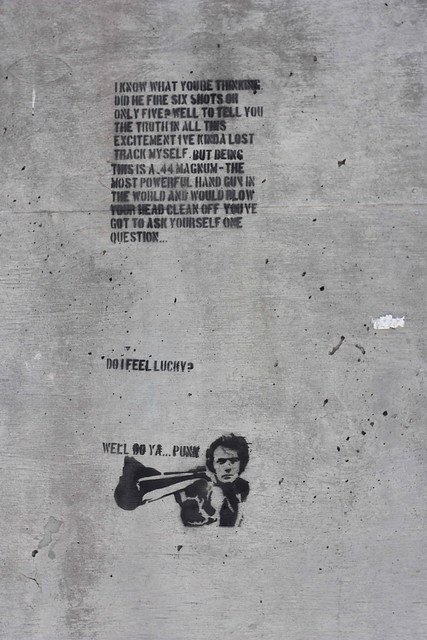
Well do ya.. punk
Honestly, I've never watched this movie, and I feel that I should (Honestly, I also do not actually know the name of this movie...The Godfather? Is that right?). Then I would understand what this is about. Right now, I can only appreciate this as a really good piece of graffiti. Just look at all those cut outs!
You know how some people consider themselves movie buffs? I guess you could call me a movie un-buff? I have never seen most of the classics or really any movies that were in vogue when I was growing up. I mean, I just saw The Sound of Music a couple of months ago, on VHS!
Friday, May 31, 2013
April Showers Bring May Flowers
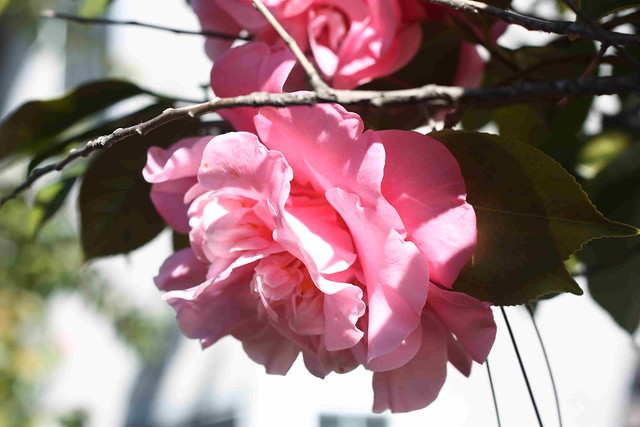
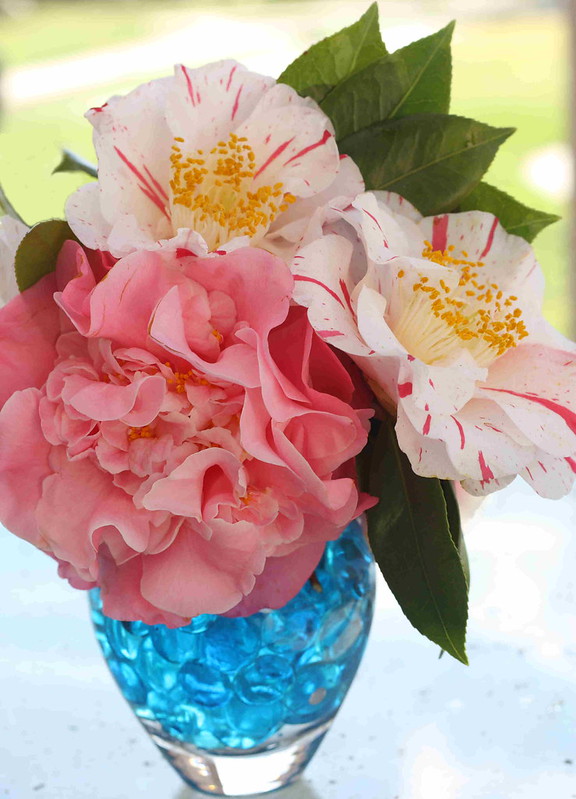
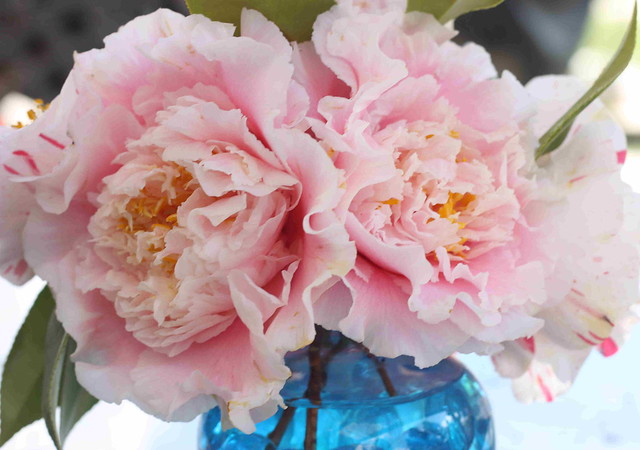
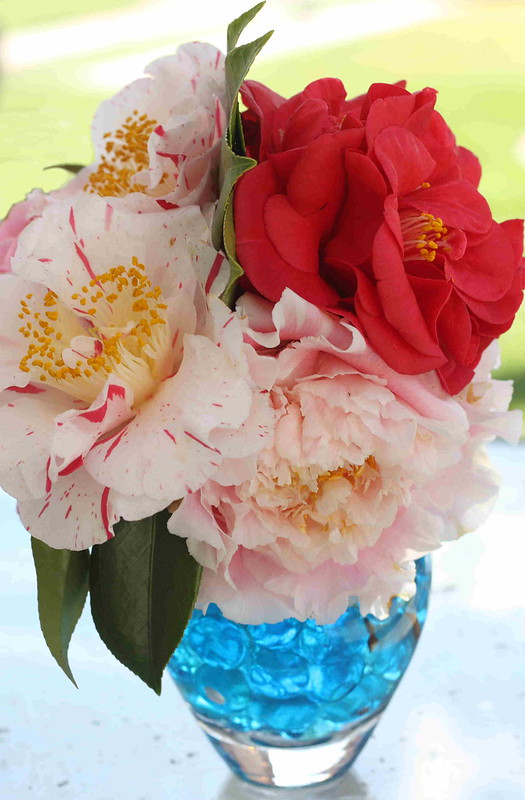
I love these big fluffy flowers. I'm not actually sure what kinds they are, fuschias? Camellias? No thanks to my parents' black thumbs, these few bushes have managed to survive in their backyard. I thought that they might be better admired inside the house, so I plucked a few blooms and put them into a vase.
I love the bright blue marbles against the soft colors of the flowers.
So fluffy and pastel and feathery, ahh..
I love that color splash effect, so pretty!
Haha, funny story: when my parents came home my mom asked who had brought over the flowers, and when I told them I just picked some flowers from the backyard, my dad asked when I learned flower arranging.
I do actually have a quick tip for flower arranging; use a rubber band to secure the stems after arranging the flowers in your hand. It'll keep the flowers from settling out of the bouquet when you set them into the vase.
Subscribe to:
Posts (Atom)